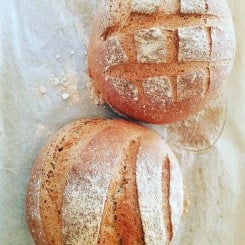
Country-Style Rye Bread
Servings: 2 9" round loaves
A crispy, crust surrounds a pillowy soft dough to create the perfect comfort food.
Print Recipe
Ingredients
- 200 g 6 oz rye starter (see link in post)
- 800 g 1 lb 8 oz bread flour
- 200 g 6 oz rye flour
- 20 g 3/4 oz kosher salt
- 8 g .25 oz active dry yeast
- 650 g 1 lb 4 oz water
- 20 g 1 oz duck fat or lard
Instructions
- In a large mixing bowl, combine the yeast and water. Allow the yeast to "bloom" or activate for 5 minutes.
- Add the flour to the mixing bowl, followed by the remaining ingredients.
- Mix to a smooth, elastic dough, either by hand or with a dough hook attachment, for 12 minutes.
- Oil your bowl lightly with canola, or olive, oil and place the ball of dough into the bowl, turning over to coat the surface of the dough with oil to prevent it from drying out as it rises.
- Cover the bowl with a clean kitchen towel and allow it rise in a warm, draft-free area, like the microwave or a cold oven, for 1 hour.
- After the dough has risen, punch it down to expel the gases that have developed during its fermentation process.
- Turn the dough out onto a lightly floured surface and divide into two equal parts.
- Shape the dough into a rounded mound, by pinching the lower portion of the dough between the side of your palm and the counter surface, while at the same time turning in a counter-clockwise direction to form a dome-shaped piece of dough.
- Carefully place it on a sheet pan lined with parchment paper that has been dusted with flour.
- Repeat with the remaining ball of dough. Once both balls have been formed, dust their surfaces lightly with flour and cover with a clean kitchen towel.
- Allow to proof until the dough has doubled in bulk (about 30 minutes). You'll know the dough has proofed sufficiently if a light touch on the dough's surface springs back slowly. If it's firm and elastic it hasn't proofed long enough. If it fails to fill in or deflates the loaf, it's overproofed and will result in an inferior bread.
- Preheat a separate oven to 425°F. (If you only have one oven, remove the bread from the oven and place it in a microwave to hold while you heat the oven for baking.)
- While the oven is heating, set a small pan filled with 2 cups of water to boil on the stove, if you lose too much to evaporation, just replace it as necessary to maintain 2 cups- you'll need this to steam the loaves.
- Just before baking, score the tops of the dough with a razor blade or a very sharp knife. This will prevent the bread from cracking- it looks pretty too.
- Bake the bread on the middle rack with the pot of boiling water on the lowest rack for 40-45 minutes, or until brown in color and hollow-sounding when tapped.
- Remove the pan from the oven and transfer the loaves to a cooling rack to cool slightly before enjoying.
- Wrapping the cooled loaves in plastic wrap and placing them sealing freezer bags will allow you to freeze them for up to two months.
Notes
Although not always popular in the states, the best way to measure ingredients in baking is by volume. Invest in a digital scale and you'll see an improvement in the results of your baked goods.
This bread is good for up to two days freshly baked. You can also slice and freeze it for up to two months.