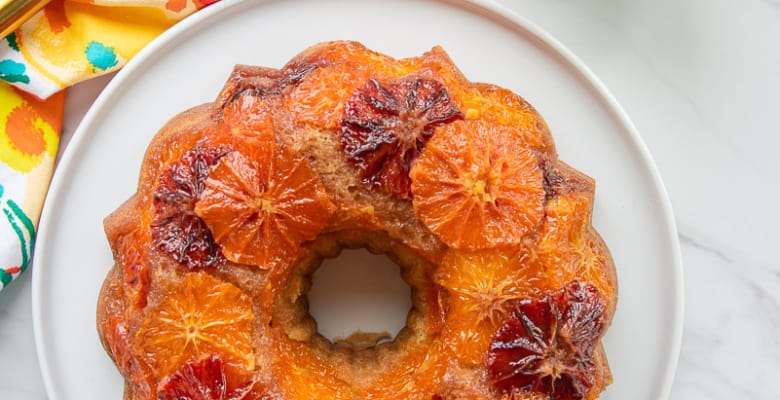
If you love pineapple upside-down cake, you’ll flip (get it?) for this Orange Ginger Coffee Cake. My orange ginger coffee cake has a tender butter cake flavored with orange zest and sour cream, topped with three types of sliced citrus in a caramel topping. Since this moist cake has bright orange flavors, it’s a favorite of all my friends who are fans of oranges and even those who aren’t.

What Is A Coffee Cake?
The biggest misconception about coffee cakes is that they are made with coffee. Coffee cakes do not contain coffee unless it’s part of the recipe. These pastries or cakes get their name from the time of day they were served: coffee or tea time. Guests or families usually enjoy these cakes with their afternoon or morning coffee or tea, hence the name “coffee” cake.
There are two types of coffee cakes: yeasted and quickbreads. The recipes that call for yeast produce a coffee cake that is more bread-like than cake-like. Quickbread coffee cakes, like this one, are faster to prepare (as their name suggests) and more resemble muffins or tea cakes than breads.
What Ingredients Do I Use To Make The Topping For This Orange Ginger Coffee Cake?

To make this orange ginger coffee cake, start with the brown sugar and butter caramel topping.
You can use light or dark brown sugar for this topping. Avoid using granulated sugar here since you want an actual caramel sauce to add to your pan. This topping will create a rich buttery coating on the final product.
How Far Ahead Can I Make the Caramel Topping?

Add the butter to a saucepan and melt it over med-high heat.
Sprinkle the brown sugar into the butter in the pan and use a whisk to combine them. Cook the butter and sugar together, constantly whisking, for 2 minutes. When the brown sugar dissolves, and the mixture in the pan resembles lava, pour the caramel into a lightly greased 10-cup bundt pan (or larger).
Because of this cake’s density, you need a bundt cake pan or a pan with a tube to bake it properly.
Set the pan aside while you gather the orange ginger cake batter ingredients.
You can prepare the caramel topping a day or two before you bake the cake. Store it in a jar or covered container in the fridge after cooling it completely. Then, just before using it, reheat it for 20 to 30 seconds in the microwave. Stir it until smooth, then pour it into the prepared bundt pan.
What Ingredients Do I Need To Make The Orange Ginger Coffee Cake?

The ingredients in the orange ginger coffee cake are whole oranges, all-purpose flour, ground ginger, baking powder, baking soda, unsalted butter, granulated sugar, kosher salt, large eggs, vanilla extract, and sour cream. Ensure all of your cold ingredients are brought to room temperature since that’s the best way to achieve a proper coffee cake batter.
Can I Replace Any Of The Oranges?

I use 3 varieties of oranges in this recipe, but you can use one, two, or even four. You can replace the oranges called for in this coffee cake recipe with another similar variety:
- Replace Navel or Cara Cara oranges with Valencia or Limas, which are sweet.
- Swap Mandarins for Tangerines or Clementines; both are sweet.
- Replace blood oranges with Ruby Red Grapefruit or Pomelo- a citrus that is both sweet and tart.
Use a microplane to remove the zest of the orange. Afterward, use a chef’s knife to remove the peels from the oranges, mandarins, and blood orange. Try to remove as much of the peel and albedo (white part) as possible.
Why Does The Topping Look Watery?

Slice each fruit 1/4-inch thick and decoratively arrange the orange slices in the prepared bundt pan. Set the pan aside while you mix the batter.
As the fruit slices sit in the caramel topping, they’ll develop an orange syrup. This is normal and awesome since it will add more flavor and moisture to the batter as the cake bakes.
How Do I Make The Orange Ginger Coffee Cake Batter?

To make the orange ginger coffee cake batter, first, in a medium bowl, sift together the all-purpose flour, ground ginger, baking powder, and baking soda. Set the dry ingredients aside after sifting them together.
In a large bowl (or the bowl of a stand mixer), beat the room temperature unsalted butter, granulated sugar, orange zest, and kosher salt using an electric hand mixer or stand mixer set to low speed. Increase the mixer to medium speed after the butter and sugar form a paste. Beat the butter and sugar together for 3 minutes. Stop and scrape down the bowl and the beaters (or the paddle attachment) halfway through the mixing time.
Stop the mixer and add one egg to the butter mixture. Blend the mixture at low speed until the egg is fully incorporated. Stop the mixer and scrape down the bowl and beaters. Continue to add the remaining eggs, adding the vanilla extract with the final egg.
Increase the mixer to medium high speed once all the wet ingredients are mixed in. Whip the mixture for 3 minutes, until it is nearly white in color, scraping the bowl and beaters down once during this period.
How Do I Create A Moist Cake That’s Also Tender?

Sift 1/3 of the flour mixture into the bowl and blend it in at low speed just until it’s no longer visible.
Next, add half of the sour cream to the bowl. Blend this in at low speed until only streaks of white are visible in the batter. Add another third of the flour mixture, the rest of the sour cream, and lastly, the remaining dry ingredients.
After you add the last of the flour mixture, use the rubber spatula to fold this in instead of the mixer. Hand-mixing the last of the dry ingredients into the orange cake batter prevents the development of too much gluten, which causes cakes to become tough and chewy. The more tender your cake’s crumb is, the more moisture your cake will retain, as well.

Carefully scoop the batter into the lined pan. Be sure not to disturb the orange slices you expertly arranged in the pan. Smooth the top of the cake batter, then gently tap the pan against the countertop to dispel any air bubbles.
How Long Do I Bake the Orange Ginger Coffee Cake?

Bake the orange ginger coffee cake in a 350°F (175°C) oven for 50-55 minutes or until golden brown on top. A cake tester will come out clean, or you can test the cake is done by gently pressing on the center of the cake. The top of the cake will spring back, and the sides will pull away from the pan when properly baked.
Remove the pan from the oven and allow the coffee cake to cool in the pan for 3 minutes. After 3 minutes, invert the cake onto a wire rack set over a sheetpan to catch spills.
How Do I Ensure All Of The Topping Comes Out Of The Pan?

Don’t remove the cake pan just yet. Allow the pan to sit over the cake for 10 minutes. This allows any lingering orange slices and caramel to drip out of the pan onto the cake. This step is a game changer in any cake with a topping made on the bottom of the pan.
Remove the pan after 10 minutes and let the cake cool completely, or serve it while it’s still warm.
How Do I Serve Coffee Cake?

This cake is one of my favorite things to bake because it doesn’t require additional toppings, glazes, or frostings to make it taste amazing. The orange slices create their own orange glaze, which penetrates the buttery cake.
To serve this orange ginger coffee cake, slice and serve. I love a warm cake, but this coffee cake tastes better as it sits. The orange slices release their juices and produce more of a moist crumb.
How Do I Store Leftovers?

You can store leftover orange ginger coffee cake covered at room temperature for up to 3 days. You can also store it in the refrigerator for 4 days, though I don’t enjoy it much when it’s cold.
Give the leftover coffee cake a freshly baked taste by heating it in the microwave for 20 seconds.
Can I Freeze Baked Orange Ginger Coffee Cake?

You can freeze the orange ginger coffee cake after baking it and allowing it to cool completely. Wrap the cooled cake in a couple of layers of plastic wrap, then cover it tightly in a layer of heavy-duty aluminum foil.
Freeze the coffee cake for up to 3 months. To thaw coffee cake, remove it from the freezer and discard the foil and plastic wrap. Thaw the cake uncovered at room temperature before covering it to keep it from going stale.

You’ll love this Orange Ginger Coffee Cake, especially if you’re a fan of oranges. Its simple ingredients allow you to bake it whenever you have a craving. Its fresh flavor definitely makes it one of the best orange desserts around.
Let me know what you think of this coffee cake in the comments below. Don’t forget to share this recipe with your orange-loving crew and pin it to your breakfast or brunch board for easy finding later.
Orange Ginger Coffee Cake
at Sense & EdibilityEquipment
- 10-cup bundt pan (or larger)
- electric hand mixer or stand mixer
Ingredients
For the Caramel Pan Schmear
- 1/2 cup (1 stick or 113 grams) unsalted butter sliced
- 3/4 cup, packed (170 grams) brown sugar
For the Orange Topping
- 1 large blood orange peeled and sliced 1/4-inch thick
- 1 medium orange Navel or Cara Cara, zested, peeled and sliced 1/4-inch thick
- 2 medium mandarin oranges peeled and sliced 1/4-inch thick
For the Orange Ginger Coffee Cake
- 2 1/4 cups (320 grams) all-purpose flour
- 2 teaspoons (4 grams) ground ginger
- 1 teaspoon (4 grams) baking powder
- 3/4 teaspoon (4 grams) baking soda
- 1 cup (2 sticks or 226 grams) unsalted butter at room temperature
- 1 3/4 cups (355 grams) granulated sugar
- 1 tablespoon orange zest from the Navel or Cara Cara orange
- 1/2 teaspoon (3 grams) kosher salt
- 4 large eggs at room temperature
- 2 teaspoons (10 milliliters) vanilla extract
- 1 cup (240 grams) sour cream at room temperature
Instructions
- Preheat an oven to 350°F (175°C).Lightly spray a 10-cup bundt pan with baking spray or grease it with shortening and dust it with all-purpose flour.Set the pan aside.
Make the Caramel Pan Schmear
- Add the butter to a 10 or 12-inch saucepan and melt it over medium-high heat.
- Sprinkle the brown sugar into the pan and use a whisk to stir it into the melted butter. Cook the butter and sugar together, constantly whisking, for 2 minutes.
- When the brown sugar dissolves, and the mixture in the pan resembles lava, pour the caramel into the greased bundt pan.
Arrange the Orange Slices
- Decoratively arrange the orange slices in the prepared bundt pan. Try to arrange the orange slices in an ombré style or random color patterns. Set the pan aside while you prepare the orange ginger coffee cake batter.
Mix the Orange Ginger Coffee Cake Batter
- Sift the all-purpose flour, ground ginger, baking powder, and baking soda into a mixing bowl. Set the dry ingredients aside after sifting them together.
- In a large bowl (or the bowl of a stand mixer), beat the room temperature unsalted butter, granulated sugar, orange zest, and kosher salt using an electric hand mixer or stand mixer set to low speed. Increase the mixer to medium speed after the butter and sugar form a paste.
- Beat the butter and sugar together for 3 minutes. Stop and scrape down the bowl and the beaters (or the paddle attachment) halfway through the mixing time.Stop the mixer and add one egg to the butter mixture.
- Blend the mixture at low speed until the egg is fully incorporated. Stop the mixer and scrape down the bowl and beaters. Continue to add the remaining eggs, adding the vanilla extract with the final egg.
- Increase the mixer to medium-high speed once all the wet ingredients are mixed in. Whip the mixture for 3 minutes, until it is nearly white in color, scraping the bowl and beaters down once during this period.
- Sift 1/3 of the flour mixture into the bowl and blend it in at low speed just until it's no longer visible. Scrape down the bowl and beaters.Next, add half of the sour cream to the bowl. Blend this in at low speed until only streaks of white are visible in the batter. Scrape down the bowl and beaters.
- Add another third of the flour mixture, the rest of the sour cream, and lastly, the remaining dry ingredients. Scrape down the bowl and beaters after each addition is mixed in.After you add the last of the flour mixture, use the rubber spatula to fold this in instead of the mixer.
Bake, Then Serve the Coffee Cake
- Carefully scoop the batter into the lined pan ensuring you don't disturb the orange slices arranged in the pan. Smooth the top of the cake batter, then gently tap the pan against the countertop to dispel any air bubbles.
- Bake the orange ginger coffee cake in the preheated oven for 50-55 minutes or until golden brown on top. A cake tester or toothpick should come out clean when inserted into the middle section of the cake.
- Remove the pan from the oven and allow the coffee cake to cool in the pan for 3 minutes.
- After 3 minutes, invert the cake onto a wire rack set over a sheetpan to catch spills. Allow the pan to sit, inverted, over the cake for 10 minutes to allow lingering orange slices and caramel to drip out of the pan onto the cake.
- Remove the pan after 10 minutes and let the cake cool completely, or serve it while it's still warm.To serve this orange ginger coffee cake, slice and serve.
Notes
Swaps and Substitutions:
- You can use light or dark brown sugar for the caramel pan schmear.
- Replace the Navel or Cara Cara orange with Valencia or Lima oranges. Swap the Mandarins for Tangerines or Clementines. Replace the blood orange with Ruby Red Grapefruit or Pomelo (you might be able to fit only half of the grapefruit slices in the pan).
- Swap the vanilla extract for almond or orange extract.
- Replace the sour cream in this recipe with plain Greek yogurt, whole milk, or buttermilk in the same quantities.
Make-Ahead Instructions:
- You can prepare the caramel pan schmear a day or two before you bake the cake and store it in a jar or covered container in the fridge after cooling it completely.
- Just before using the pan schmear, reheat it for 20 to 30 seconds in the microwave. Stir it until smooth, then pour it into the prepared bundt pan.
Tips and Techniques:
- Because of this cake's density, you need a bundt cake pan or a pan with a tube to bake it properly.
- As the fruit slices sit in the caramel topping, they'll develop an orange syrup. This is normal and will add more flavor and moisture to the batter as the cake bakes.
- Hand-mixing the last of the dry ingredients into the orange cake batter prevents the development of too much gluten, which causes cakes to become tough and chewy.
- The top of the cake will spring back, and the sides will pull away from the pan when properly baked.
- This coffee cake tastes better as it sits.
Storage Instructions:
- Store leftover orange ginger coffee cake covered at room temperature for up to 3 days.
- You can also store it in the refrigerator for 4 days.
- Give the leftover coffee cake a freshly baked taste by heating it in the microwave for 20 seconds.
Freezer Instructions:
-
To freeze the orange ginger coffee cake after baking it:
- Allow it to cool completely, then wrap the cooled cake in a couple of layers of plastic wrap and a layer of heavy-duty aluminum foil.
- Freeze the coffee cake for up to 3 months.
- To thaw the coffee cake, remove it from the freezer and discard the foil and plastic wrap. Thaw the cake uncovered at room temperature before covering it to keep it from going stale.

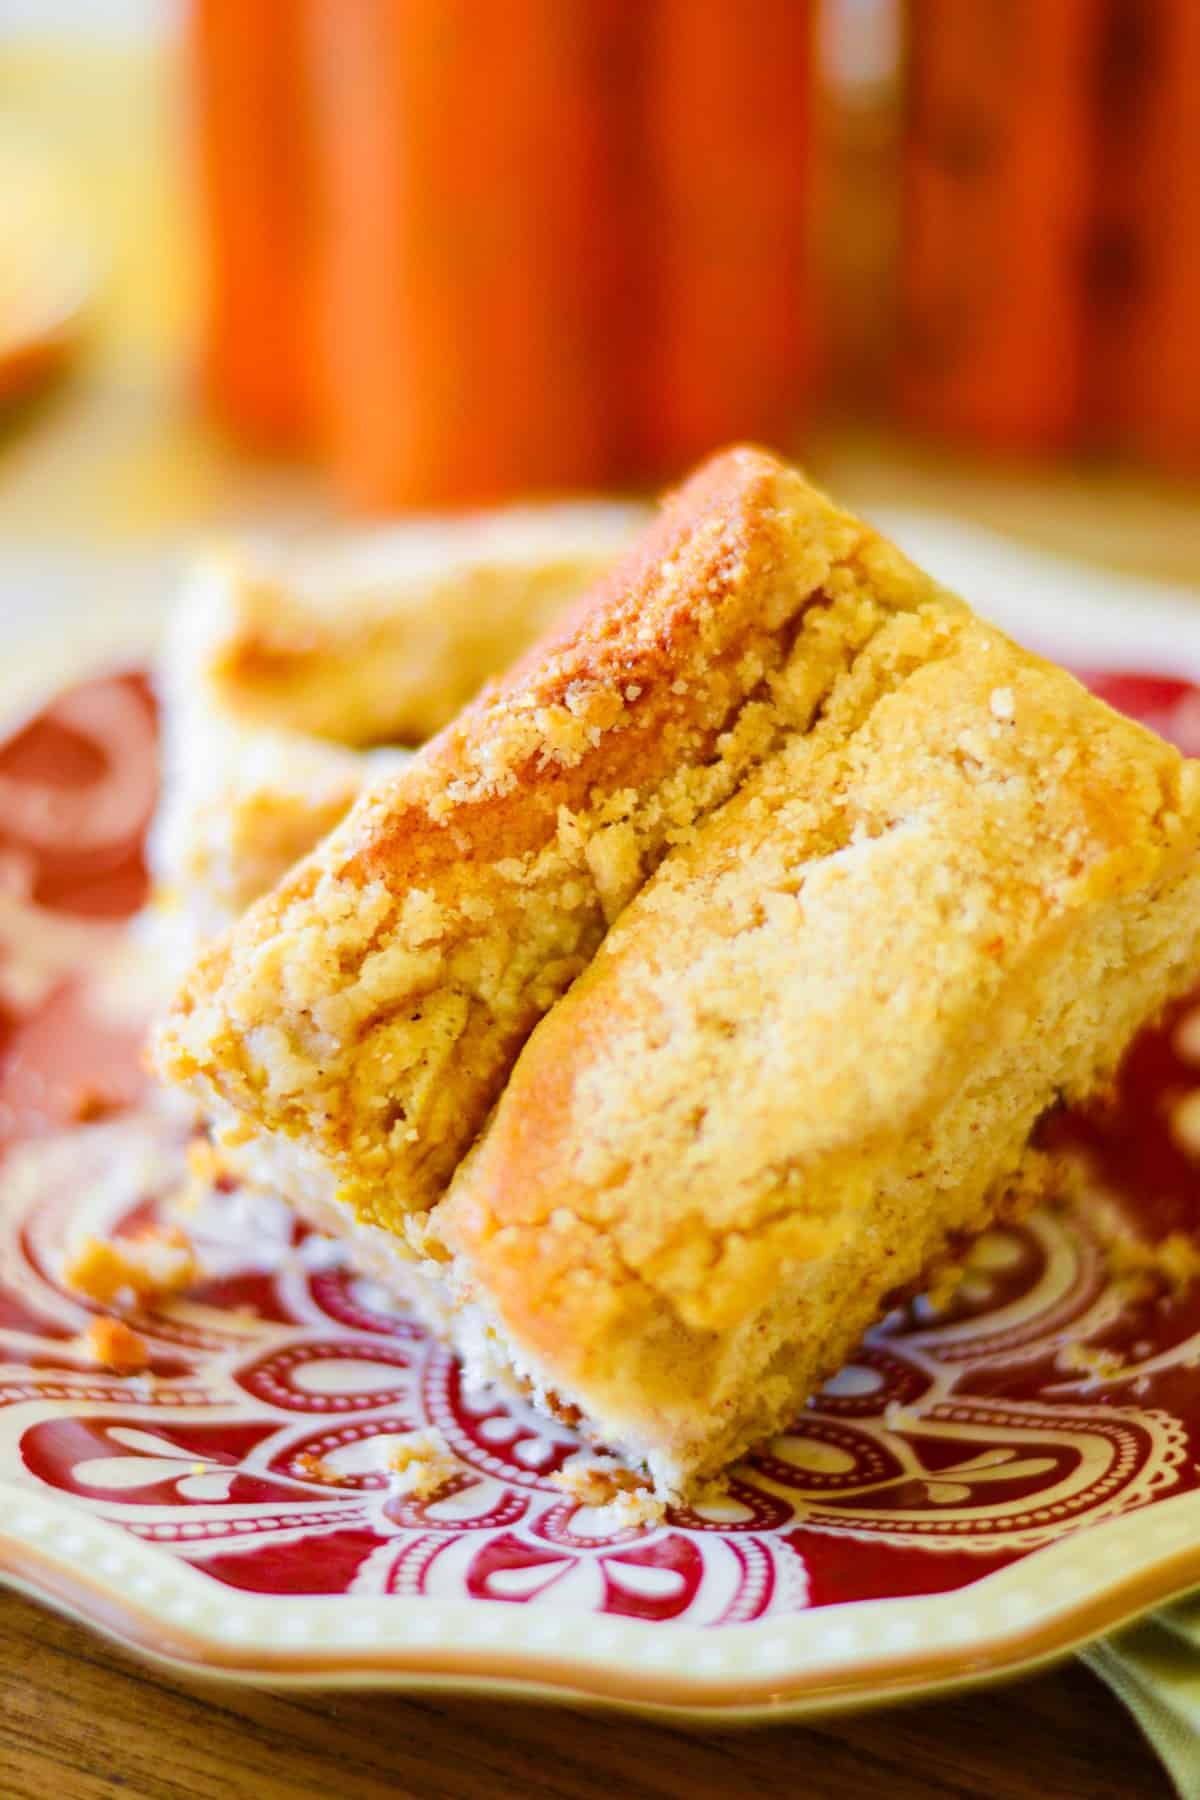


All I can say is wow!!! This orange ginger coffee cake was tasty and it looked absolutely amazing on my dessert spread. I’ll be making this every time I want to impress guests!
It’s an edible centerpiece, Jen!