I want this to be the year you jump on the dry brine turkey train. I mean, if you haven’t already. Turkey is the star of the upcoming holiday season, so why not make it your best one yet? A dry brine removes the drama of finding a vessel large enough to hold the wet brine, but it doesn’t sacrifice the flavor or juiciness you want in a turkey. Or any other type of meat, for that matter. Let me show you everything I know about how to dry brine and roast a turkey.
This post was originally published on November 22, 2017. I updated the hideodorous pictures and streamlined the article.
What is a brine?
I always try to think of clever, approachable ways to describe food processes.
Think of the hottest summer day you’ve ever experienced. Now put yourself outside. That sun and heat begin to make you sweat, which means you’re losing moisture. If you stay out in the sun long enough, you lose tons of moisture and become dehydrated. If you dehydrate too much, you die.
So it is with meats, especially lean meats like turkey. When they’re roasting, they’re like you outside in the, say, El Paso, Texas, July heat. They’re in the oven, “sweating” and losing all their moisture. You leave them in too long, and it’ll be dry as a bone when you take them out. Dead, like you. Whenever we know that we’re going to be outside sweating our butts off, we hydrate with electrolytes (salt) to plump ourselves up full of moisture. As we sweat, we, hopefully, continue to hydrate, so we don’t die. A brine is Gatorade for our turkey. It is a sodium-packed liquid that changes the structure of a protein cell so that the cell absorbs the water that was initially leached out by the salt. The cells are now filled with more moisture as well as flavor.
That’s epic. I expect a Pulitzer for that one, my friend.
What’s the difference between dry brine and wet brine?
The only difference between wet brine and dry brine is that the former involves liquid. You can use everything you would in a wet brine to make a dry version. If you’re using large leaves of herbs, like bay leaves, you want to crush them down to a powder, but besides that, you can flip any wet brine to a dry one.
For me, the most important difference in the techniques is the ease with which you can dry brine your foods. With a wet brine, you need to figure out the logistics of getting a vessel large enough to hold whatever you’re brining, plus the liquid, plus the ice that’s invariably involved.
You know what? Let me tell you a little story…
Why would I want to brine a turkey?
For years, I was a dedicated adherent to the philosophy that one should always brine the holiday bird. Thanksgiving enjoys cult status in my family, so I can’t mess around with the main course. But, for so long, I was chained to the wet brining technique as being “the one.” It wasn’t until a disturbing encounter with a mutant bird that I said, “Enough’s enough!” and switched to dry brines.
I always host military servicemembers for the holidays. But, one particular Thanksgiving, we had a buddy tell us he would provide the turkey if I would take care of cooking it.
“Too easy!” I said.
Now, normally I wouldn’t think twice about the deal. In fact, I didn’t think twice- until homeboy pulled up to the house two days before to drop off the turkey.
“Where’s the bird?” I asked.
“Oh! ‘He’s’ in Jr.’s car seat,” he replied.
“The hell? The ‘car seat?’ Why are you putting raw poultry in your son’s car seat?”
“It’s still frozen. It’s safe.”
“Wait. What?! You didn’t let it thaw?!”
“Oh…no. I didn’t know I had to,” as he gets out to open the back door.
“Ugh! Okay, We still have time. Hopefully, it’s small.”
<<brace yourself>>
“WHAT THE HELL IS THAT?!?!!?”
“The turkey!”
“That’s a freaking pterodactyl! How many pounds is it!?!”
“Thirty-two! I got a big bird so we can have leftovers.”
“It’s going to take at least five days to thaw this damn thing!”
“Well, you’re a ‘chef.’ Make it happen.”
“First of all, don’t put ‘chef’ in air quotes. I am a chef. You don’t need to air quote it. Second of all, I’m not a Soldier, so what your mouth. Third of all, you’re carrying that beast into the house.”
I took so much joy in watching him struggle to walk that animal into the house. But, reality came crashing down around me when I realized there was no way this thing was going to thaw under refrigeration in two days. I ended up having Hector clean out the largest cooler we owned. Then I put it in our guest bathroom tub and ran cold water over it for twenty-four hours. Mission: “Thaw the Beast” was accomplished. But where was I to brine it?
I wasn’t. There was no way the water and the bird would fit into anything sanitary. So, I took everything I normally used in a wet brine and rubbed it on the turkey. People said it was my best turkey yet.
I learned two things that day: never ask a combat medic to buy your turkey, and that wet brining isn’t all it’s cracked up to be.
What do I need to dry brine a turkey?
The first step in dry brining your turkey is getting your hands on a normal-sized bird (NOT 32 lbs). Also, it’s important to try to avoid turkeys that are injected with “a solution.” Take a look at the packaging to see if yours contains one. That “solution” is usually some sort of sodium infusion they’ve pumped into the bird to make it taste better. We don’t need all of that because we have each other, so steer clear of turkeys with that on the label. If you can’t find an uninjected bird, go ahead and pick up what you can, but you might want to reduce the amount of brine by a tablespoon.
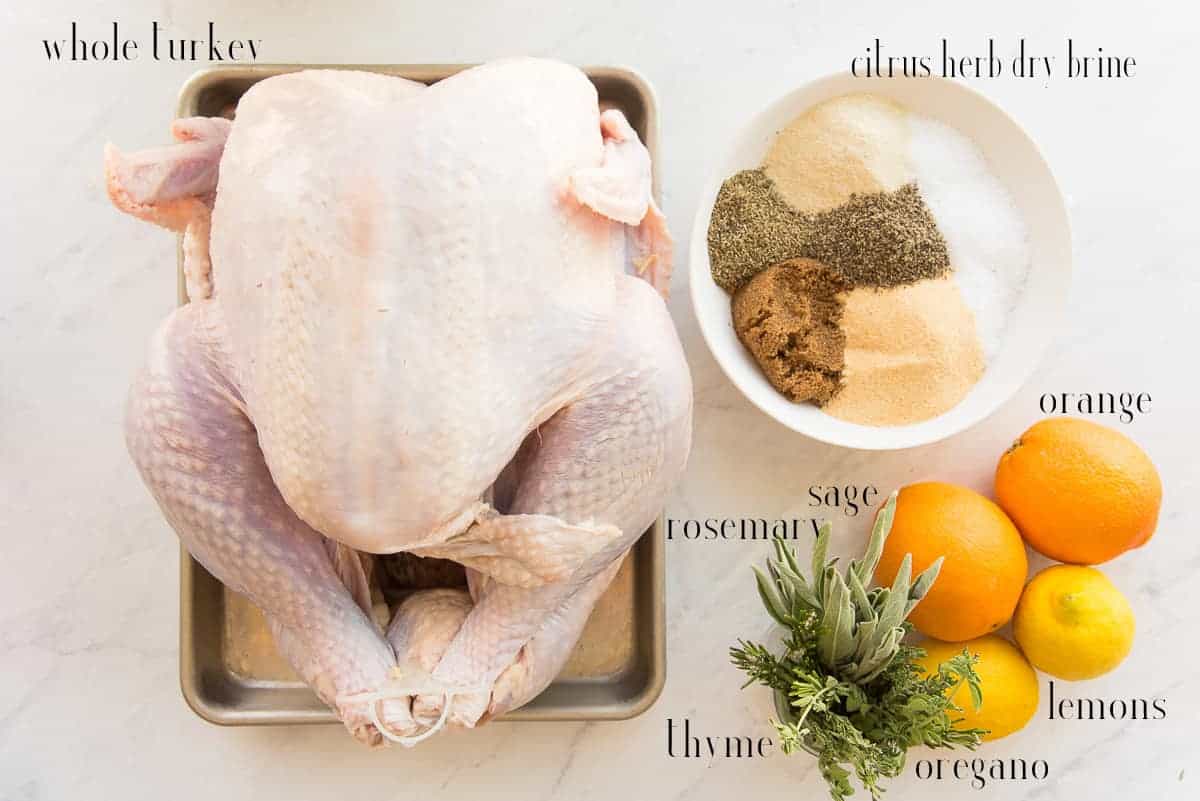
Additionally, you need half of this Citrus-Herb Dry Brine recipe. More flavor for the bird comes in the form of orange and lemon wedges (I just use the fruits I zested for the citrus-herb dry brine), onion, garlic, and fresh herbs. Fresh herbs can be whatever you prefer, but the classic “poultry herb blend” is sage, rosemary, thyme, and oregano. You can add parsley, too, if you want.
Most importantly, besides the turkey, you need a roasting pan with a rack.
How do I make the dry brine?
Though the link to the citrus-herb blend will give you a more detailed breakdown of the recipe, here it is in a snapshot:
- Combine kosher salt, brown sugar, herbs de Provence, granulated garlic and onion powders, and pepper, together with the zest of orange and lemons, and mix.
- Separate the dry brine mix you need for this turkey or 1 tablespoon per pound of meat.
- Use it.
In the linked post, I give options and swaps to make your own unique blend.
Can I make the dry brine ahead?
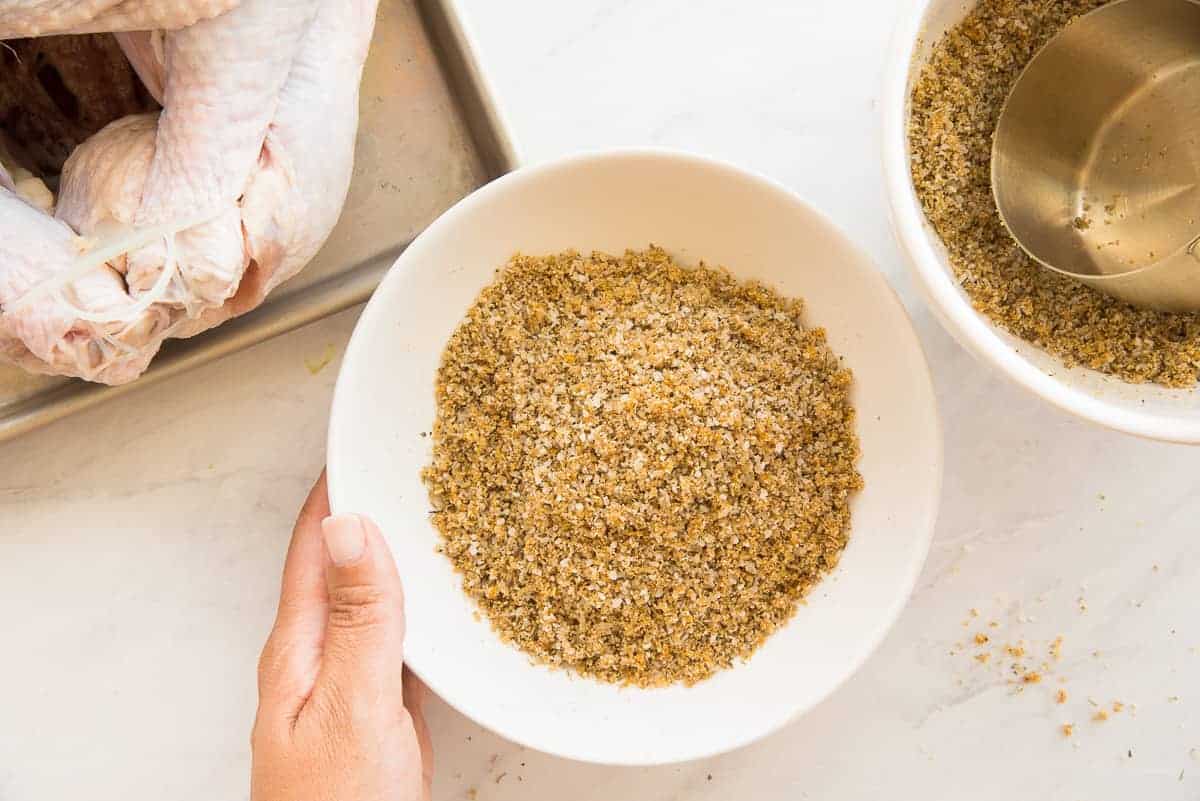
I actually encourage you to make your dry brine ahead. You can mix it and store it in a glass jar with a lid for up to a month in the pantry.
Since this dry brine is versatile, you don’t have to limit yourself to using it only on turkeys, either. But this recipe is for a turkey, so let’s get to it.
Pictured is a 14-pound turkey, so I’m using 14 tablespoons, which is just under a cup, but a little more than 3/4-cup. You can round up or down based on how your blood pressure is doing that day.
How long does it take a turkey to thaw?
My horror story above should beg the question, “How long does it take to properly thaw a turkey?”
My guideline for thawing a turkey is straight from the USDA website:
For the refrigerator thawing method, give your turkey 24 hours per 5 pounds of meat:
8-12 pound turkeys: 2-3 days
12-16 pound turkeys: 3-4 days
16-20 pound turkeys: 4-5 days
20-24 pound turkeys: 5-6 days
So what if you didn’t plan ahead, or what if a combat medic brought you a dinosaur? Quick thawing methods are faster, but they also run up your water bill.
For quick defrosting, set the turkey in a sink or tub of cold water. Allow the turkey to soak for 30 minutes per pound, changing the water every 30 minutes:
8-12 pound turkeys: 4-6 hours
12-16 pound turkeys: 6-8 hours
16-20 pound turkeys: 8-10 hours
20-24 pound turkeys: 10-12 hours
And, no, thawing a turkey in the microwave is not an option for anyone I hang with. Plan ahead.
How far in advance should I dry brine my turkey?
I advise dry brining your turkey for at least 12 hours. Because turkeys are pretty meaty, you want to give the salt a chance to do its osmosis thang.
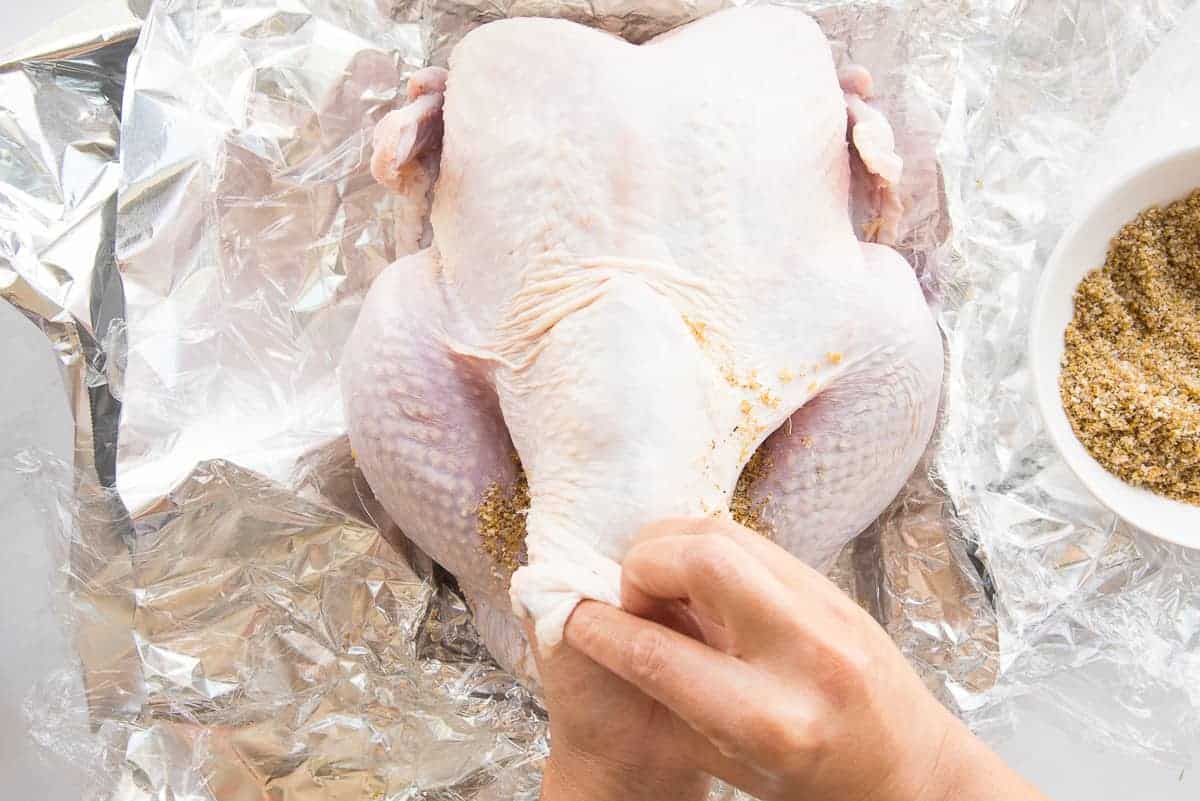
There’s a membrane between the skin of the turkey and the breast meat. Use your index (pointer) finger to separate the membrane right where the breast comes to a point (where the cavity is). Continue using your finger to push between the skin and the meat to separate the two. Take care to avoid tearing the skin since everything in life is about capturing the perfect shot for Instagram (insert eye-roll here).
Once the skin is separated, shove a 1/2-cup of the citrus-herb brine under the skin. If you didn’t take the time to do this, the turkey would be good but not amazing. Here, there’s no barrier between breast meat and dry brine. As a result, your turkey breast will absorb all the salt, spices, and herbs and retain as much moisture to boot.
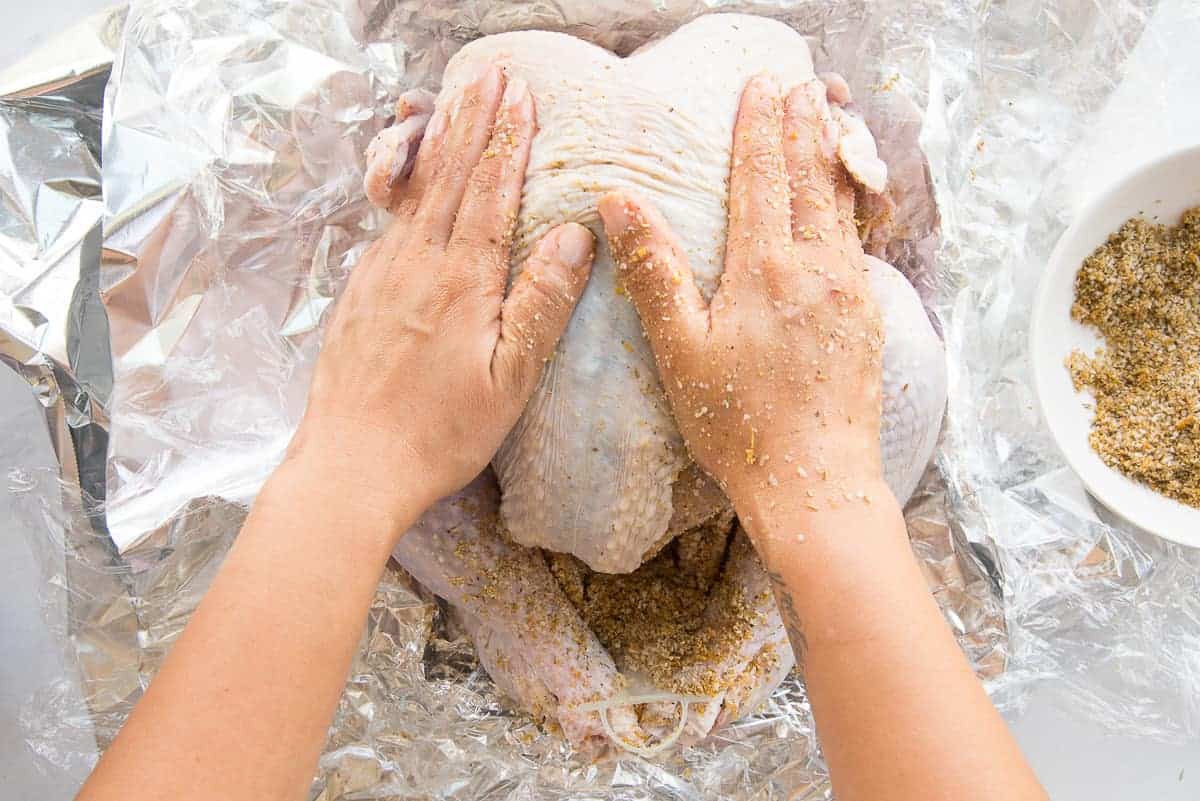
Use your hands to spread the brine under the skin. Just give the bird a nice, deep tissue massage or something.
How long does the turkey need to marinate?
Rub the remaining citrus-herb dry brine all over the outside of the turkey, making sure to hit up the inside of the cavity, too.
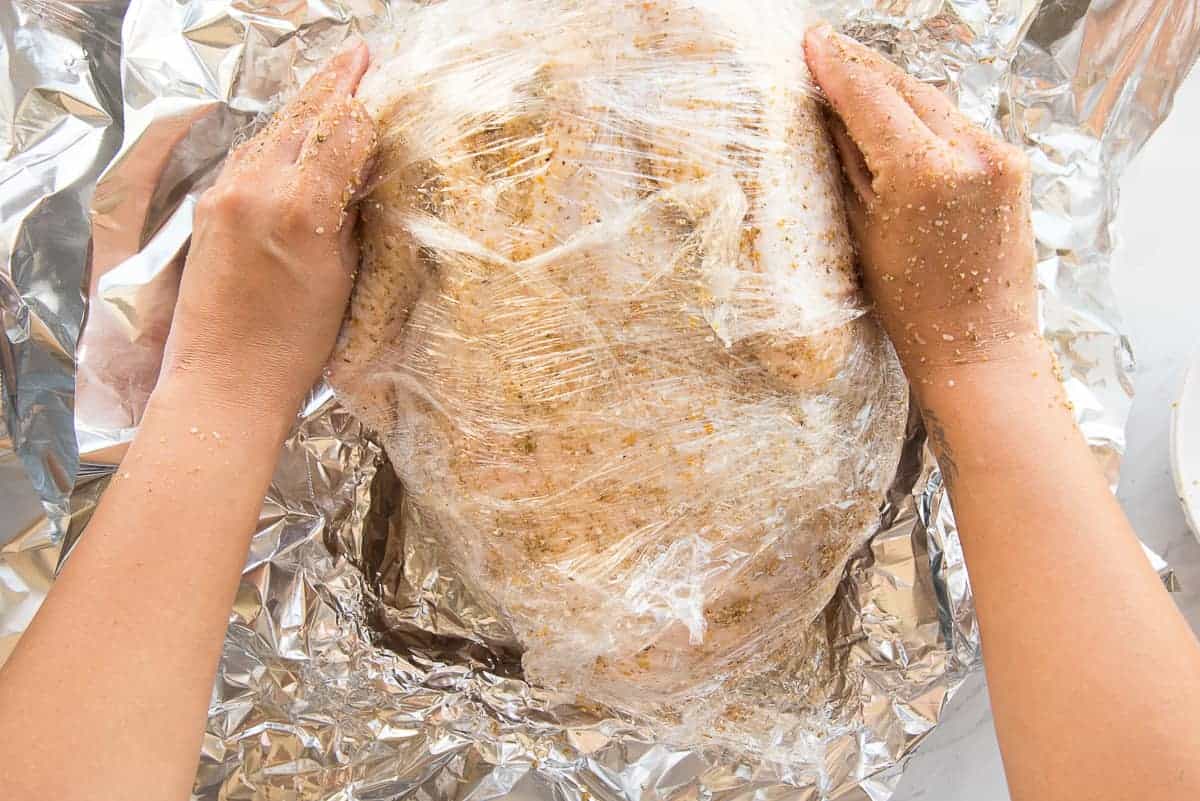
I have this trick for marinating meats. It’s very much like preparing gravlax or my Pernil. Wrap the hell out of it, so the brine has nowhere to go. In addition to the salt naturally drawing out the liquid and the turkey sucking it back up, the wrapping acts as a bodyguard. It prevents any flavor from escaping.
Wrap the bird tightly in overlapping layers of plastic film. Go wash your hands and grab two sheets of heavy-duty aluminum foil. Wrap the bird once again in the two sheets of foil and plunk it onto a sheetpan. Marinate the turkey anywhere from 12-24 hours.
No need to go longer than 24 hours because the meat is so lean it will absorb as much flavor as it can hold within that time. If you go over by 6-8 hours, that’s okay too, but don’t push past then.
What type of pan works best for roasting a turkey?
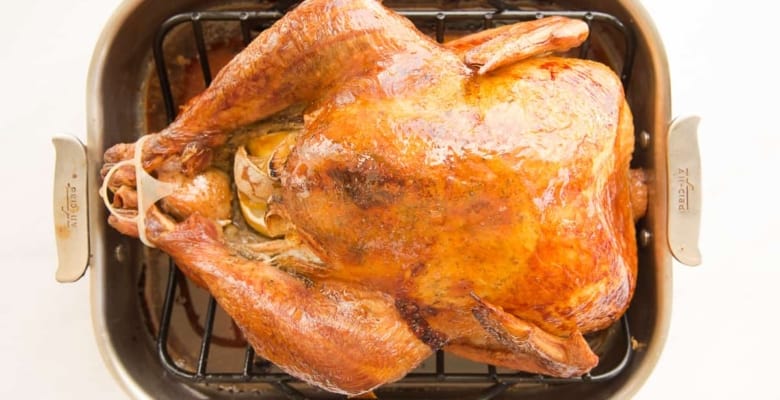
A roasting pan, preferably one with a rack that sits inside, is best for roasting your turkey. Roasting pans have taller sides, which usually have handles on opposite ends. Those tall sides mean large pieces of meat (or birds) can sit inside and release their juices without making a mess in the oven. In addition to tall sides, roasting pans are thicker stainless steel, so they can be heated on the stovetop (gravy anyone?).
Avoid glass roasting pans as they are notoriously prone to shattering in the heat. Plus, you can’t go from oven to stovetop with them. The old-school black or blue-mottled roasting pan with a lid was the cornerstone of every Black and Hispanic kitchen that I walked into. I’m sure my Asian and White friends had them too.
For me, the most important thing about the pan is whether or not it has a rack. A rack is essential in achieving uniform roasting and browning of the bird. The bird sits in its juices without it, and the bottom skin becomes rubbery instead of crisp. If your roasting pan doesn’t have a rack, make one out of chopped root veggies (like potatoes, onions, carrots, and celery) or out of a tube of foil coiled up like a snail. Set the bird on top, and you have a makeshift rack.
How do I prep the turkey for roasting?
First, lower the middle rack to the lower half of your oven. You don’t want the bird too close to the heating element, or it will brown unevenly. Next, preheat your oven to 325°F (163°C).
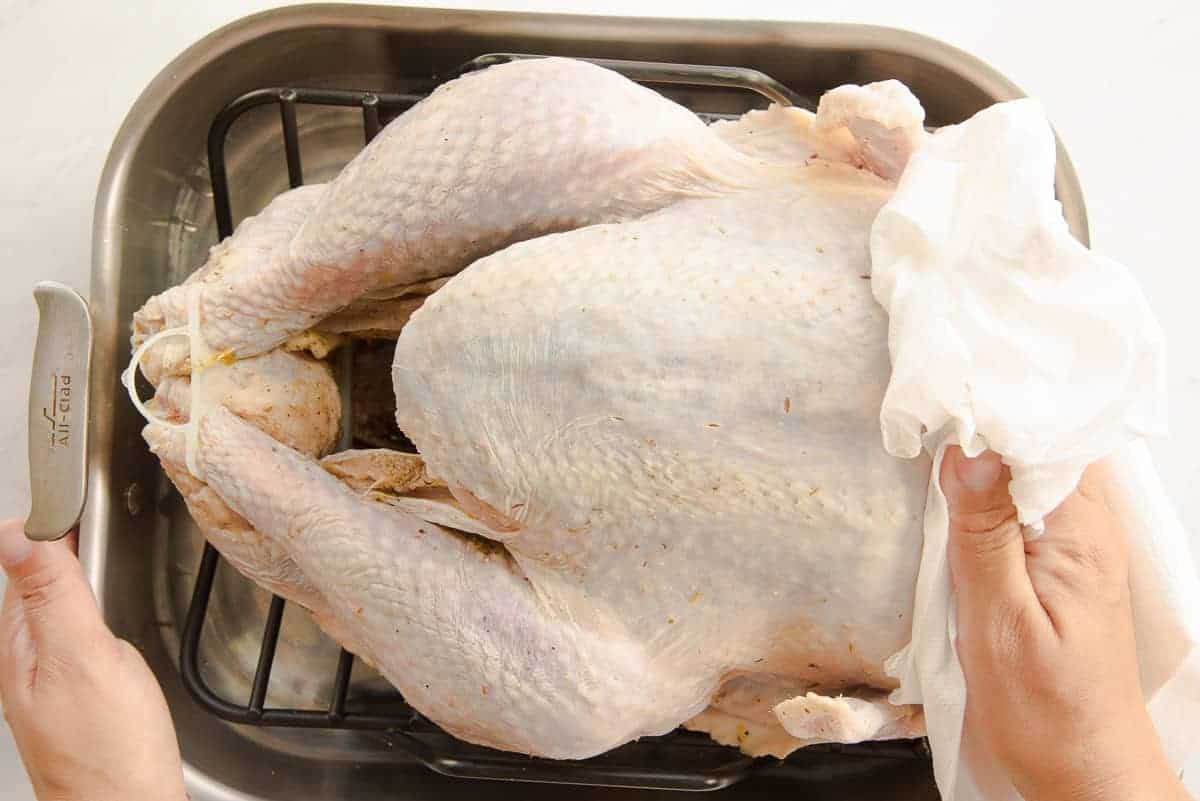
Before roasting your bird, pat the outside of the turkey dry with paper towels or a kitchen towel. Because you’re going to roast for a few hours, you want to remove the spices on the surface that may burn.
Leave the plastic binding on the drumsticks since that’s what’s holding the legs in a compact position.
What can I stuff the cavity of the bird with?
Stuffing the cavity of your bird is another great way to add flavor to the meat.
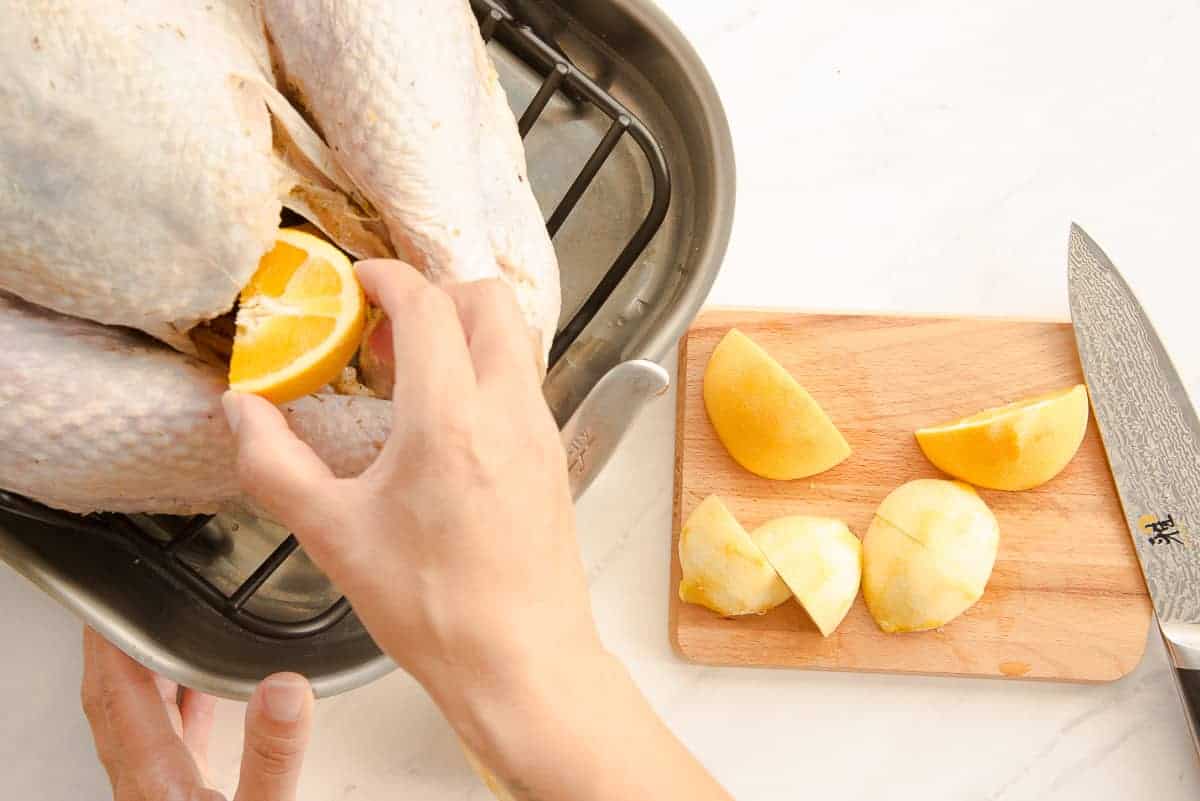
Again, I reserve the citrus fruits I zested for the dry brine mixture solely for this purpose. Cut the orange and the lemons into small wedges. Stuff half of the wedges into the cavity of the bird.
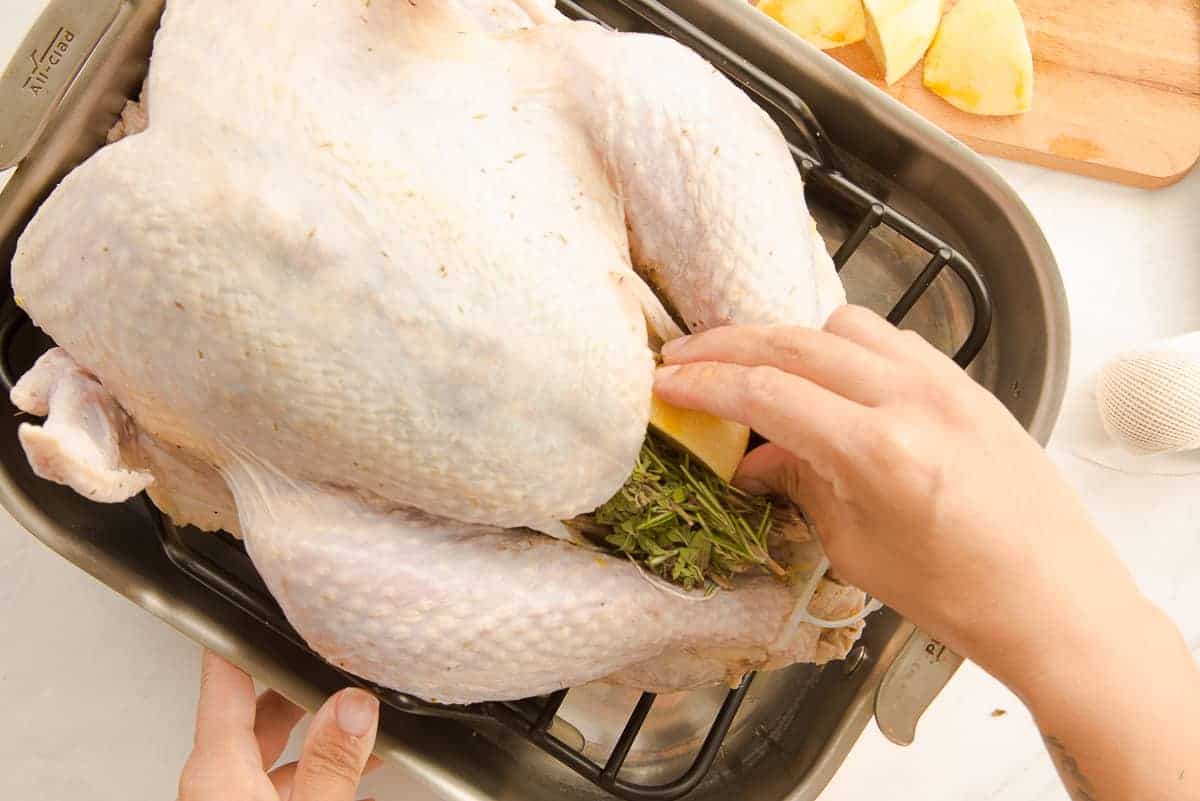
Follow the citrus fruits with a bundle of fresh herbs.
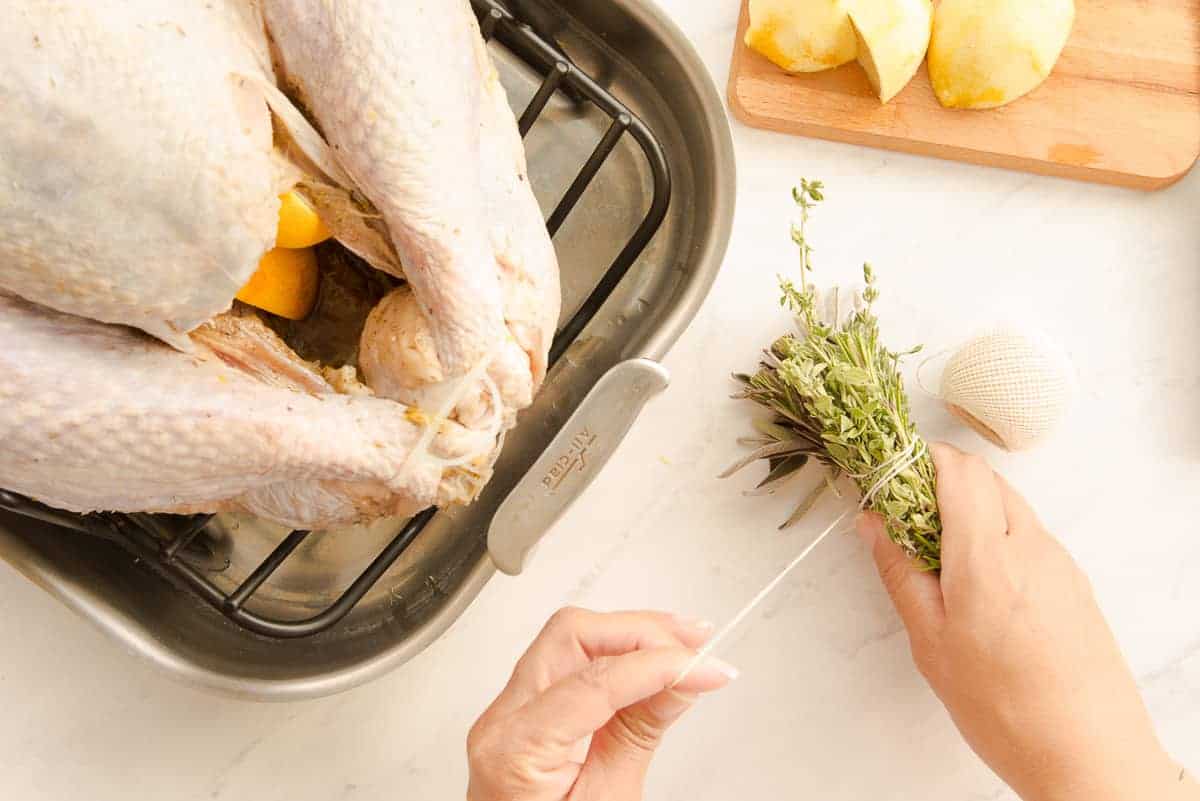
I stack the sage, rosemary, thyme, and oregano on top of one another and wrap the bundle tightly in butcher’s twine. Make a knot in the twine and push the spice bundle into the center of the cavity.
Follow the spice bundle with a small white onion cut in wedges and a whole head of garlic cut across its width. Finish with the remaining citrus wedges.
Yes, all of this fits into my bird, but I’m not shy about getting in it.
How do I achieve the perfect-looking bird?
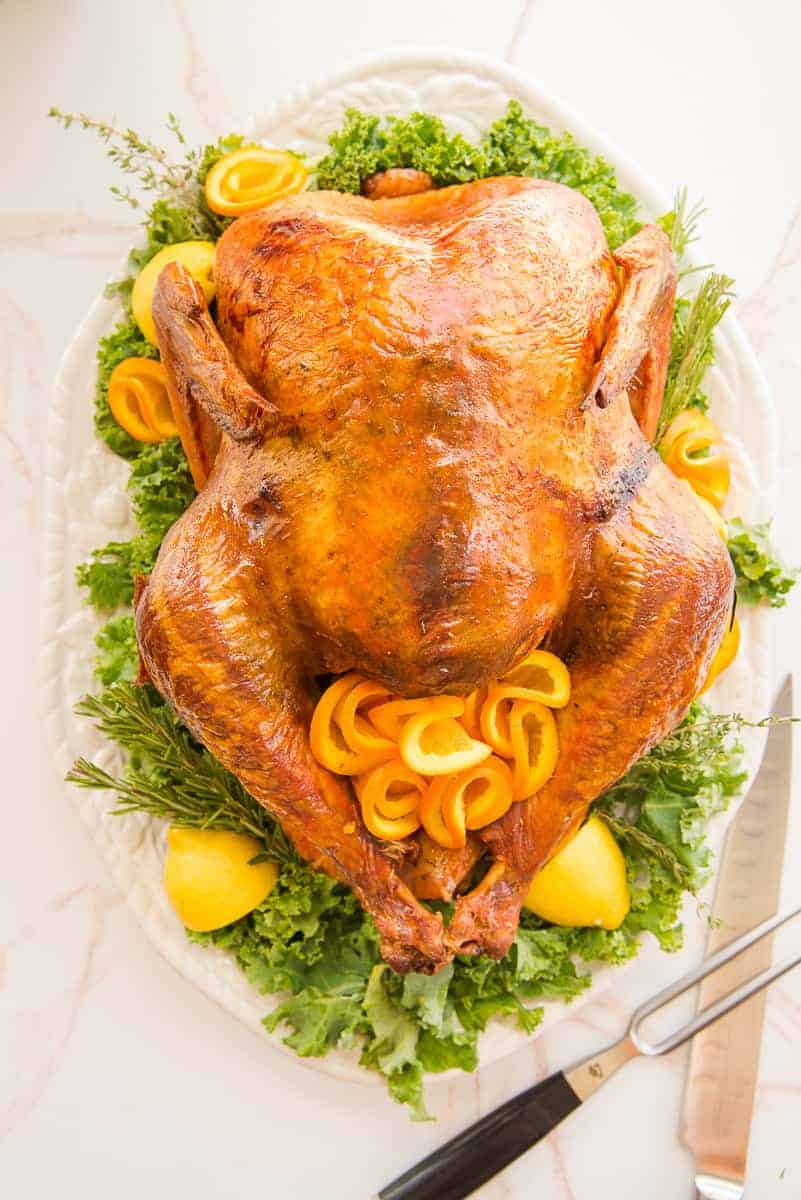
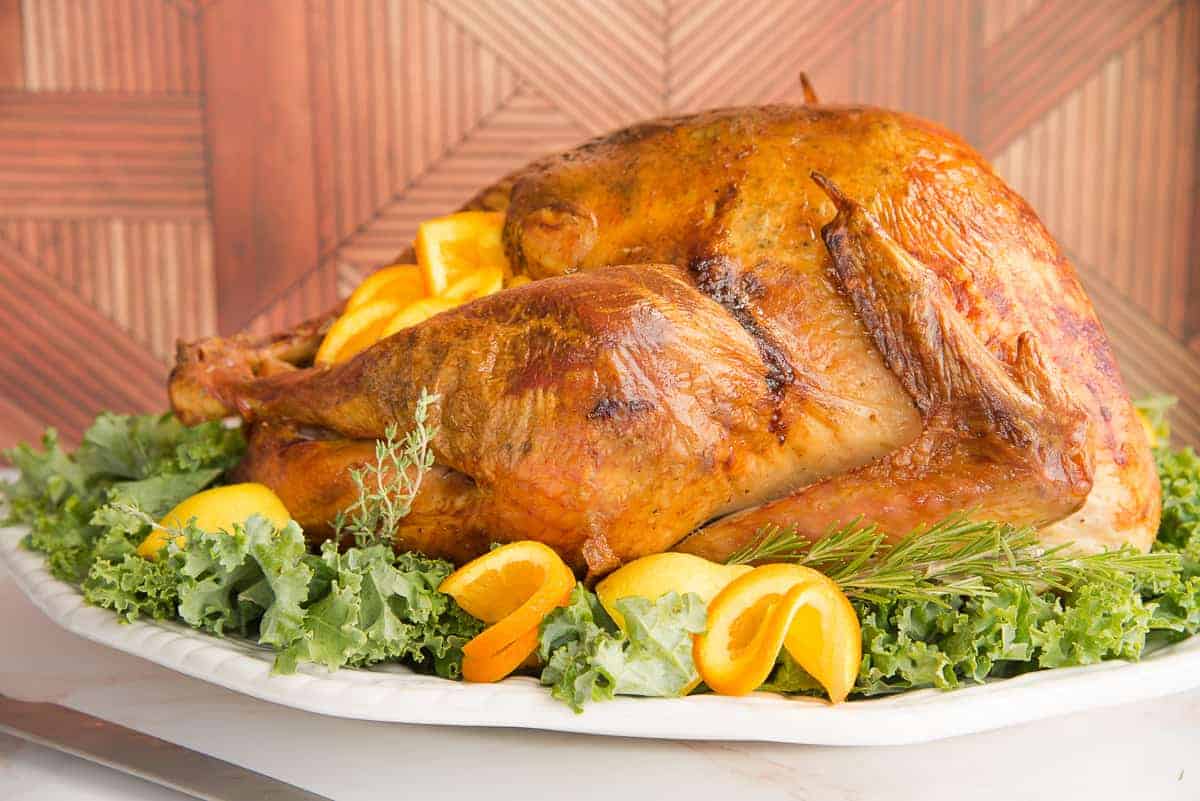
If by “perfect” you mean looking like it fell out of a magazine, you’re going to need brown food color, oil, and maybe some liquid smoke. Seriously. Those pictures were styled by food stylists to make them look perfect. Because we’re actually going to eat our turkeys, we’re not doing all that.
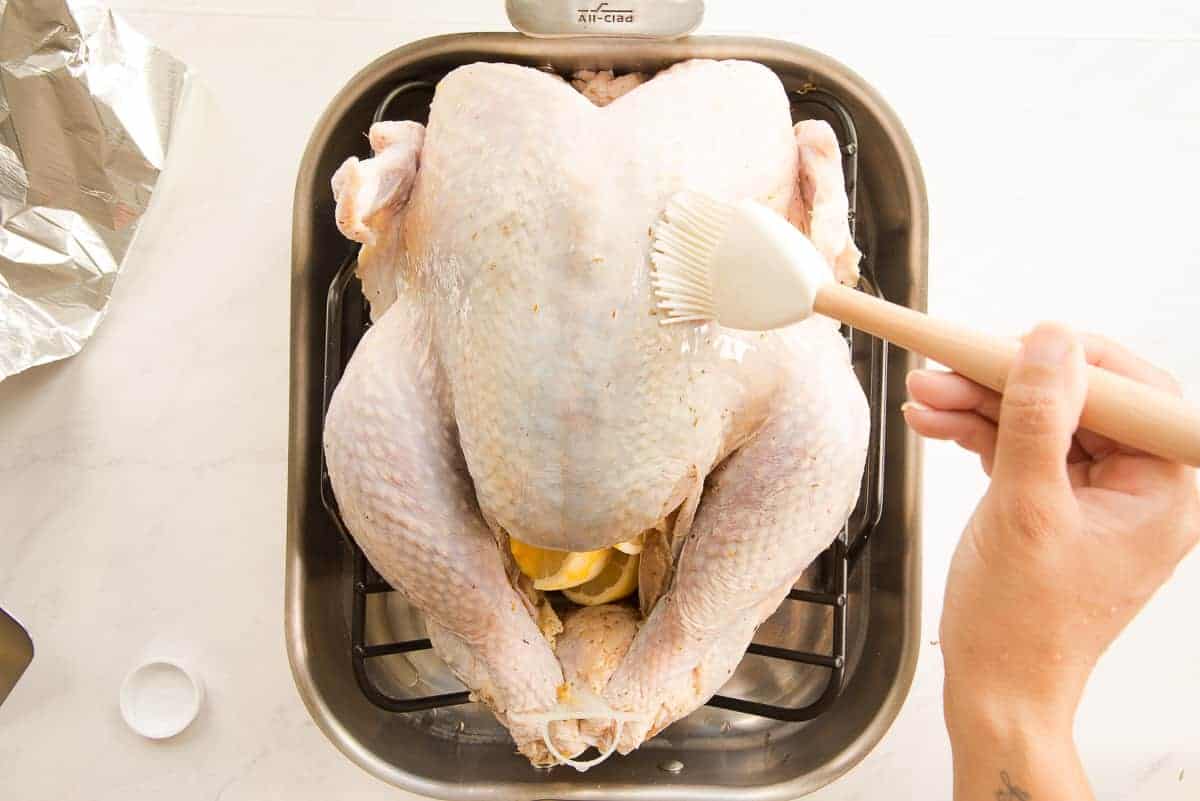
Since perfect to me means golden brown and properly cooked, I’m going to tell you that you need to start by brushing your turkey breast and the wingtips with cooking oil. Just a small amount- 1 tablespoon- will do.
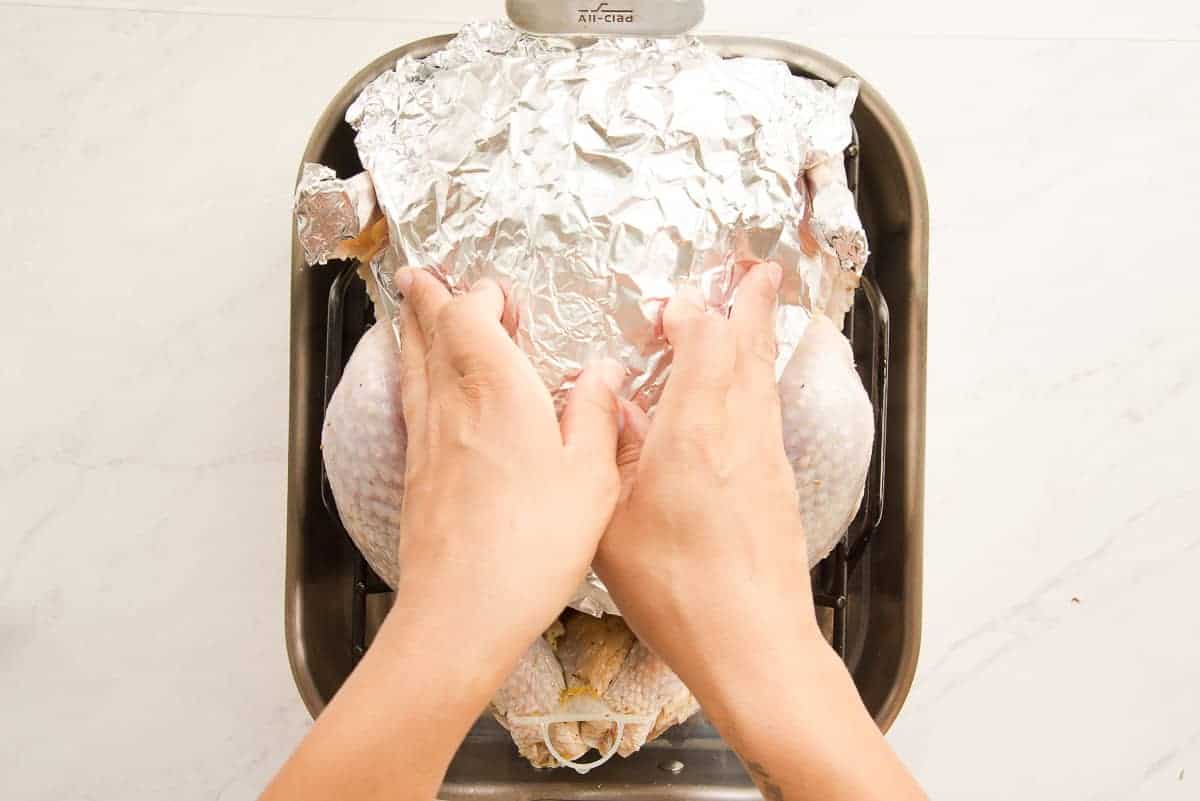
Next, form a piece of heavy-duty foil around the breast down to the cavity. Leave the turkey legs exposed. Cut small pieces of foil to cover the tips of the wings.
Since the turkey breast and wingtips brown faster than the rest, we’re going to start roasting with them covered. Towards the end of roasting, we uncover them to allow them to finish browning.
How long do I roast the turkey?
A good timetable is 20 minutes per pound of turkey
I’m all about “this much time per pound” because it gives you a gauge and allows you to convert roasting times based on your bird’s size. Since we’re technically stuffing this bird- albeit with things we won’t eat- we need to account for that by increasing the roasting time to 20 minutes per pound.
If, for some reason, you choose not to add more flavor by stuffing the cavity, decrease the time to 15 minutes per pound. This is all at 325°F (163°C).
If you need a visual:
14-pound turkey x 20 minutes per pound= 280 minutes
280 minutes divided by 60= 4 hours 40 minutes
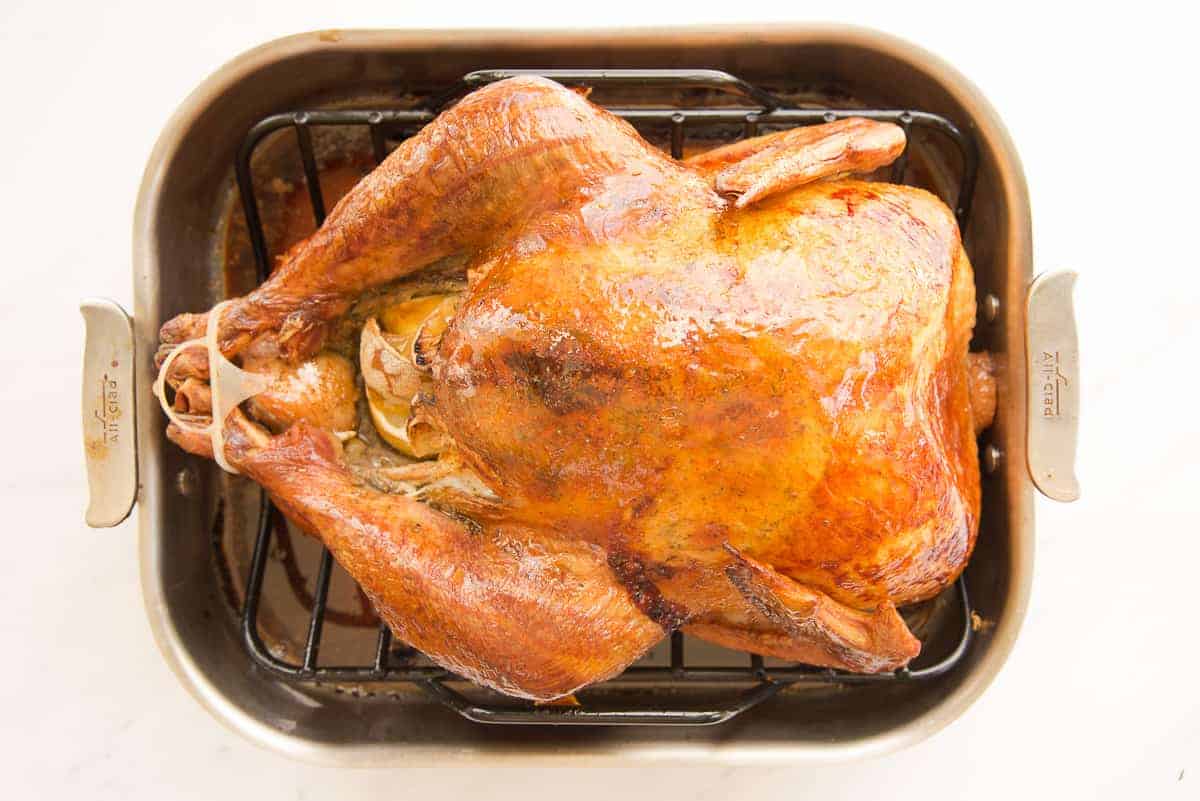
An hour before the roasting time is up, remove the pan from the oven. Take off the foil covering from the breast only. Return the pan to the oven to finish roasting the turkey.
Ultimately, the internal temperature of the turkey is what’s most important. So, insert an internal probe into the thickest part of the thigh- making sure the probe isn’t touching the bone. If the thermometer reads 165°F (74°C), your turkey is done.
Remove the turkey from the oven and allow it to rest under a foil tent for 15 minutes before carving. Doing this gives the juices in the meat a chance to settle into place.
How many people will my turkey feed?
That depends on how greedy your family is. All of us are insane when it comes to turkey, so we only get three meals out of a 14-pound bird.
If you want leftovers, you need 1 1/4-pound of meat per guest you plan to feed. If leftovers aren’t your thing, you can scale down to 1-pound per guest.
So:
8 guests: 8-10 pound turkey
10 guests: 10-12 1/2-pound turkey
12 guests: 12-15 pound turkey
14 guests: 14-18 pound turkey
Again, the lower number represents the no leftovers crew. Clearly, the higher weight represents my crew.
How do I serve this dry brine-roasted turkey?
Though we sometimes have it, my family isn’t huge on gravy. For us, it just gets in the way of the flavor. Also, this turkey just doesn’t need it.
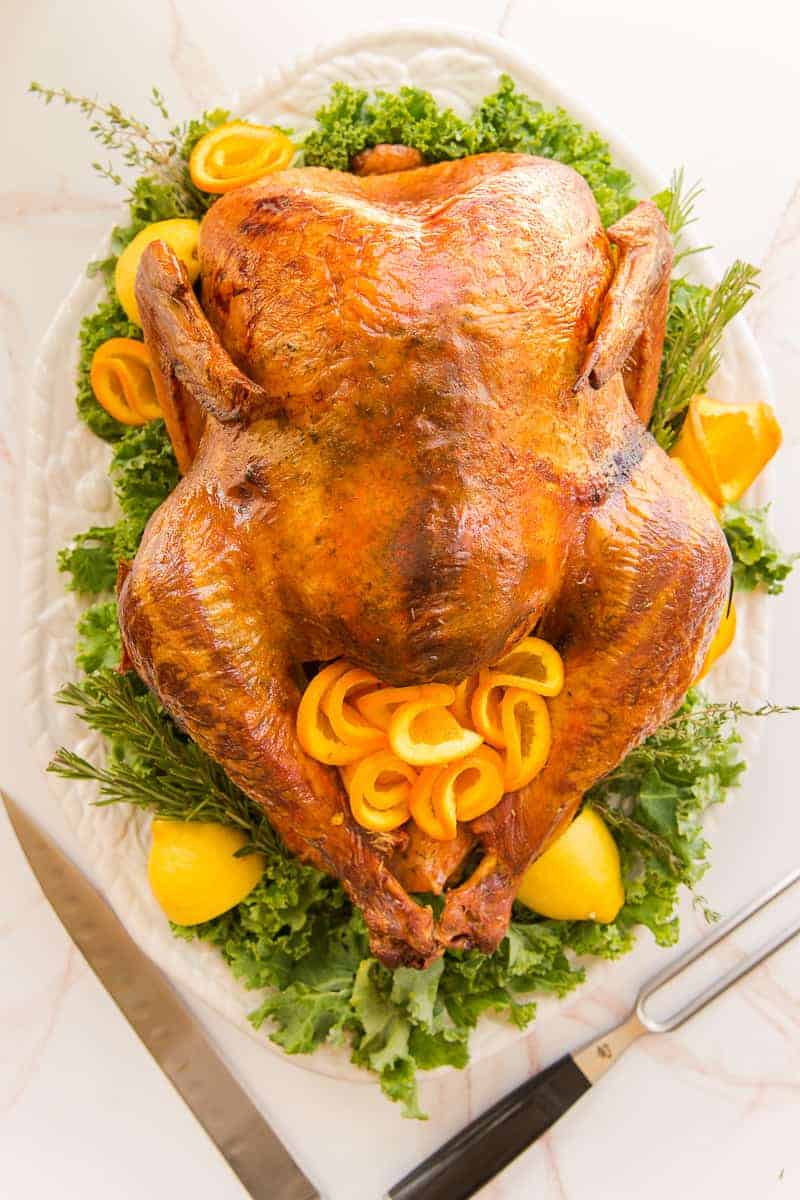
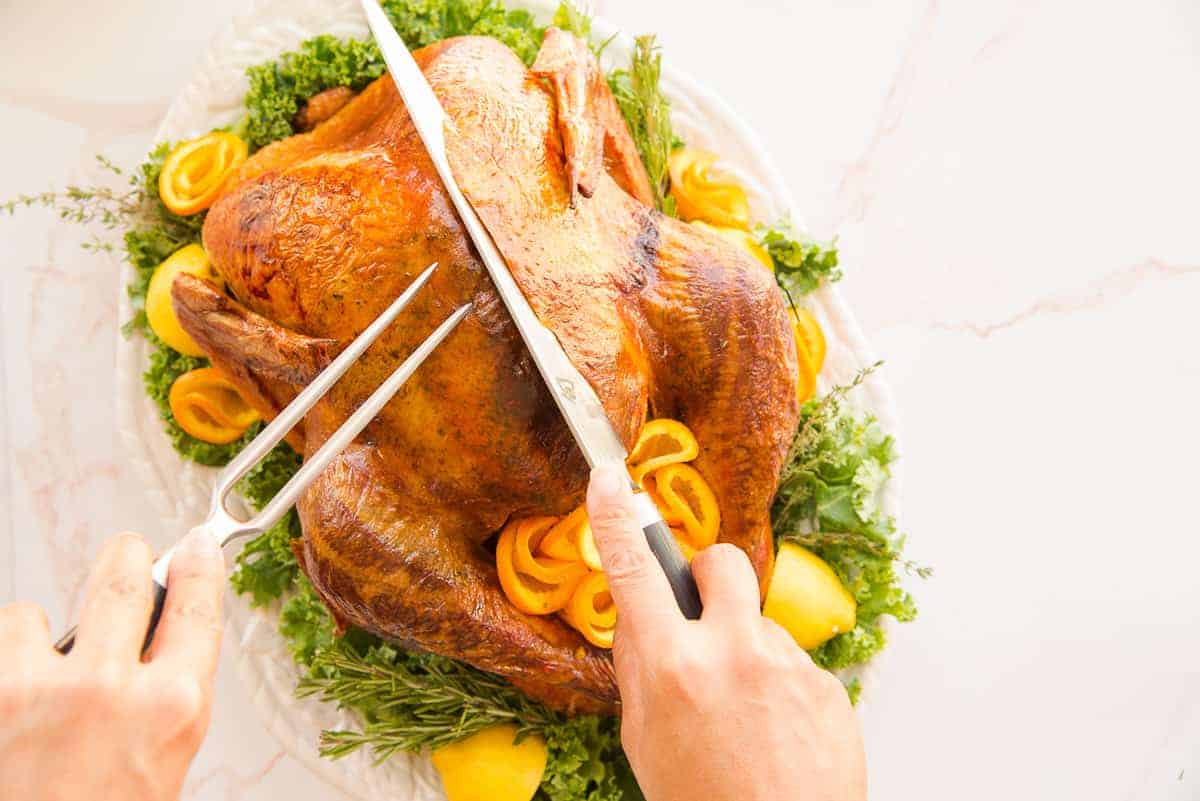
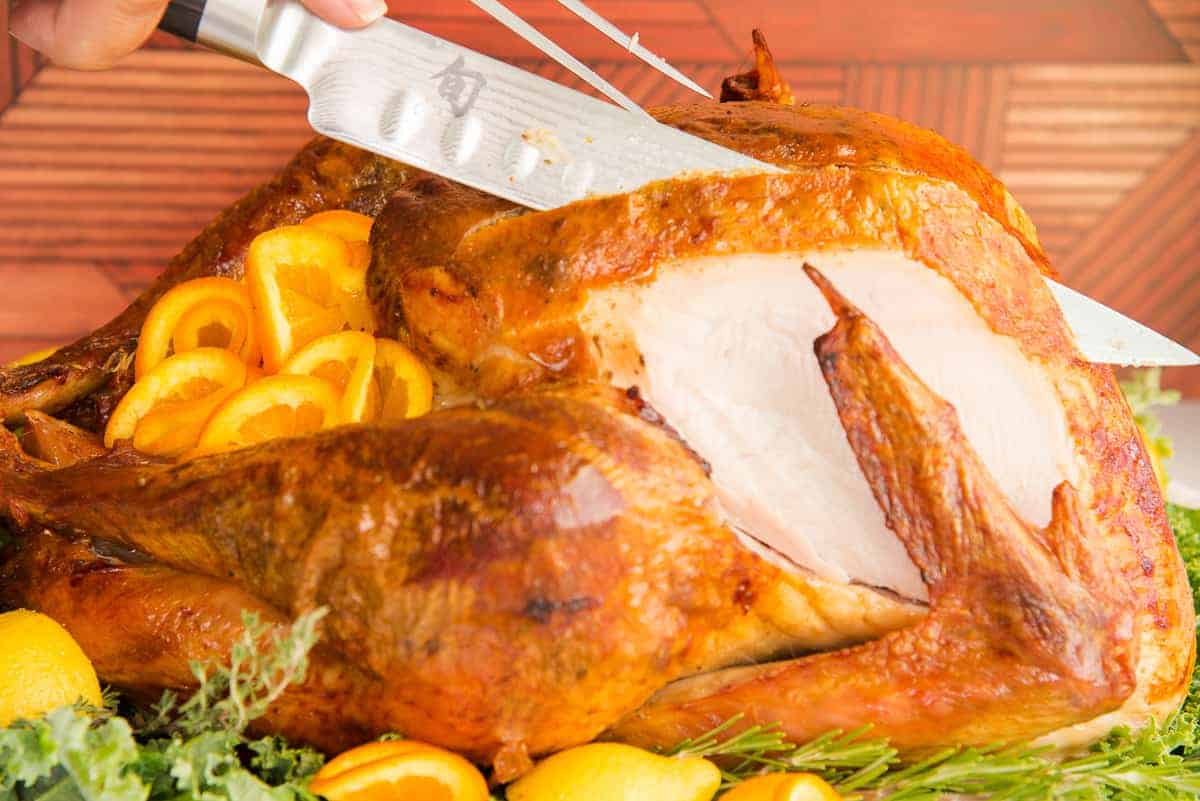
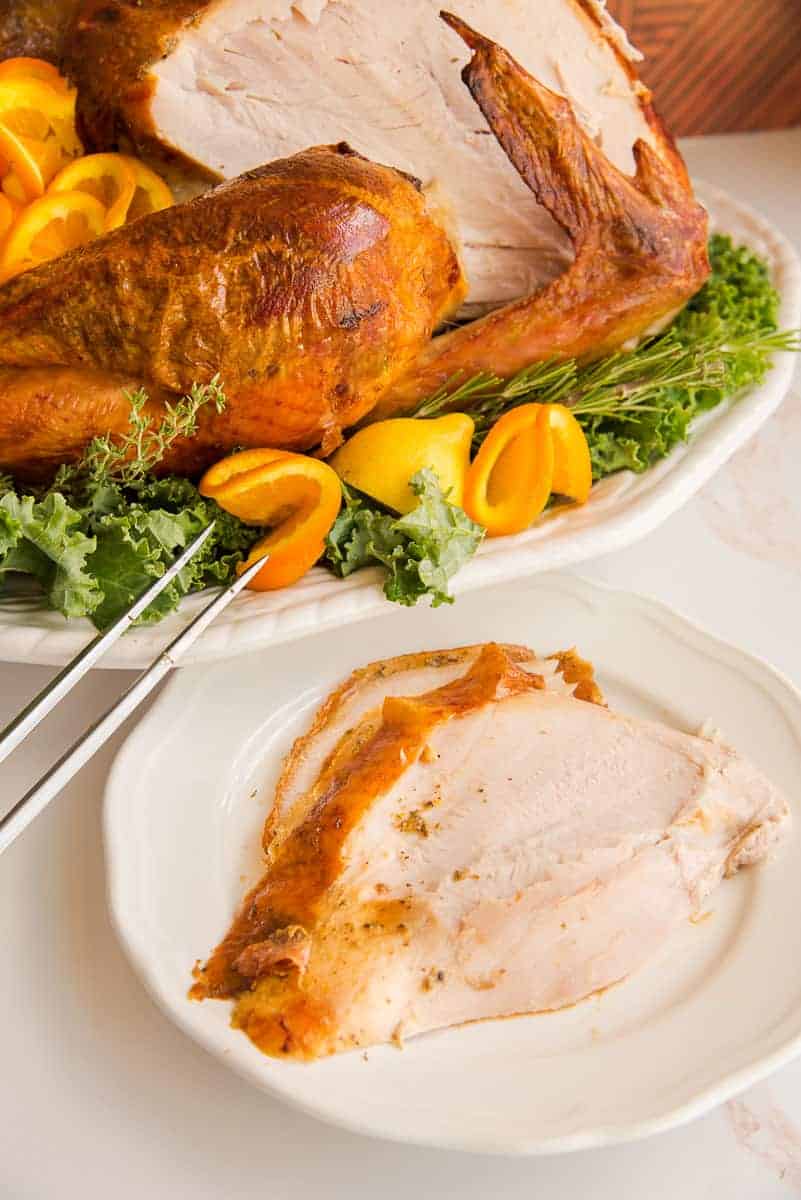
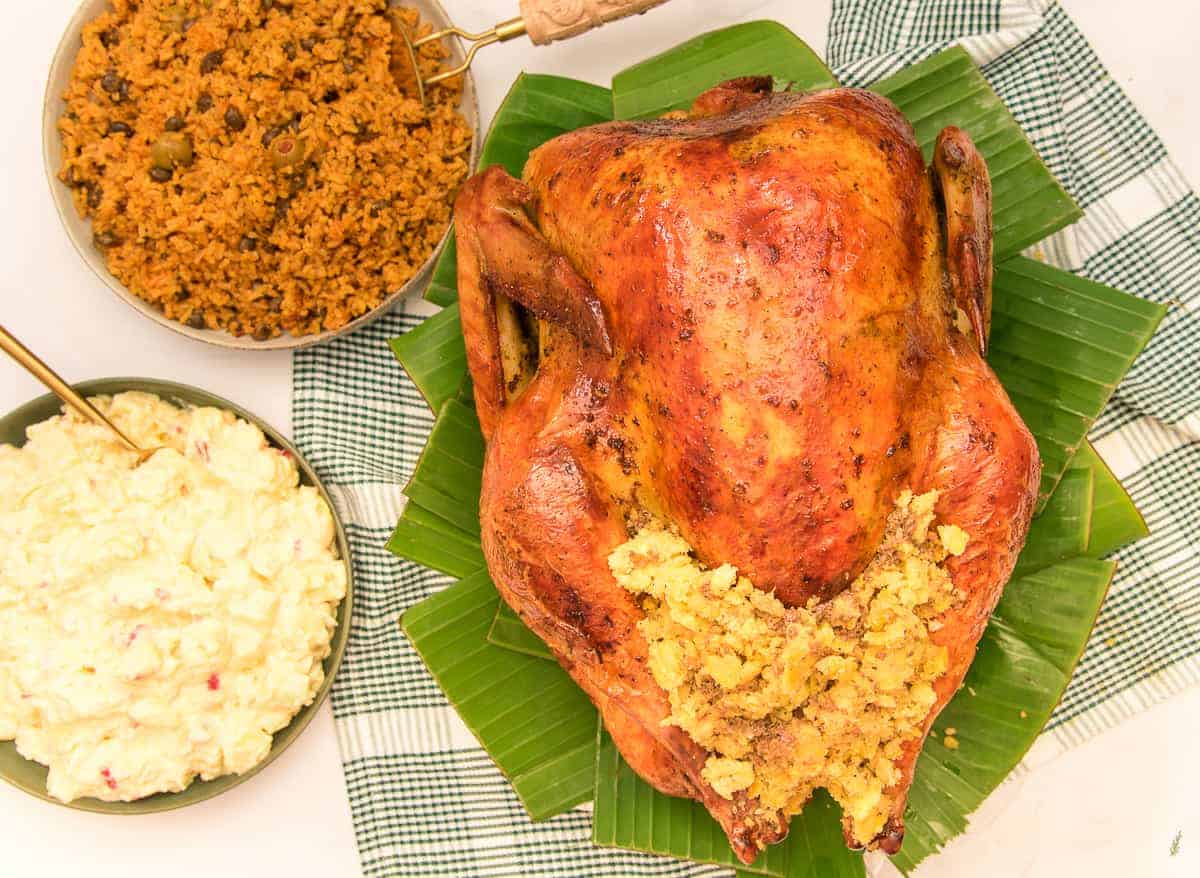
Carve the turkey how you normally would and serve it with your favorite side dishes.
Here are the ones I always serve during the holidays:
- Boozy Spiced Cranberry Sauce
- Slow Cooker Country-Style Collard Greens
- Arroz con Gandules
- Five Cheese Baked Macaroni and Cheese
What’s the best way to store leftovers?
Because you want to preserve this turkey for the next day’s leftovers, be sure not to leave it sitting out at room temperature for too long.
Serve what you will then pack the remaining meat into food storage containers. Store the leftovers in the fridge for 3 days, reheating only what you plan to eat in one sitting. You can reheat cold turkey in the microwave on high heat until steaming hot. And cold turkey is totally a vibe. I definitely recommend it.
Can I freeze leftover turkey?
If you can’t go through the leftovers in 3 days, freeze them! Because I know we can’t (or shouldn’t) eat a 14-pound bird in that time, I pack half of the leftovers into food storage bags and freeze them.
Turkey meat can be frozen for 2 months. When you’re ready to heat and eat, allow it to thaw overnight in the fridge. Reheat the leftovers in the microwave or on the stovetop with a little bit of water. Just heat it with the water in a skillet until it is warmed through.
Can I use this dry brine technique with other cuts of meat?
Don’t limit your dry brine to turkey. Using the same measurement of 1 tablespoon to 1 pound, you can use this technique for any type of meat. Try it the next time you want to roast a whole chicken, pork loin, or pot roast. You’ll find it’s more versatile than you may have thought.
Be sure to pin this recipe to your holiday boards and share it with your crew. But, don’t let the combat medic pick up the bird. Let them take the day off.
How to Dry Brine and Roast a Turkey
at Sense & EdibilityIngredients
- 14 pound (6 1/4 kilograms) fresh turkey thawed completely
- 1 cup (200 grams) Citrus-Herb Dry Brine
- 6 sprigs fresh sage
- 4 stems fresh rosemary
- 3 stems fresh thyme
- 3 stems fresh oregano
- 1 medium orange cut in eighths
- 2 medium lemons cut in quarters
- 1 small onion peeled and cut into wedges
- 1 head garlic rinsed and cut across its width
- 1 tablespoon (15 milliliters) vegetable oil
Instructions
Dry Brine the Turkey, then Marinate it
- Use your index (pointer) finger to begin separating the membrane right where the turkey breast comes to a point (where the cavity is). Continue using your finger to tear between the skin and the meat to separate the two. Take care to avoid tearing the skin.
- Once the skin is separated, spoon a 1/2-cup of the citrus-herb brine under the skin. Use your hands to spread the brine under the skin. Rub the remaining citrus-herb dry brine all over the outside of the turkey, making sure to season the inside of the cavity, too.
- Wash your hands and lay out two pieces of heavy-duty aluminum foil. On top of that, lay out 3 or 4 pieces of plastic film, overlapping them to create a sheet large enough to wrap the turkey in. Wrap the bird tightly in the plastic film. Then wrap the bird once again in the foil and place it onto a sheetpan. Marinate the turkey anywhere from 12-24 hours.
Prep, then Roast the Turkey
- Lower the middle rack to the lower half of your oven. Next, preheat your oven to 325°F (163°C).Stack the sage, rosemary, thyme, and oregano on top of one another and wrap the bundle tightly in butcher's twine. Tie a knot in the string and set aside.
- Unwrap the bird completely. Pat the outside of the turkey dry with paper towels or a kitchen towel. Leave the plastic binding on the drumsticks to keep the legs close to the body. The allows the bird to cook evenly.
- Stuff half of the orange and lemon wedges into the cavity of the bird. Follow the citrus fruits with the bundle of fresh herbs placing it into the center of the cavity. Follow the spice bundle with the onion wedges and the garlic halves. Finish stuffing the cavity with the remaining citrus wedges.
- Brush the turkey breast and the wingtips with the cooking oil. Form a piece of heavy-duty foil around the breast down to the cavity. Cut small pieces of foil to cover the tips of the wings. Leave the turkey legs exposed. Place the pan into the preheated oven and roast the turkey for 3 hours and 40 minutes.
Uncover the Turkey to Finish Roasting
- After the 3 hour 40 minute roasting time is up, carefully remove the pan from the oven and remove the foil that's covering the turkey breast.Return the pan to the oven and roast the turkey for an additional hour, or until a meat thermometer, inserted into the thickest part of the thigh reads 165°F (74°C).
- Remove the turkey from the oven and allow it to rest under a foil tent for 15 minutes before carving. Because you want to preserve this turkey for the next day's leftovers, be sure not to leave it sitting out at room temperature for too long.
Notes
Turkey Thawing Times (Refrigerator Method) *24 hours per 5 pounds of meat*:
- 8-12 pound turkeys: 2-3 days
- 12-16 pound turkeys: 3-4 days
- 16-20 pound turkeys: 4-5 days
- 20-24 pound turkeys: 5-6 day
Quick-Defrosting Method *30 minutes per pound*:
Set the turkey in a sink or tub of cold water. Allow the turkey to soak for 30 minutes per pound, changing the water every 30 minutes.- 8-12 pound turkeys: 4-6 hours
- 12-16 pound turkeys: 6-8 hours
- 16-20 pound turkeys: 8-10 hours
- 20-24 pound turkeys: 10-12 hours
Turkey Roasting Time *20 minutes per pound of turkey* at 325°F (163°C):
For example: 14-pound turkey x 20 minutes per pound= 280 minutes 280 minutes divided by 60= 4 hours 40 minutes If you don't stuff the cavity of the turkey with aromatics, reduce the roasting time to 15 minutes per pound. A fully cooked turkey is 165°F (74°C). Always rely on the internal temperature of the turkey for the most accurate test of doneness. Insert an internal probe into the thickest part of the thigh- making sure the probe isn't touching the bone.Turkey serving chart:
*Plan to serve 1 1/4 pounds of turkey per person if you want leftovers. If not 1 pound of turkey per person is fine.*- 8 guests: 8-10 pound turkey
- 10 guests: 10-12 1/2-pound turkey
- 12 guests: 12-15 pound turkey
- 14 guests: 14-18 pound turkey
Storage Instructions:
- Pack the remaining meat into food storage containers. Store the leftovers in the fridge for 3 days, reheating only what you plan to eat in one sitting.
- If you can't go through the leftovers in 3 days, freeze them:
- Pack leftovers into food storage bags and freeze them.
- Turkey meat can be frozen for 2 months.
- When you're ready to eat, allow it to thaw overnight in the fridge.
Reheating Instructions:
- Reheat cold turkey in the microwave by adding a small amount of water to its container and heating on high, while covered, until steaming hot.
- You can also reheat leftover turkey on the stove. Add sliced turkey to a skillet with a small amount of water and heat over medium heat until warmed through.
- Turkey can also be served cold.





I used this recipe for a 7-pound turkey on thanksgiving. Thanks for making me look like I know what I’m doing! The dry brine smelled so good and I love how simple and affordable it was to make. I only needed to buy the fruits and herb seasoning. The turkey came out tender and really juicy! I can’t wait to try the rest of the dry brine on my chicken. I’m going to be adding this one to the rostahhh.
I’m so glad you liked the dry brine, Victoria! Yes, the citrus in the brine goes so well on all poultry and pork, too!
This turned out great. I had a hard time tunneling under the skin once I got to the wings and thighs, but that just means I need more practice. The instructions were super helpful.
I’m so glad you found the instructions helpful! The wings and thighs of the turkey are a challenge for me as well, so feel free to just rub the dry brine on them, but under the rest of the skin of the turkey. Happy holidays!
Your advice is so spot on. I reviewed this post ahead of thanksgiving to make sure my turkey game was strong! As usual, giving my Tom a vest and little wingtip hats kept him looking fine! He turned out brilliantly thanks to your advice and citrus dry brine. (Dry brine is so winning. God bless you for that advice. Finding a place to store/brine a
20lb turkey is utter nonsense.). My timing was off this year…Tom was done almost two hours early. (Though I was monitoring w a thermometer so I realized we were headed for disaster pretty early and got the other dishes in the oven in time!). I went over your instructions and my math again and it should have been accurate. We moved this summer and I haven’t used my bottom oven much, so I’m thinking I may need to get an oven thermometer and check the temperature, because it’s the only thing that I can think was different from last year!!
A 20-pounder? That truly is a wet brine challenge!
Hi Marta. I’ve been eyeing this recipe for a while and was planning on using this recipe in the future. But I’m curious and please don’t get offended, but in your recipe, which calls for 14 tbls of dry brine for a 14 lb turkey, does it make the turkey insanely salty or perfectly seasoned? I’ve never dry brined before and there’s so many recipes out there for dry brine that calls for different amounts, like 1 tbls salt for every 3-5 lbs and so on. Please let me know as I really want to try it your way!
Hi Lela! Not at all offended! Remember that while this brine does contain salt, it’s “cut” with sugar and herbs, so it’s not pure salt. All lot of other brines are more salt than anything else, but this contains a lot more of the other ingredients than just sodium. That said, I’ve never received a complaint about it being too salty, but everyone’s sensitivity to sodium differs. If you think it’s too much, you can use 1 tablespoon per 2-3 pounds. See if you like it or if it’s too bland and increase the brine to your liking. I hope this helps.
Huge thanks for the tips! I have always struggled with getting the turkey done and nicely browned without making it dry and leathery. I used your dry brine (epic!) and followed these roasting instructions. Your timing was spot on and the little turkey vest and wing hats were easy to do and kept it all browning evenly. It turned out awesome and I was a rockstar on thanksgiving! The deep tissue massage with the dry brine under the skin was pretty winning. The meat was so flavorful. I used the leftover carcass to make stock for soup and it was delicious. The stock/soup honestly didn’t even require seasoning like normal because it was so flavorful.
My pleasure! I love that you call them a turkey vest and wings hats! LOL!!