Pasteles are a traditional Puerto Rican meat-filled root vegetable patty served during the holidays. The “pasteles-making” party is a long-honored event that marks the start of the holiday season, which runs from Thanksgiving here in the States, to Dia de los Reyes (or Epiphany) on January 6th.
For every worker to take home their fair share, the pasteles must be made in large amounts. The process is long and laborious, comprised of many steps, so it’s best to involve the whole family. Unfortunately, since many Puerto Ricans are scattered across the world, they are often without a crew to call upon. So, we find a connection we can buy them from, or we make them ourselves. This recipe equips you to gather even non-Puerto Ricans and host your own party!
*I updated this October 2021 post to streamline the instructions and article to make it shorter.*

What Are Pasteles?
Pasteles are patties made from a puree of traditional Puerto Rican root vegetables and stewed meats. Pastel means “pie” in Spanish, but in Puerto Rico, pasteles are these root veggie meat-filled patties. Pasteles are a true amalgamation of Puerto Rican culture: cooking root vegetables in banana leaves is very indigenous and represents the native Taino Indians of our island. The meat filling, in its tomato-based sauce and sofrito- is a common way to prepare meats in Spain. Finally, the other root vegetables and even the masa’s puree are very African in origin.
Pasteles are commonly made with a masa of green bananas cut with other root vegetables and squash or with a puree of yuca (cassava).
I was taught to make pasteles by very old-school cooks. My first indoctrination into the tradition was with my mother, who insisted pasteles must be shredded by hand. A few bloody fingers and years later, I joined the advanced society and began shredding my vegetables with a food processor. I strongly encourage you to do the same.
What do I need to make Pasteles de Masa?

For the masa, you need very green bananas, yautía (or you can use malanga), calabaza (or Kabocha squash), batata (boniato or white sweet potato), or a regular Russet potato, achiote (annatto) oil, ham or chicken broth, and salt to taste.
To make the pork filling, you need pork shoulder or Boston butt, onion, garlic, sofrito, spices, olives, capers, tomato sauce, and bay leaves.
Consider add-ins like strips of roasted (jarred) red peppers- make them spicy, even- green olives, raisins, and/or chickpeas when assembling the pasteles. I prefer just chickpeas, red pepper, and olives. Or, keep it simple and don’t add any additional fillers.
To wrap the pasteles, you need more achiote oil, prepared or frozen banana leaves, parchment rectangles, and butcher’s twine.
What Do I Use to Make the Masa for Pasteles Soft?
Abuela Leria said the best way to make fluffy masa for your pasteles is to add broth. Some people use milk to soften the masa for pasteles, which means people with lactose allergies can’t have them. Instead, make (or buy) a flavorful broth that compliments your filling.

Fill a 6 to 8-quart stockpot with 6 cups of cold water. Add a large smoked ham hock, bay leaves, peeled garlic cloves, half of a yellow onion cut into quarters, black peppercorns, and kosher salt.

Bring the water up to a boil over medium-high heat. Don’t stir the broth as it boils. Reduce the heat to medium-low and allow the broth to simmer for 20-25 minutes.

Once the broth is done cooking, use a spider or slotted spoon to remove the ham hock, onion, garlic cloves, and bay leaves from the pot. Don’t discard the ham hock. You can always dice it up and use it in soups or beans.
Next, line a funnel with a few layers of cheesecloth or a clean tea towel. Place the funnel inside a 1-liter glass bottle that has a lid. Carefully pour or ladle the broth through the cheesecloth to filter it into the bottle.
Store the ham broth, covered, in the fridge for up to a week. You can also freeze it in a freezer-safe container for up to a year. Thaw the ham broth in the fridge and use it to soften the masa for your pasteles.
You can make a turkey broth for your chicken pasteles using this same method. If you’re making vegan pasteles, use a vegetable broth (homemade or store-bought) to soften your pasteles masa instead.
What Do I Wrap My Pasteles In?

Pasteles are traditionally wrapped in banana leaves and parchment paper. Banana leaves are a common wrapping for pasteles because they impart a unique flavor to the pasteles than parchment alone. You can use fresh or frozen banana leaves, but I prefer using fresh. Parchment paper alone will work if you can’t find banana leaves.
Avoid wrapping your pasteles in wax paper. Wax paper melts to your pasteles when you boil them, which ruins them. I, personally, don’t like cooking my food wrapped in foil unless I can help it, so I also avoid wrapping my pasteles in foil.
Banana leaves are naturally stiff, so you must soften them before wrapping your pasteles. Use your kitchen shears to remove the rigid rib on the banana leaf.

Wipe both sides of the banana leaves with a damp kitchen towel or paper towels to remove any dirt.

You need to heat the fresh banana leaves to make them pliable.
Pass the leaves over your gas stove’s high flame, holding them with tongs. The leaf will look like it’s melting as the fire heats it, which is the wax in the leaf melting away. Continue passing the leaves, on both sides, over the flame until all of your leaves are wilted.
You can freeze your banana leaves overnight to soften them if you don’t have a gas flame. Cut the leaves into a rectangle that measures 7 1/2-inches by 6-inches.
How Do I Prep Frozen Banana Leaves?
You can also wrap your pasteles in frozen banana leaves that you thaw and wipe down. You can find them in the frozen section of your grocery store or in an Asian or Hispanic food market.
Wrap your pasteles in the parchment paper alone if you can’t find banana leaves at all. Parchment paper is easily accessible these days, and it’s right by the foil in the grocery store. To wrap the pasteles, you need 18 parchment sheets cut in 18-inch by 12-inch rectangles or buy pre-cut sheets of parchment paper.
What Cut of Pork is Best for Pasteles?

The filling for pasteles is most often stewed pork butt or chicken. However, just as there are different types of masa to wrap your filling, there are different fillings. You can add lentils, vegan meat, firm tofu, or chickpeas fillings create vegan pasteles.
The best cut of pork to use for pasteles is a boneless pork butt or pork shoulder. Find a piece of meat with a good amount of marbling- fat that runs through the muscle. As the pork cooks, that fat moistens and flavors the meat.
Put the meat on a large cutting board and slice it into 1/2-inch thick slabs with a chef’s knife. Dice the pork meat into chunks that are about a 1/2-inch.
Do I Have to Use Pork?
Chicken thighs make a great filling for pasteles, especially if you don’t eat pork. Buy boneless, skinless chicken thighs and cut them into 1/2-inch cubes as you did with the pork meat.
Stewed lentils (or your favorite vegan protein) are a great option if you want to make vegan pasteles.
How Long Do I Have to Marinate the Meat Filling for Pasteles?

Grate half of a large yellow onion into a large mixing bowl. If your eyes can’t take it, you can blend it in a blender or food processor. Use a non-reactive (non-metallic) mixing bowl if you plan to marinate the meat in the bowl. The acid in the marinade will react with the metal in the bowl and impart a tinny flavor to your meat. Instead, use a plastic, glass, or ceramic bowl. You can also marinate the meat in a metal bowl and transfer it to a food storage bag afterward.
Add white wine vinegar (or white distilled vinegar), olive oil, some of the sofrito (reserve the rest for cooking the filling), 6 or 7 crushed garlic cloves, adobo, sazón, oregano, and black pepper to the mixing bowl, and use your hands or a whisk to combine the marinade.
Add the diced meat to the bowl and toss it in the marinade to coat it thoroughly.

Cover the bowl with plastic wrap and put it in the refrigerator. Marinate the meat for your pasteles filling for at least four hours, but 24 hours (or even overnight) is best.
You can also marinate the meat and freeze it for up to 2 to 3 months. Thaw it overnight in the refrigerator before you plan to cook it.
How Do I Make the Filling for Pasteles?

To cook the meat filling for your pasteles:
- Heat a caldero or dutch oven over medium-high heat.
- Add achiote oil to the caldero and allow it to heat for 30 seconds.
- Dice the remaining half of the yellow onion and add it, along with the remaining sofrito, to the pot and sauté for 1-2 minutes or until fragrant.
Stir the marinated pork into the ingredients in the pot and brown it over medium-heat heat for 8-10 minutes.
Add the tomato sauce, sliced olives, capers, and bay leaves, and bring the mixture to a boil before reducing the temperature to low. Cover the pot and allow the meat to simmer for 20-25 minutes. Because this is meat from the pig’s shoulder and is tough, the pork filling for your pasteles needs to simmer at a low temperature for at least 20 minutes. When making chicken filling for your pasteles, you need only simmer the meat for 10-15 minutes.
After the cooking time has elapsed, allow it to cool for 20 minutes, then use it to fill your pasteles. If you’re making the meat filling for your pasteles ahead, allow it to cool completely, then transfer it to a storage container and refrigerate it for up to 2 days. You will need to heat it slightly to release the liquid that’s solidified, though.
To freeze the meat filling for your pasteles after cooking it, cool it completely, then transfer it to a freezer-safe container or storage bag. Freeze the meat for up to 2 months. Thaw a day in advance before using it.
How Do I Make Masa de Guineo for Pasteles?

The ingredients you need to make the masa are guineos verde (green bananas), yautía (malanga or you can use taro root), calabaza (Kabocha squash), and batata (white sweet potato). Use adobo to season the masa, achiote (annatto) oil, and broth to add color to the pasteles masa and soften it simultaneously.
Green bananas are not the same as green plantains. Guineos verde (gee-NAY-ohs vehr-day) are the same bananas you use to make banana bread; they’re just ungassed to prevent them from ripening too fast.
Use a paring knife to cut off both stem ends of each banana. Make a slit down the front and back of each banana using the tip of the paring knife.
Put the bananas into a large mixing bowl and cover them with very hot tap water. Leave them to soak for 20 minutes to soften the peels while you peel and chop the other vegetables. You can peel the guineos after soaking them, leaving them whole. Dump the soaking water and return the bananas to the bowl. Cover them with cold water to keep them from oxidizing.
How Do I Finish the Masa?

Use a chef’s knife cut the calabaza wedge into 1/2-inch thick slices. Next, use a paring knife to remove the rind of the calabaza wedge. Leave the unpeeled calabaza in strips or cut them into large chunks.
Add the chunks of calabaza to a large bowl of cold water.

Yautía (or malanga) helps to bind the masa and keeps it from falling apart. In a pinch, taro root is another good substitute. You can add either yautía lila (which has a purple undertone beneath the peel) or yautía blanca to your masa for pasteles.
Peel the skin from the yautía with a vegetable peeler, then cut it into long strips. Yautía is slippery, so be careful as you peel and cut it. Add it to the bowl with the other vegetables.
Peel and cut the batata into 1-inch thick strips as well. Potato of any sort- Russet, Yukon Gold, or sweet potato- will soften the masa of pasteles, so you don’t have to add milk. You can omit the batata and use more ham broth and achiote oil, but it might make your pasteles loose.
Do I Add Plantains to the Masa?
My family believes that adding plantains to pasteles masa makes the pasteles hard. We don’t add plantains to our pasteles masa for that reason.
Unless you live in an area where green bananas are non-existent or unattainable, I don’t recommend using them. You can always ask your produce manager to order a case of “ungassed bananas.”
However, if your family recipe includes plantains, please continue to honor them by using them in your pasteles.
Do I Need a Special Machine to Make the Masa for Pasteles?

Some people buy a masa grinder to grind the masa for pasteles. I think that’s a waste of money and space because it’s only used for pasteles once or twice a year.
Some folks still grind their vegetables by hand. While I love the nostalgia and respect for the ancestral ways, I feel for their poor, bloody fingers.
Use a 14-cup food processor to grind the masa for your pasteles. It accomplishes the mission and can be used for more than one purpose in the kitchen.
Fit your food processor with the grater attachment. Grate the soaking veggies to make them smaller. Grating the vegetables/fruits first gives the food processor a break so it doesn’t burn out as you puree the veggies.

Remove the grater attachment and replace it with the blade attachment after all the root veggies are grated. Next, add a quarter of the shredded veggies to the food processor bowl and puree for 30 seconds. Stop the machine and scrape down the sides of the bowl. Make sure to get into the corners of the bowl, too.
Puree for another 30 seconds and stop and scrape again. Puree once more for 30 seconds to 1 minute.
Continue pureeing the root veggies in 1/4 batches until you have a bowlful of masa.
How Do I Finish the Masa?

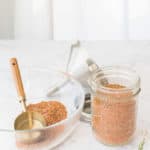
Achiote oil gives pasteles their unique color.
Use a large spoon to stir the masa in the bowl together to combine it. The masa should be free of lumps, light, and airy, with a spongy consistency. Add 1/4 to 1/2 cup of achiote oil to the masa in the bowl. Next, stir in 1/2 cup to 1 cup of the ham broth to add more flavor and soften the masa. The more masa you make, the more you will need to add.
The masa for your pasteles should be smooth and spreadable, like hummus or yogurt. A spoon should leave swirls on the surface of the masa. It’s too runny and needs another banana if liquid forms at the bowl’s bottom. Add more ham stock and achiote oil if it’s thick, like peanut butter.
How Far Ahead Can I Make Masa for Pasteles?

You can make masa for pasteles a day or two in advance, lay a piece of plastic film directly onto its surface, and refrigerate it in a sealed container. The protective layer of plastic prevents the pasteles masa from oxidizing too much.
Can I Freeze the Masa for Pasteles?
You can freeze the masa for pasteles for up to 6 months. Transfer it to a freezer storage bag once it’s prepared and freeze the masa laying flat. Stand it up in the freezer once it’s frozen solid. This saves space in the freezer.
Thaw frozen masa for pasteles in the refrigerator two days before you use it. Day one is actually for thawing the masa. Day two is to drain the masa in a cheesecloth bag for an hour. This method extracts excess water that accumulates during freezing.
How Do I Assemble My Pasteles?

Taste-test your masa before assembling your pasteles. Drop a spoonful of the masa onto a microwave-safe plate. Lay a sopping wet paper towel over the masa and heat it in the microwave for 20 minutes. See if you’re happy with the seasoning; if not, adjust as needed. Don’t make it perfectly salted because pasteles boil in salted water. Barely undersalt the masa.
To assemble the pasteles, first lay out your ingredients and supplies. I prefer an assembly line set-up: parchment paper, banana leaves, achiote oil, masa, meat filling, and add-ins. My add-ins include red pepper slices (mild and spicy), olives, and sometimes chickpeas. You also need a pair of scissors and butcher’s twine for tying the bundles together.
I cut all of my twine before beginning so I can work faster. Measure 40-inches of twine per bundle, which is more than enough slack to tie the bundles (or yuntas) of pasteles.

Lay a banana leaf in the center of a parchment rectangle and spread a tablespoon of the achiote oil onto the center of the leaf. The oil keeps the pasteles from sticking to the wrapper when you unwrap them.

Scoop 1/2-cup of the masa onto the center of the banana leaf and spread the masa into an oval.
Fill the masa with 1/4 cup of the pork filling, then spoon a tablespoon of the broth from the pork filling on
Top the meat with your add-ins. Make sure to identify spicy pasteles if you’re making them by wrapping them with a red-colored twine.
You can add raisins to your pasteles if you want a sweet element.
How Do I Wrap Pasteles?

Top the meat with your add-ins. Make sure to identify spicy pasteles, if you’re making them, by wrapping them with a red-colored twine.
You can also add raisins to your pasteles if you want a sweet element.
How Do I Wrap Pasteles?

Bring the two long edges of the parchment paper together over the pastel. Think of it like folding a bed sheet and bringing the edges together.
Next, make a 1-inch fold in the paper. Fold the parchment in half to form a band almost as wide as the pastel to encase the meat in the masa.

Fold the paper’s short ends (sides) in 1/2-inch and use your nail to crease it. Next, fold the “tails” or unfilled end of the paper towards the center of the bundle. It should land right about midway to the pastel. Repeat on the opposite side.
How Do I Tie Pasteles?
Tying the pasteles properly isn’t hard, but it is essential because you don’t want them to open during the boiling stage and allow the masa to leak out.
Pasteles are tied in yuntas, or bundles of two. Stack two pasteles with the folded ends touching each other. Grab your cut piece of twine and hold the cut ends together, holding the string’s loop in one hand and two loose ends in the other.
Slide the string under the stacked pasteles, ensuring the bundle’s short end sits right in the middle of the two strings. Bring the three fingers of the hand with the looped end up. Go through the loop with those fingers and grab the two strings in the other hand. Pull the two loose ends through the loop and towards the sides of the bundle.
Flip the bundle over and bring the string’s edges under the two strands on the backside (formed earlier by the loop). Tie the two loose ends in a knot.
Or, watch the video above.
How Do I Store Pasteles?

Refrigerate or freeze pasteles after assembling them. You can package pasteles in a food storage bag and store them for 24 hours in the fridge or freeze them for up to one year.
Pasteles are often frozen after assembly and wrapping, so we can have them “in stock” throughout the holiday season.
How Long Do I Have to Cook Pasteles?

Pasteles must be boiled in salted water before eating. You can boil pasteles while they are frozen.
Bring a gallon of water to a rapid boil. Add a 1/4-cup of salt to the water and stir the water to dissolve the salt. Add the frozen pasteles to the water and boil them for an hour to an hour and 15 minutes. Fresh, unfrozen pasteles only need to boil for 45 minutes.
Use tongs or a carving fork to lift the cooked pasteles from the pot and set them in a colander inside the sink to drain. Snip the strings off of the bundles with scissors and cut both ends of the paper off before unwrapping the pasteles and sliding them onto your plate.
Remove and discard both the parchment paper and the banana leaf.
What Are Pasteles Served With?

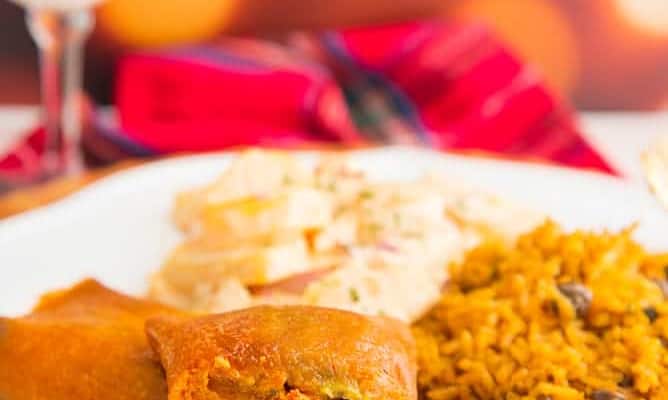
Pasteles are served with Pernil, Arroz con Gandules, and potato salad, a traditional Puerto Rican holiday meal. Coquito is never far away, either.
But you can serve pasteles on their own or with a side salad.
How Do I Store Leftover Pasteles?

Store leftover pasteles in a food storage container in the fridge for no longer than 24 hours. Pasteles become gummy and hard when you reheat them.
To reheat cooked pasteles, cover them with a damp paper towel to cut down on the gumminess, and microwave them until warm.
I hope this extensive guide to making authentic Puerto Rican pasteles is helpful to you! Pin this recipe to your dinner boards, and don’t forget to share it with the ones you love!
Authentic Puerto Rican Pasteles
at Sense & EdibilityEquipment
- 14-cup food processor, blender, or box grater
- butcher's twine
- vegetable peeler
- parchment paper
Ingredients
For the Caldo de Jamón, or Ham Broth (Can Be Make 1 Week Ahead), Optional
- 6 cups (1.5 litres) cold water
- 1 2-pound (1 kilogram) smoked ham hock
- 1/2 large yellow onion peeled and cut in half
- 4 cloves garlic peeled
- 2 tablespoons (18 grams) kosher salt
- 1/2 tablespoon black peppercorns
- 4 large bay leaves
For the Meat Marinade (Can Be Made 1 Week Ahead)
- 1 large yellow onion cut in half, separated
- 1 cup (245 grams) sofrito separated
- 1/2 cup (120 milliliters) white wine vinegar or white distilled vinegar
- 4 cloves (3 tablespoons or 45 grams) garlic crushed to a paste
- 2 tablespoons (30 milliliters) olive oil
- 3 teaspoons (16 grams) adobo plus more to taste
- 1 tablespoon (10 grams) sazón
- 2 teaspoons (1 gram) oregano
- 1 teaspoon (1 gram) black pepper
For the Pork Filling (Begin Marinating 4 Hours Ahead)
- 2 tablespoons (30 milliliters) achiote oil or vegetable oil
- 3 pounds (1 1/2 kilograms) Boston butt (see note section for meat replacements)
- 1 1/2 cups (12 ounces or 350 mililliters) tomato sauce
- 10 olives sliced
- 1 tablespoon (15 grams) capers
For the Masa de Guineo (Green Banana Puree)- Can Be Made One Day Ahead
- 12 each (2.3 kilograms) guineos verde (green cooking bananas)
- 2 pounds (990 grams) yautía (or malanga)
- 1 pound (450 grams) calabaza (Kabocha squash)
- 1 large (365 grams) batata (boniato) or Russet potato
- 1/4-1/2 cup (60-120 milliliters) achiote oil plus more for oiling the banana leaves
- 1/2-3/4 cup (120-175 milliliters) ham broth
- 2 teaspoons adobo or to taste
To Assemble the Pasteles
- 18 prepared (or frozen and thawed) banana leaves see body of post for preparing the banana leaves
- 3/4 cup (175 milliliters) achiote oil
- masa de guineo
- pork filling
- manzanilla olives optional
- jarred roasted red pepper sliced, optional
Instructions
Prepare the Caldo de Jamón (or Ham Broth)
- Fill a 6 to 8-quart stockpot with the cold water. Add the smoked ham hock, onion quarters, garlic cloves, kosher salt, black peppercorns, and bay leaves.
- Bring the water up to a boil over medium-high heat. Don't stir the broth as it boils. Reduce the heat to medium-low and allow the broth to simmer for 20-25 minutes.
- Once the broth is done cooking, use a spider or slotted spoon to remove the ham hock, onion, garlic cloves, and bay leaves from the pot. Line a funnel with a few layers of cheesecloth or a clean tea towel. Place the funnel inside a 1-liter glass bottle that has a lid. Carefully pour or ladle the broth through the cheesecloth to filter it into the bottle. The broth is ready to use right away or store.
Prepare the Banana Leaves
- Use your kitchen shears to remove the rigid rib on the banana leaf.Wipe both sides of the banana leaves with a damp kitchen towel or paper towels to remove any dirt.
- Pass the leaves over your gas stove's high flame, holding them with tongs. The leaf will look like it's melting as the fire heats it, which is the wax in the leaf melting away. Continue passing the leaves, on both sides, over the flame until all of your leaves are wilted.
- You can freeze your banana leaves overnight to soften them if you don't have a gas flame. Cut the leaves into a rectangle that measures 7 1/2-inches by 6-inches.
Prepare the Meat Marinade
- Grate half of a large yellow onion into a large mixing bowl. Add 1/4 cup (60 grams) of the sofrito, the white wine vinegar (or white distilled vinegar), garlic, olive oil, adobo, sazón, oregano, and black pepper to the mixing bowl, and use your hands or a whisk to combine the marinade.
Cut and Marinate the Meat
- Slice the pork into 1/2-inch thick slabs with a chef's knife, then dice the pork meat into chunks that are about a 1/2-inch.Add the diced meat to the bowl and toss it in the marinade to coat it thoroughly.
- Cover the bowl with plastic wrap and put it in the refrigerator. Marinate the meat for your pasteles filling for at least four hours, but 24 hours (or even overnight) is best.
Cook the Meat Filling
- Heat a caldero or dutch oven over medium-high heat.Add achiote oil to the caldero and allow it to heat for 30 seconds.
- Dice the remaining half of the yellow onion and add it, along with the remaining sofrito, to the pot and sauté for 1-2 minutes or until fragrant. Stir the marinated pork and its liquids into the ingredients in the pot and brown it over medium-heat heat for 8-10 minutes.
- Add the tomato sauce, sliced olives, capers, and bay leaves, and bring the mixture to a boil before reducing the temperature to low. Cover the pot and allow the meat to simmer for 20-25 minutes.
- After the cooking time has elapsed, allow it to cool for 20 minutes, then use it to fill your pasteles.
Soak and Peel the Guineos Verde
- Use a paring knife to cut off both stem ends of each banana. Make a slit down the front and back of each banana using the tip of the paring knife. Put the bananas into a large mixing bowl and cover them with very hot tap water. Leave them to soak for 20 minutes to soften the peels while you peel and chop the other vegetables.
- Once the guineo peels are soft, peel them, leaving them whole. Dump the soaking water and return the bananas to the bowl. Cover them with cold water to keep them from oxidizing.
Peel and Prep the Other Root Vegetables
- Use a chef's knife cut the calabaza wedge into 1/2-inch thick slices. Next, use a paring knife to remove the rind of the calabaza wedge. Leave the unpeeled calabaza in strips or cut them into large chunks. Add the chunks of calabaza to a large bowl of cold water.
- Peel the skin from the yautía with a vegetable peeler, then cut it into long strips. Add it to the bowl with the other vegetables.Peel and cut the batata into 1-inch thick strips, adding it to the bowl as well.
Prepare the Masa for Pasteles
- Fit your food processor with the grater attachment. Grate the soaking veggies to make them smaller.
- Remove the grater attachment and replace it with the metal blade attachment after all the root veggies are grated. Next, add a quarter of the shredded veggies to the food processor bowl and puree for 30 seconds. Stop the machine and scrape down the sides of the bowl. Make sure to get into the corners of the bowl, too.
- Puree for another 30 seconds and stop and scrape again. Puree once more for 30 seconds to 1 minute.Continue pureeing the root veggies in 1/4 batches until you have a bowlful of masa.
- Use a large spoon to stir the masa in the bowl together to combine it. The masa should be free of lumps, light, and airy, with a spongy consistency. Add 1/4 to 1/2 cup of achiote oil to the masa in the bowl. Next, stir in 1/2 cup to 1 cup of the ham broth to add more flavor and soften the masa.
Assemble Your Pasteles
- Cut parchment paper in 18-inch by 12-inch rectangles or buy pre-cut sheets of parchment paper.
- Taste-test your masa before assembling your pasteles: drop a spoonful of the masa onto a microwave-safe plate. Lay a sopping wet paper towel over the masa and heat it in the microwave for 20 minutes. See if you're happy with the seasoning; if not, adjust as needed. Don't make it perfectly salted because pasteles boil in salted water. Barely undersalt the masa.
- To assemble the pasteles, first lay out your ingredients and supplies in this order: parchment paper, banana leaves, achiote oil, masa, meat filling, and add-ins like red pepper slices (mild and spicy), olives, and chickpeas. You will also need a pair of scissors and butcher's twine for tying the bundles together.
- Measure 40-inches of twine per bundle, which is more than enough slack to tie the bundles (or yuntas) of pasteles.Keep them nearby so you can reach them while holding the pastel in one hand.
- Lay a banana leaf in the center of a parchment rectangle and spread a tablespoon of the achiote oil onto the center of the leaf. Scoop 1/2-cup of the masa onto the center of the banana leaf and spread the masa into an oval. Fill the masa with 1/4 cup of the pork filling, then spoon a tablespoon of the broth from the pork filling onTop the meat with your add-ins.
Wrap, Then Tie Your Pasteles
- Bring the two long edges of the parchment paper together over the pastel. Think of it like folding a bed sheet and bringing the edges together. Next, make a 1-inch fold in the paper. Fold the parchment in half to form a band almost as wide as the pastel to encase the meat in the masa.
- Fold the paper's short ends (sides) in 1/2-inch and use your nail to crease it. Next, fold the "tails" or unfilled end of the paper towards the center of the bundle. It should land right about midway to the pastel. Repeat on the opposite side.
- Stack two pasteles with the folded ends touching each other. Grab your cut piece of twine and hold the cut ends together, holding the string's loop in one hand and two loose ends in the other.
- Slide the string under the stacked pasteles, ensuring the bundle's short end sits right in the middle of the two strings. Bring the three fingers of the hand with the looped end up. Go through the loop with those fingers and grab the two strings in the other hand. Pull the two loose ends through the loop and towards the sides of the bundle.
- Flip the bundle over and bring the string's edges under the two strands on the backside (formed earlier by the loop). Tie the two loose ends in a knot.
Store or Boil the Pasteles
- Bring a gallon of water to a rapid boil. Add a 1/4-cup of salt to the water and stir the water to dissolve the salt.
- Add the frozen pasteles to the water and boil them for an hour to an hour and 15 minutes. Fresh, unfrozen pasteles only need to boil for 45 minutes.
- Use tongs or a carving fork to lift the cooked pasteles from the pot and set them in a colander inside the sink to drain. Snip the strings off of the bundles with scissors and cut both ends of the paper off before unwrapping the pasteles and sliding them onto your plate. Remove and discard both the parchment paper and the banana leaf.
- Pasteles are traditionally served with Pernil, Arroz con Gandules, potato salad, and a glass of coquito.
Notes
Swaps and Substitutions:
- You can make a turkey broth for your chicken pasteles using this same method as the ham broth.
- If you're making vegan pasteles, use a vegetable broth (homemade or store-bought) instead.
- You can also wrap your pasteles in frozen banana leaves that you thaw and wipe down. You can find them in the frozen section of your grocery store or in an Asian or Hispanic food market.
- Wrap your pasteles in the parchment paper alone if you can't find banana leaves.
- You can also add raisins to your pasteles if you want a sweet element.
Tips and Techniques:
- Don't discard the ham hock. You can always dice it up and use it in soups or beans.
- Because this is meat from the pig's shoulder and is tough, the pork filling for your pasteles needs to simmer at a low temperature for at least 20 minutes. When making chicken filling for your pasteles, you need only simmer the meat for 10-15 minutes.
- The masa for your pasteles should be smooth and spreadable, like hummus or yogurt. A spoon should leave swirls on the surface of the masa. It's too runny and needs another banana if liquid forms at the bowl's bottom. Add more ham stock and achiote oil if it's thick, like peanut butter.
- Make sure to identify spicy pasteles, if you're making them, by wrapping them with a red-colored twine.
- Pasteles must be boiled in salted water before eating. You can boil pasteles while they are frozen.
Meat Filling Alternatives:
- Chicken: buy boneless, skinless chicken thighs. Prepare the meat and cook as instructed. Reduce the simmering time to 15 minutes.
- Shrimp, Crab, Conch, or Lobster: remove any shells and dice the meat. Reduce the simmering time to 10 minutes.
- Lentils: Omit the meat. In addition to the other filling ingredients, add 1 large green bell pepper to the aromatics. Add 6 cups of vegetable stock, 1 tablespoon of adobo, 1 1/2 teaspoons of sazón, and 1 tablespoon of white wine vinegar after sautéing the aromatics and 1 pound of brown lentil. Bring the mixture up to a boil. Reduce the heat to low and simmer for 35 minutes.
Storage Instructions:
- Store the ham broth, covered, in the fridge for up to a week.
- You can also freeze it in a freezer-safe container for up to a year. Thaw the ham broth in the fridge and use it to soften the masa for your pasteles.
- You can marinate the meat and freeze it for up to 2 to 3 months. Thaw it overnight in the refrigerator before you plan to cook it.
- If you're making the meat filling for your pasteles ahead, allow it to cool completely, then transfer it to a storage container and refrigerate it for up to 2 days. You will need to heat it slightly to release the liquid that's solidified, though.
- To freeze the meat filling for your pasteles after cooking it, cool it completely, then transfer it to a freezer-safe container or storage bag. Freeze the meat for up to 2 months. Thaw a day in advance before using it.
- You can make masa for pasteles a day or two in advance, lay a piece of plastic film directly onto its surface, and refrigerate it in a sealed container. The protective layer of plastic prevents the pasteles masa from oxidizing too much.
- You can freeze the masa for pasteles for up to 6 months. Transfer it to a freezer storage bag once it's prepared and freeze the masa laying flat. Stand it up in the freezer once it's frozen solid. This saves space in the freezer.
- Thaw frozen masa for pasteles in the refrigerator two days before you use it. Day one is actually for thawing the masa. Day two is to drain the masa in a cheesecloth bag for an hour. This method extracts excess water that accumulates during freezing.
- Refrigerate or freeze pasteles after assembling them.
- You can package pasteles in a food storage bag and store them for 24 hours in the fridge or freeze them for up to one year.
- Store leftover pasteles in a food storage container in the fridge for no longer than 24 hours.
Reheating Instructions:
- Pasteles become gummy and hard when you reheat them.
- To reheat cooked pasteles, cover them with a damp paper towel to cut down on the gumminess, and microwave them until warm.


How many pasteles would you say this recipe would make?
It makes 19 pasteles, 1 1/2 dozen plus one for a taste test. You may have a little masa left over, but you can use that for alcapurrias or to top your pot of arroz con gandules.
Thank you so much for sharing! The measurements of the root vegetables, is that with the peel on or off? Like the Guineos ?
It’s my pleasure! The measurements I give are for how you’d pick it up in the grocery store. That way it’s easy for you to buy what you need. Hope that helps.