Traditional flies by the seat of its pants when it comes to this Pastelillo de Guayaba Cheesecake. If you’re a fan of sweet and tart, this is going to soon be your signature dessert. You’ll taste those original pastry flavors all cuddled up inside of a buttery cookie crust. Begin this recipe a day ahead to give the cheesecake ample time to chill and set up. Decadence is the name of the game here, so let’s get ‘ta playing.
What is a Pastelillo de Guayaba Cheesecake?
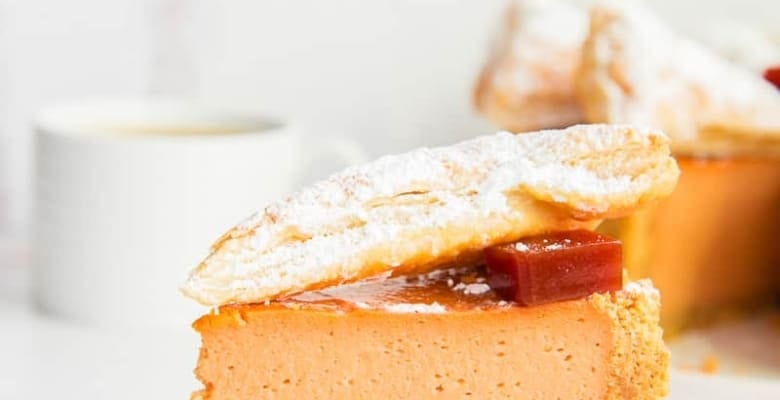
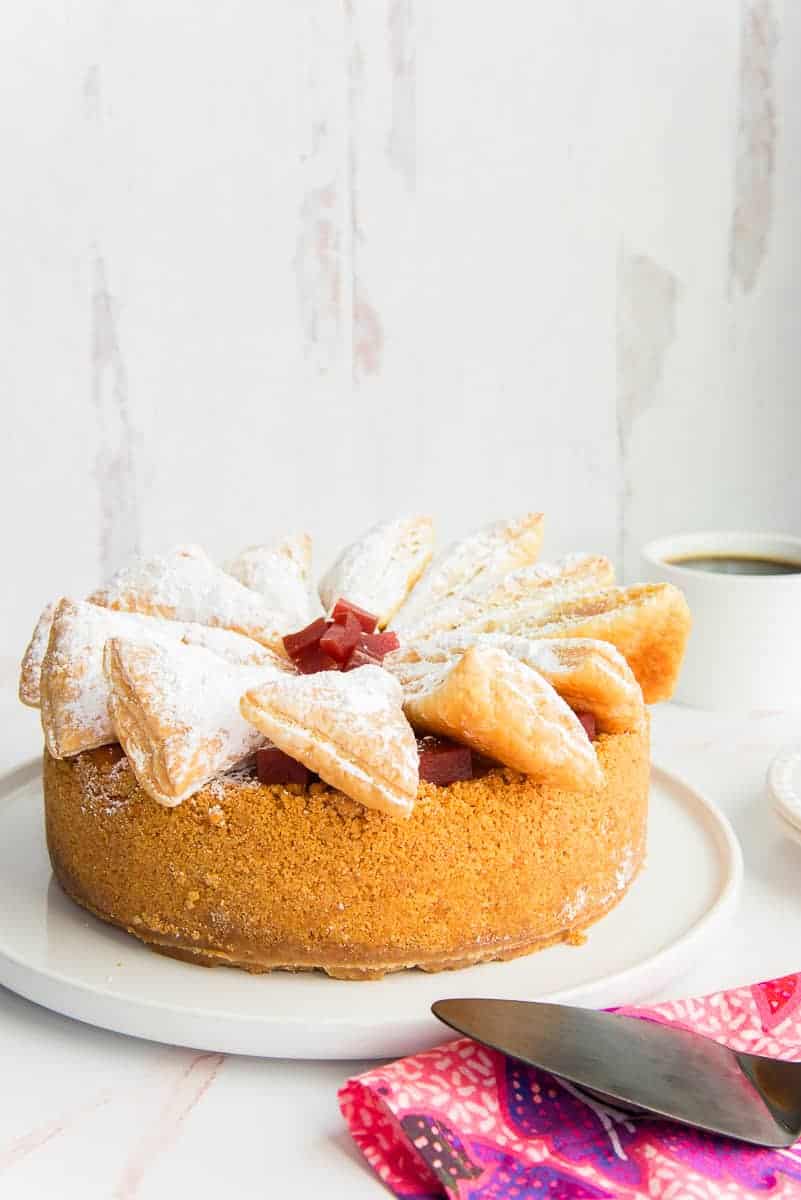
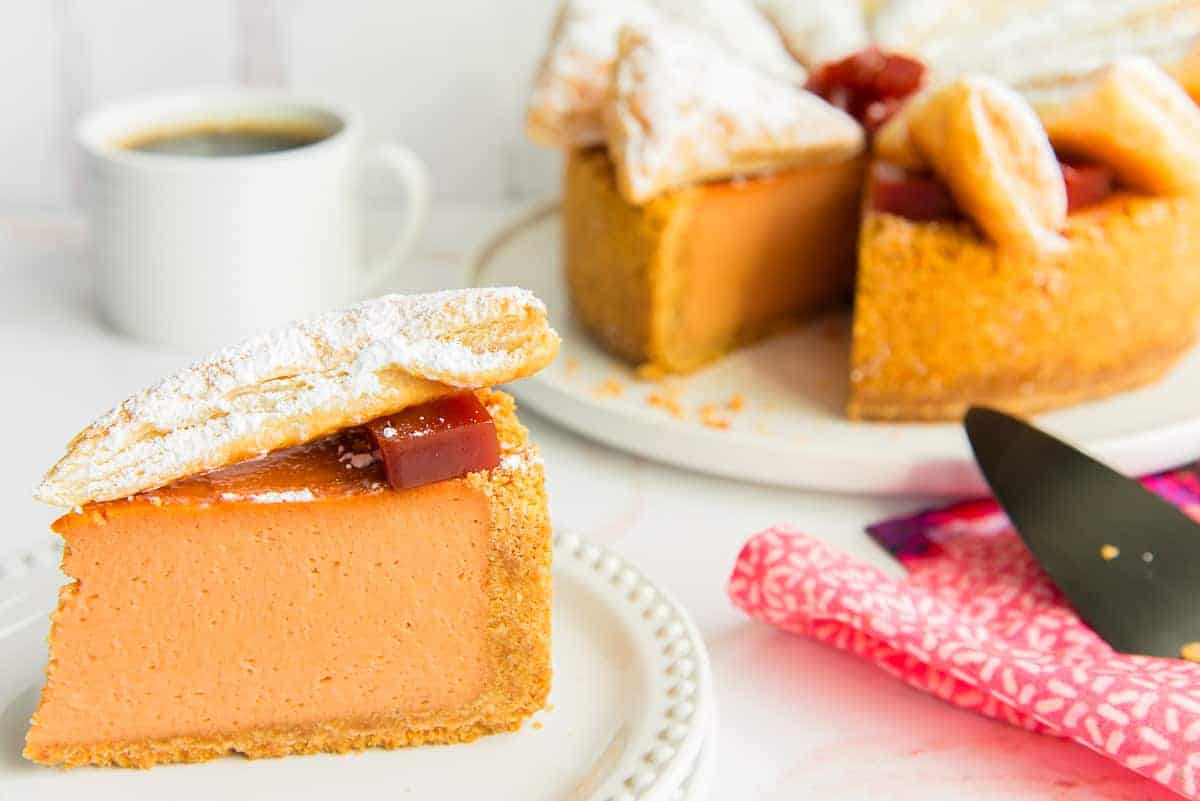
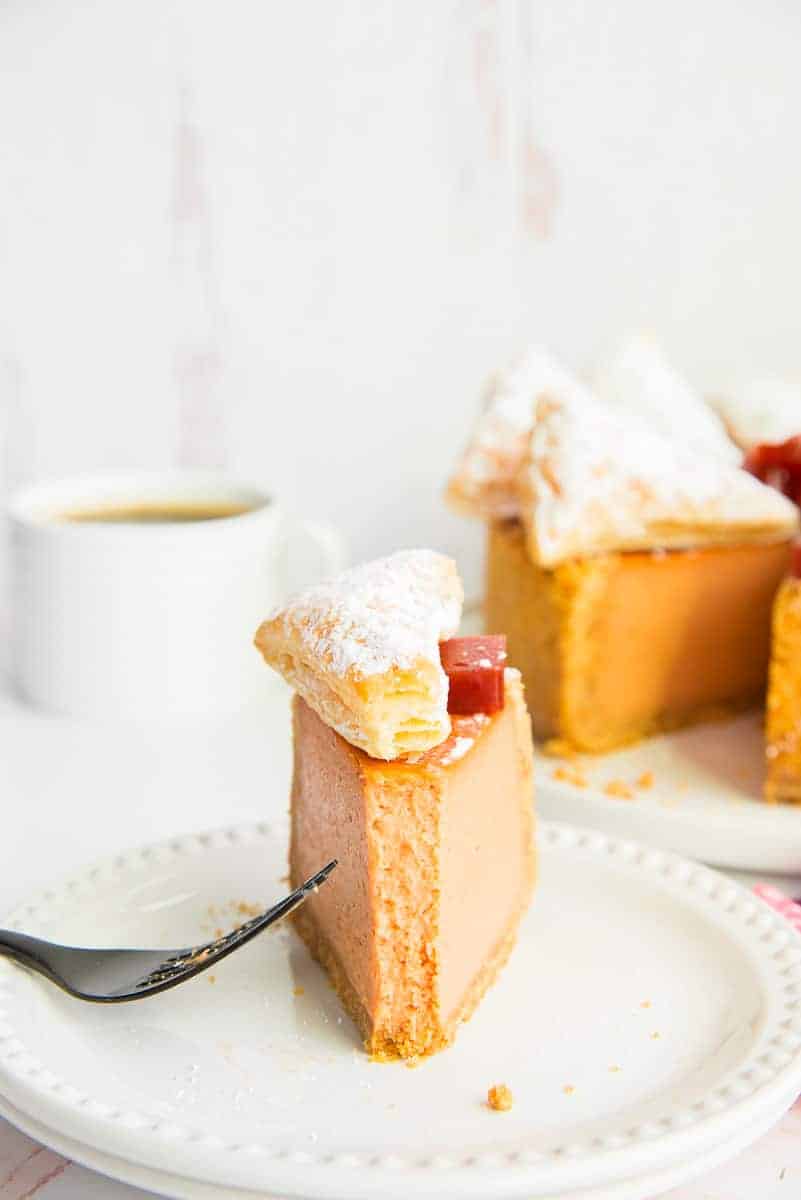
A pastelillo de guayaba cheesecake begins with a Maria cookie crust. The cookies, which are popular in Latin American countries, are crushed to crumbs to replace the traditional cheesecake crust of graham crackers. That crust surrounds a cheesecake batter packed with tons of guava flavor before being topped with a circle of flaky puff pastry.
There is a wide range of textures and flavors in this one dessert: buttery, creamy, tart, sweet, and nutty. This is a genius mash-up of all things that are right in the dessert world.
What is a Pastelillo de Guayaba Pastry, and where’s it from?
Pastelillos de guayaba are pastries. Some countries have pastries that are exactly the same but are called by different names. The baker wraps puff pastry around guava paste to create a flaky pastry that gets a generous dusting of powdered sugar. We typically enjoy pastelillos de guayaba with a cup of café con leche in the morning. But I’ve been known to eat them whenever the heck I feel like it. The closest thing to them, here in the States, would be fruit turnovers. Only, these are more exciting (in my humble opinion).
If you haven’t been able to pin them down to a location, pastelillos de guayaba are Puerto Rican. Cubans and Dominicans call them pastelitos de guayaba. In fact, most of the other Hispanic countries call them that. Most countries with a tropical climate have a version of breakfast pastry that incorporates guava, and you’d be hard-pressed to find a bad one. Most bakeries in PR have these in the case, along with quesitos. Both of which really are a beloved part of morning traditions in our communities.
What do I need to make the cheesecake crust?
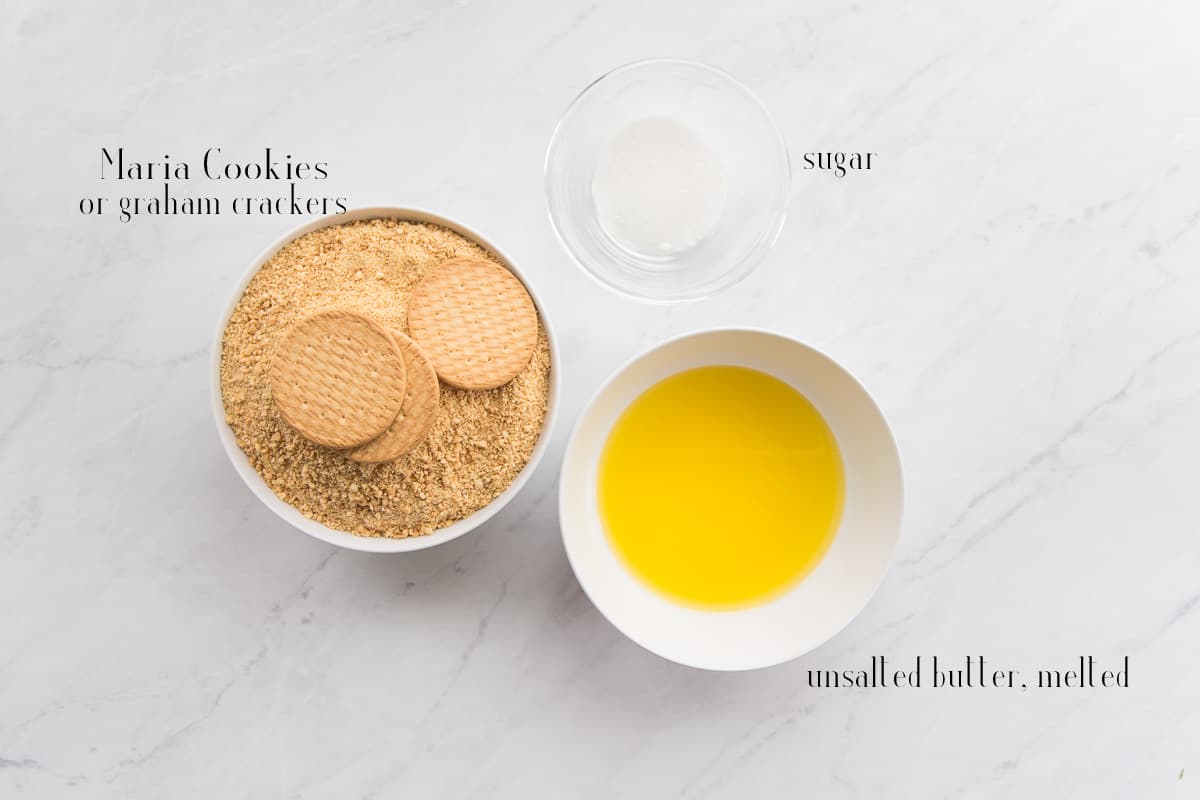
The basis of any great cheesecake is its crust. Instead of using graham crackers, I think we need to keep it super-Hispanic and use Maria cookies. You’ll need two sleeves or roughly 60 individual crackers to make the full crust. You’ll also need unsalted butter that’s melted and a little bit of sugar.
Crush the Maria cookies in your food processor until they resemble crumbs. You can also just take a rolling pin to them to crush them. That may be more therapeutic, actually.
What are Maria Cookies?
Maria cookies are vanilla-flavored, thin, crisp cookies that are pretty popular around the world. In Latin America, they are a favorite among little ones and adults alike. We enjoy serving them with café con leche. They often made an appearance whenever we had guests over.
Gamesa is a brand I prefer, though you may find many different brands in your local grocery store. I even found it overseas (in Europe), only to find out later that they originated in England. Shocked the hell outta me. I just knew some viejita in a pueblo somewhere created them. That’s neither here nor there, though. Now it’s a beloved cookie in many cultures, and we’re tossing it in here.
Can I use a different type of cookie for the crust?
You can use graham crackers, vanilla wafers, or dry (crispy) oatmeal cookies if you can’t find Maria cookies or if you want to stick with what you know. Use the same weight and process each of these the same as the Maria cookies: to a crumb.
Mix the cookie crumbs, melted butter, and salt together in a mixing bowl. Before forming the crust, grip a handful of the mixture to see that it sticks together. If the mixture crumbles or doesn’t hold its shape, add a tablespoon more butter and try again. Butter that oozes through your fingers when you squeeze the crust means the cheesecake will be oily after baking. Dry it out by adding 1/4 cup more cookie crumbs.
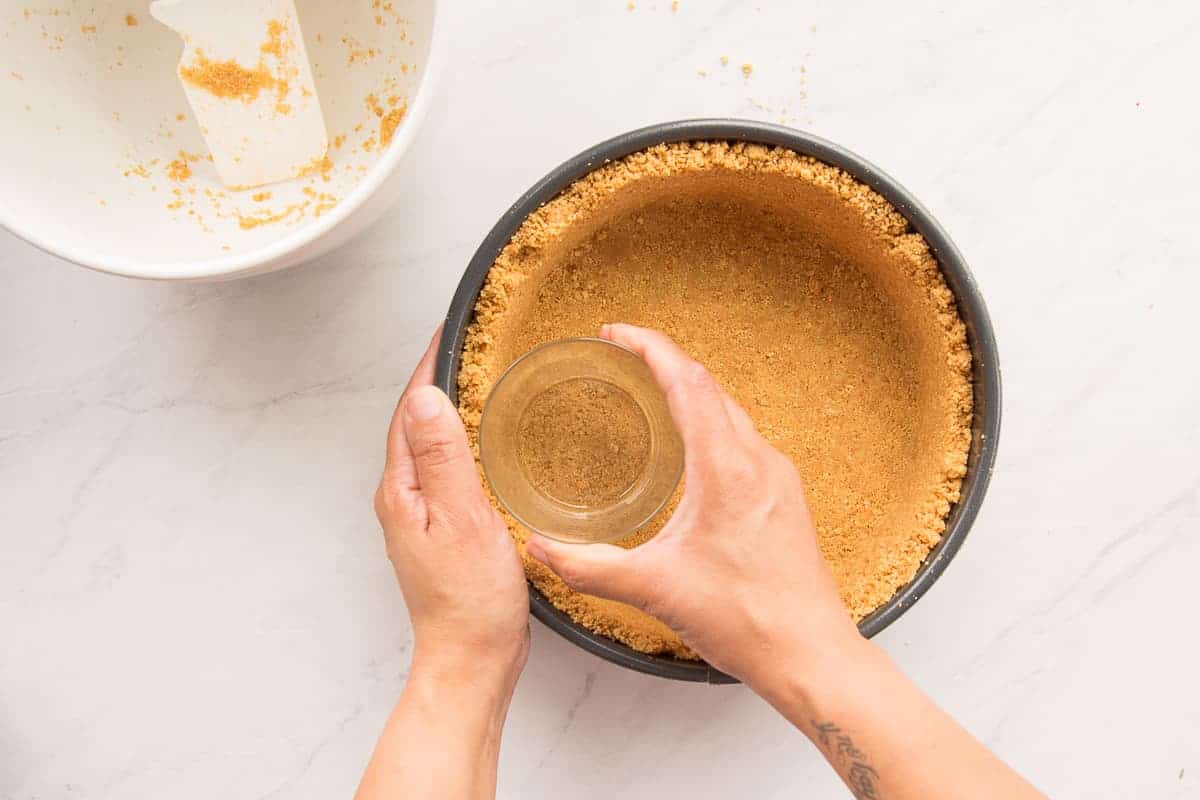
Once your crust mixture is perfect, dump it all into your springform pan. Use the bottom of a cocktail glass or your measuring cup to press the crust firmly into the bottom of the pan and up along the sides. Usually, I do a bottom crust and small side edge, but I want something to cut through the richness of the guava cheesecake; so, full side-crust it is. Be sure to press the crust into the pan firmly, so you don’t have it falling into the center when you put it into the oven.
How long do I bake the Maria cookie crust?
Bake the crust for 10 minutes in a preheated 350°F (177°C) oven. You’ll know your crust is ready to come out when you start smelling it.
Remove the pan from the oven and allow it to cool. Now’s a great time to measure out the ingredients for the cheesecake. Once the pan is cool to the touch, wrap the bottom and sides in two layers of heavy-duty aluminum foil. This will keep the water bath from seeping into the pan and ruining our cheesecake.
What is pasta de guayaba, and where can I buy it?
Guava is a tropical fruit that grows in abundance in the Caribbean and in other tropical climates. I can’t count the number of times I could go to a yard and pick one from the tree. Now, I have to settle for buying pitiful guavas at the store.
Guava paste results from an hour (sometimes two) of slow simmering of guavas, sugar, and water on the stove until it reaches a thick, gummy candy consistency. Guava paste is extremely thick. It has a coral color and a sticky, sometimes grainy feel to it. It’s very similar in texture to Turkish delight candies. It has a sweet-tart flavor that’s amazing when paired with creamy, milky foods like fresh cheese, cream cheese, or on crackers.
I buy Conchita guava paste because- in my opinion- it’s the best tasting of the store-bought options. I don’t have the time or the gajillion dollars needed to make the guava paste from scratch, so this is a good substitute. Look in your local grocery store’s Hispanic food section or in a market that sells Latin American products. I’ve also had luck finding guava paste in Middle Eastern markets and Asian grocery stores. When in doubt, go to the lord of the online shopping world (use the link above).
Guava jelly or preserves is not what you want to use for this cheesecake. Both are too runny to produce the baked texture we want in this dessert. You’ll need to add 1/4 cup of cornstarch to the batter at the very end of mixing if you can’t find guava paste and have to use guava jelly.
How do I melt pasta de guayaba?
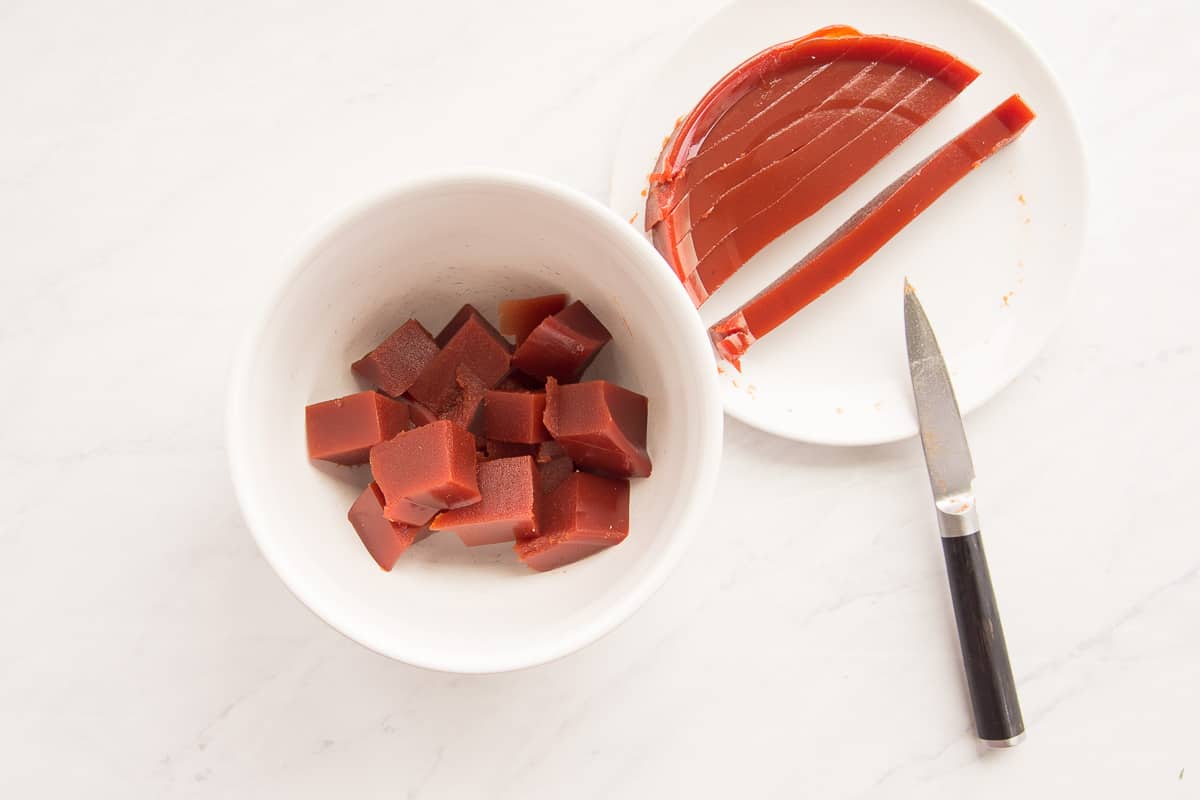
Remember when I said that guava paste is super thick? Check out what I mean (above). You can slice it into chunks. That’s how thick it is.
Cut the disc (or square) into 1 to 1 1/2-inch chunks to melt the guava paste. Put the chunks in a microwave-safe bowl, then heat them in the microwave for 30 seconds. Remove the bowl from the microwave and use a spatula or whisk to stir the paste a little. At this point, the paste will still be mostly solid, but you want to move it around to keep the paste on the outside from burning. Return the bowl to the microwave and heat it for another 30 seconds. Remove the bowl and whisk again.
Continue heating the paste in short intervals until the paste is smooth and loose. The paste will never be liquid but will be the consistency of thick pudding. This, again, is what will give our cheesecake body.
Don’t begin this melting process too far ahead of when you plan to mix the cheesecake batter because it’ll begin to firm back up as it sits. Usually, before I begin mixing the cream cheese and sugar, I do this melting step. That way, the guava paste has time to cool before it goes into the batter. You can start the melting before you begin measuring your ingredients for the cheesecake, as well.
What do I need to make the guayaba cheesecake?
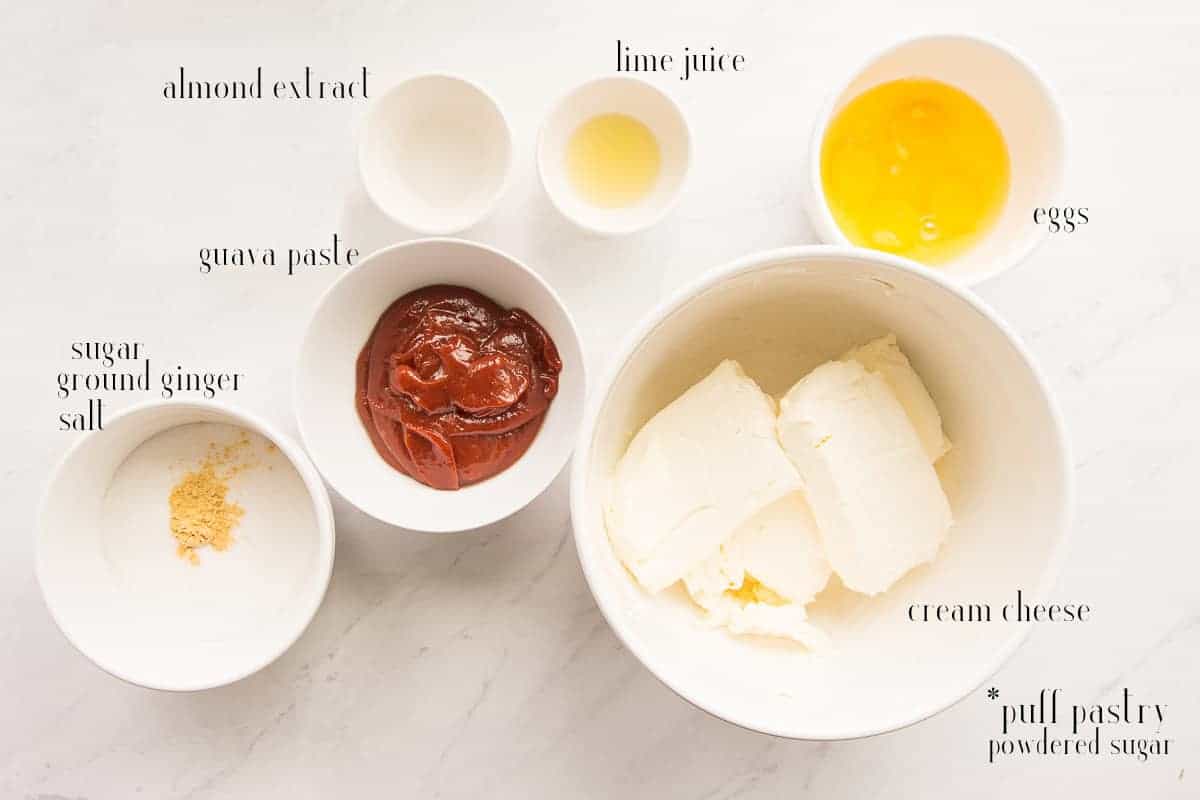
The rest of the ingredients for the guava cheesecake are sugar, ground ginger, salt, almond extract, lime juice, eggs, and cream cheese. A little later, you will use puff pastry and powdered sugar.
Make sure the eggs and cream cheese are both at room temperature. You don’t want clumps of cream cheese in your guava cheesecake. They’ll mock you.
Mixing the cheesecake batter is best done with an electric hand mixer or a stand mixer, too.
How do I make the cheesecake batter?
Before mixing the cheesecake batter, set a pot filled with 5 cups of water to boil over medium-high heat. This is what you’ll use to create the bain-marie (water bath) to bake our cheesecake in.
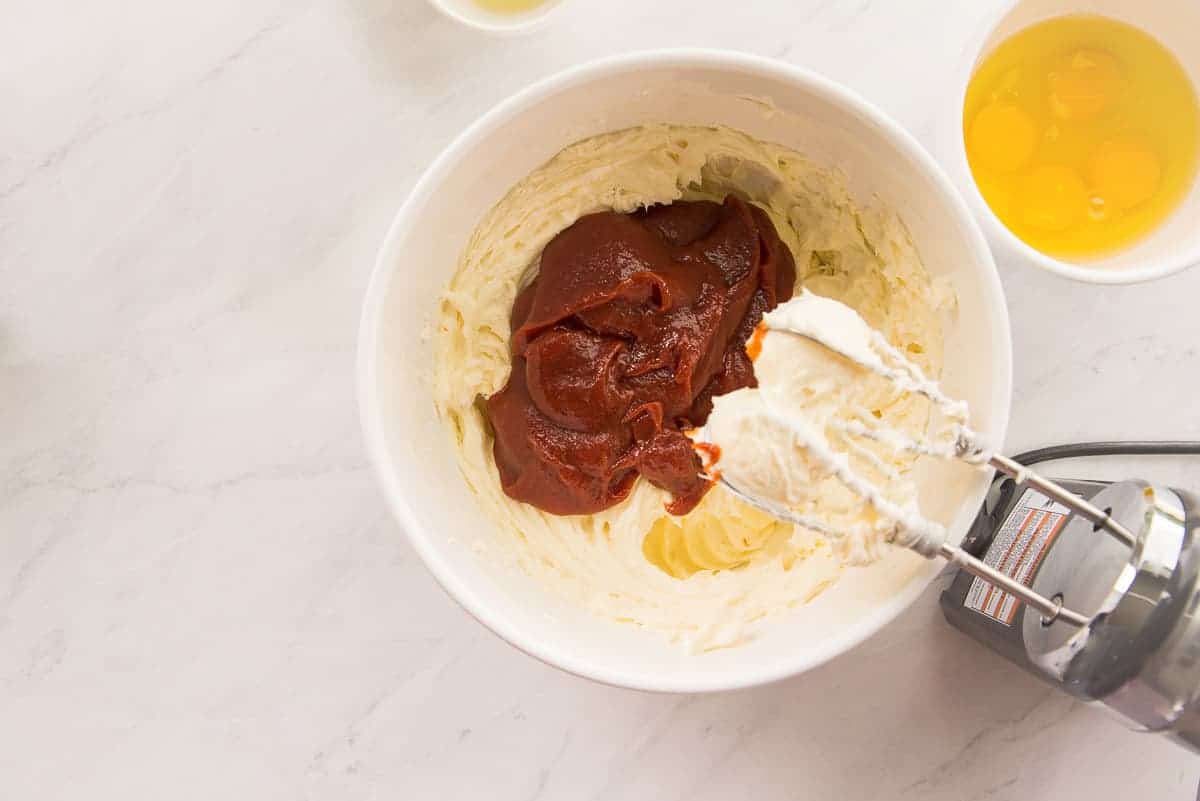
In a large mixing bowl, blend together the cream cheese, sugar, ground ginger, and salt on medium speed. Once the mixture is smooth and free of clumps, use a rubber spatula to scrape down the bowl and beaters, then add the guava paste.
Blend the paste into the cheese mixture at low speed until the batter turns a deep pink color, and no streaks of cream cheese are visible. Stop the mixer and scrape down the bowl and beaters once again.
My batter looks gummy!
Remember how the guava paste looked before you melted it? Well, once it hits the other ingredients- the cream cheese has the same thickness in its natural state- it’s going to thicken back up. A gummy texture at this point is normal. It will resolve itself once you add the liquid ingredients. Keep the faith!
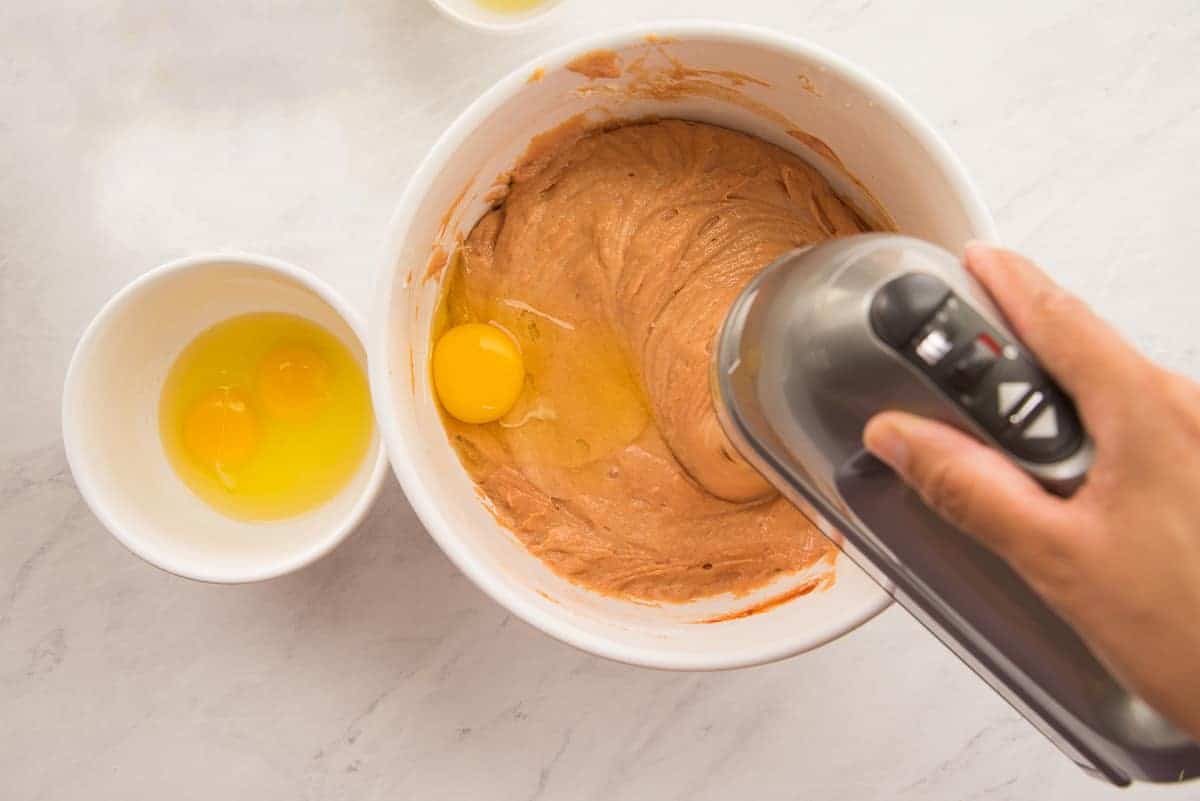
Add the eggs to the bowl, one at a time. Blend each egg in at low speed before adding the next egg. Add the almond extract and lime juice to the bowl with the final egg. Stop the mixer and scrape once again. Blend for 30 seconds to fully incorporate the eggs into the cheesecake batter. If, for some reason, you find the cheesecake batter to be too thick- like the consistency of mashed potatoes- blend in a 1/4 cup of heavy cream on low speed.
The final batter should be thick but pourable.
Why do I have to bake my cheesecake in a water bath?
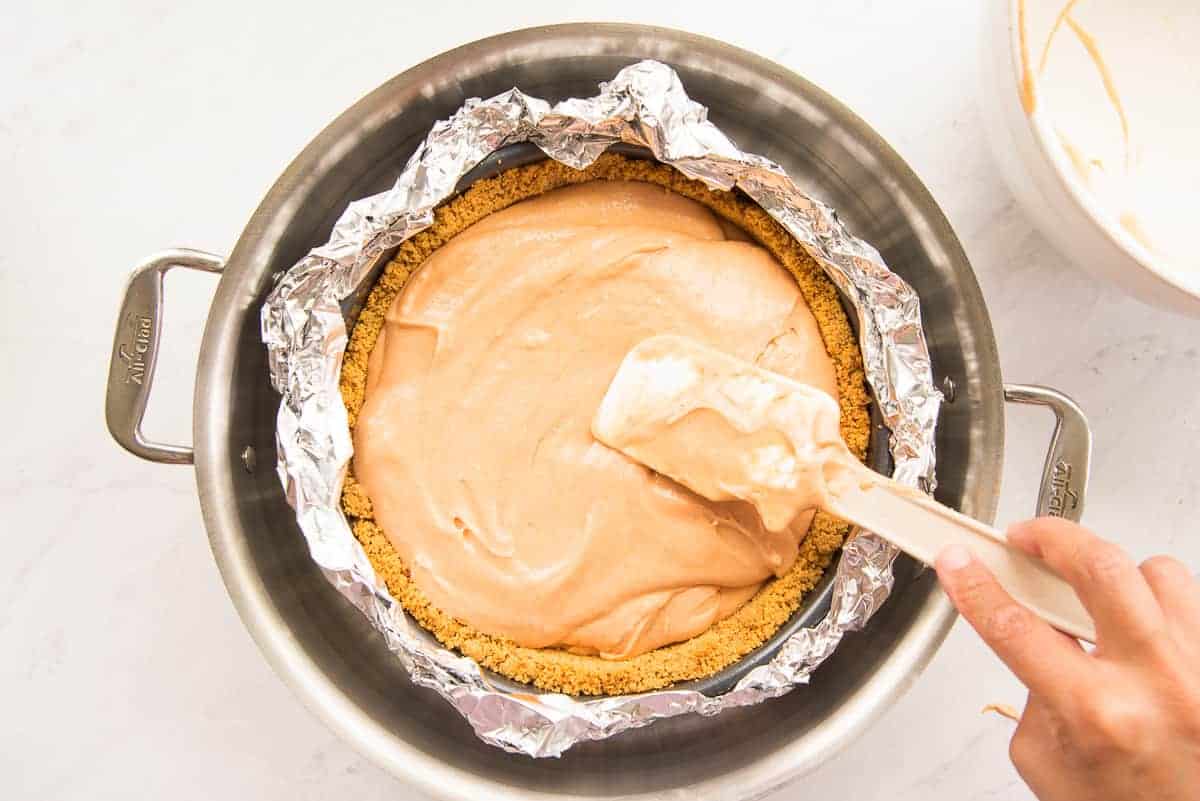
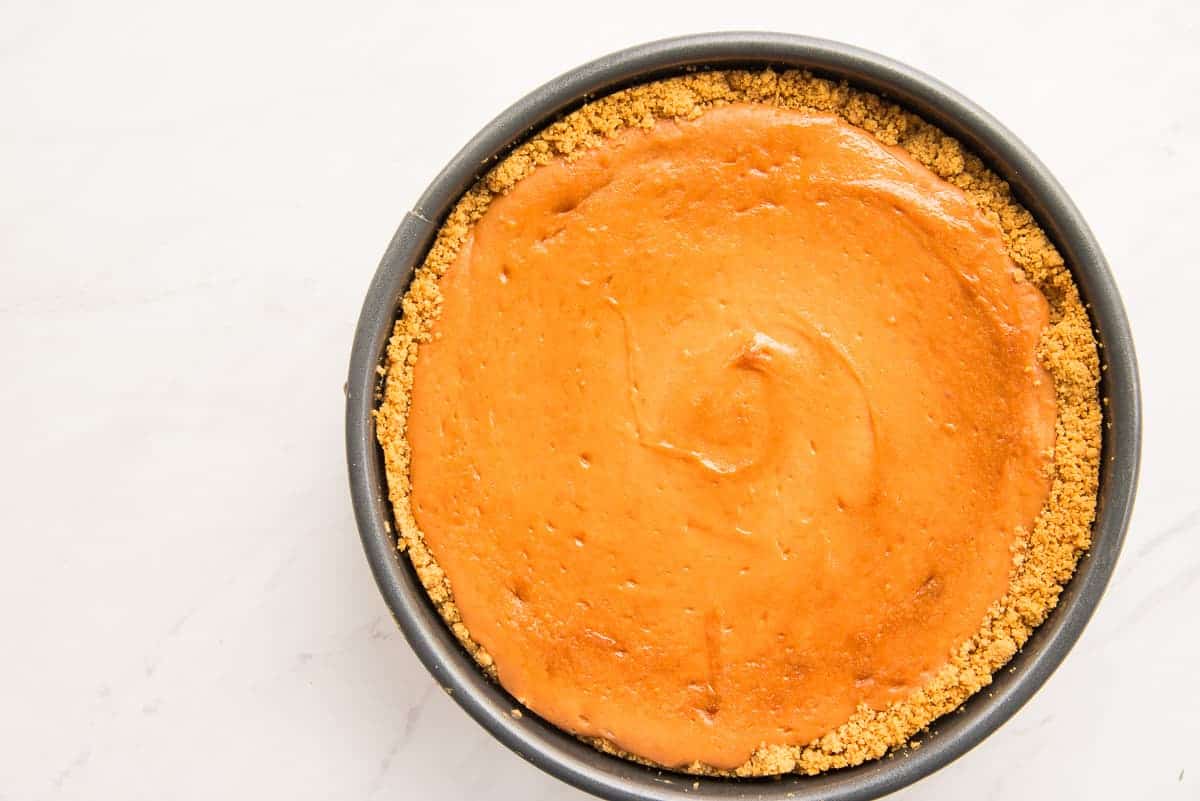
Pour the guava cheesecake batter into the prepared pan. Use your rubber spatula to smooth the top of the batter in the pan before giving it a few taps on the countertop. This tapping expels any trapped air bubbles in the batter. Set the foil-wrapped springform pan into a larger pan. You want that larger pan to have at least a 3-inch margin from the springform pan.
Pour the boiling water you put on the stove earlier into the larger pan. Carefully slide the pan into the preheated oven and bake the guava cheesecake.
Though it may not seem like it matters, a bain-marie is essential in preventing a crack from forming in the cheesecake. It produces a environment where the custard- which is all a cheesecake is- bakes evenly. Without it, you can still bake your cheesecake, but the likelihood of baking one without it developing a crack is very low.
Bake the cheesecake for 1 hour. Do your best to avoid opening the open while it bakes. Remember, we want to keep the baking environment free of any temperature fluctuations. After 1 hour of baking, turn the oven off. But leave the pans inside.
How long does the cheesecake take to cool properly?
My method for cooling cheesecake always gets a rise out of people. Some complain it’s excessive, but no one ever complains about how perfect their cheesecakes come out, so whatevs.
Instead of whipping the pan out of the warm environment into a cooler one, prop the oven door open 2 to 3-inches. If your oven door doesn’t stay open on its own, prop it open with a wooden spoon. Allow the cheesecake to gradually cool inside the oven for 1 hour.
After an hour:
- Remove the pan from the oven, then remove the springform pan from the water bath.
- Unwrap the cheesecake pan and allow it to sit on the counter for 30 minutes to cool further.
- After 30 minutes, lay a paper towel over the pan. Don’t push it down. Just let it rest on the top of the pan’s rim. This will trap any steam produced from residual heat once you cover the pan.
- Cover the pan with plastic wrap and transfer it to the fridge to cool completely, or for at least 4 hours.
This step-down method is the foolproof way to cool all of your cheesecakes. In 20 years of baking them and doing this, I have yet to end up with a crack in any of mine. I’m not even knocking on wood because I know it will never happen as long as I continue doing it.
Can I use store-bought puff pastry in this Pastelillo de Guayaba Cheesecake?
Even I have to admit that making puff pastry from scratch is a chore. A delicious chore that’s worth it, but a chore nevertheless. You can find frozen puff pastry sheets in the dessert section of the freezer aisle in the grocery store. Use that because the cheesecake is a labor of love by itself. Don’t forget to thaw the puff pastry the day before you plan to bake it, too. To thaw it, just put it in the fridge.
You don’t have to bake the puff pastry topper the same day you bake the cheesecake. The first couple of times I baked the recipe, I made the topper the same day as the cheesecake, and it grew stale in the fridge. I recommend waiting until an hour before you plan to serve the cheesecake to do this step.
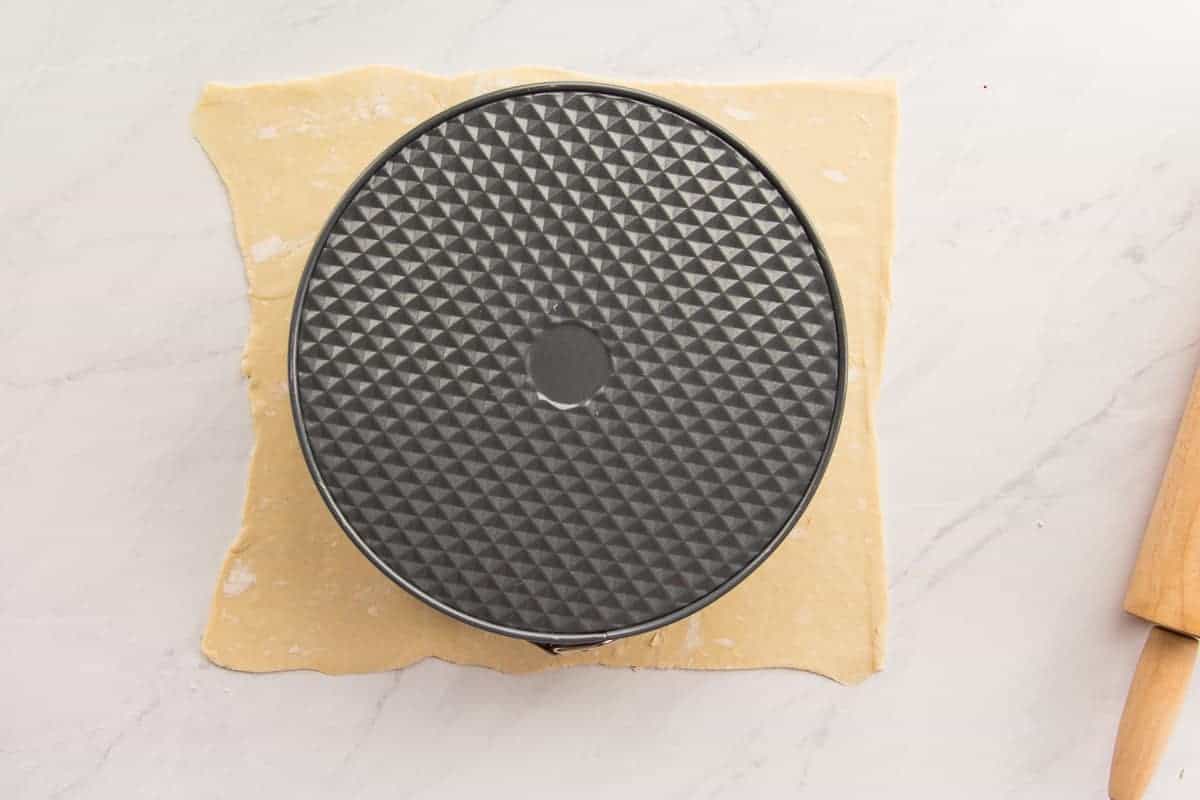
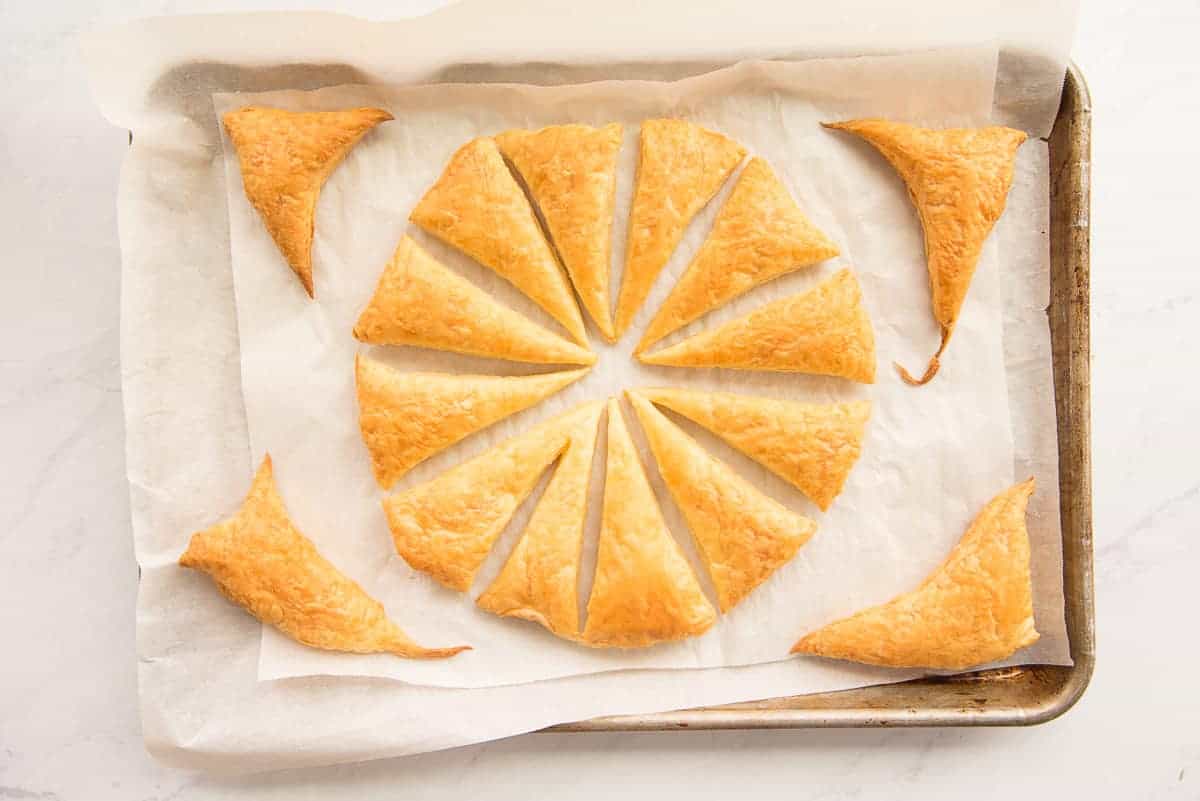
Roll the sheet of thawed puff pastry out into a larger rectangle. Use a plate that’s a little smaller than the springform pan you baked the cheesecake in as a cutting guide. Here, I’m using an 8-inch springform pan. If you’re not a weirdo with 3 different size cheesecake pans, a plate works just fine. Once you roll out your dough, flip it onto a sheet of parchment for easier transfer to the pan.
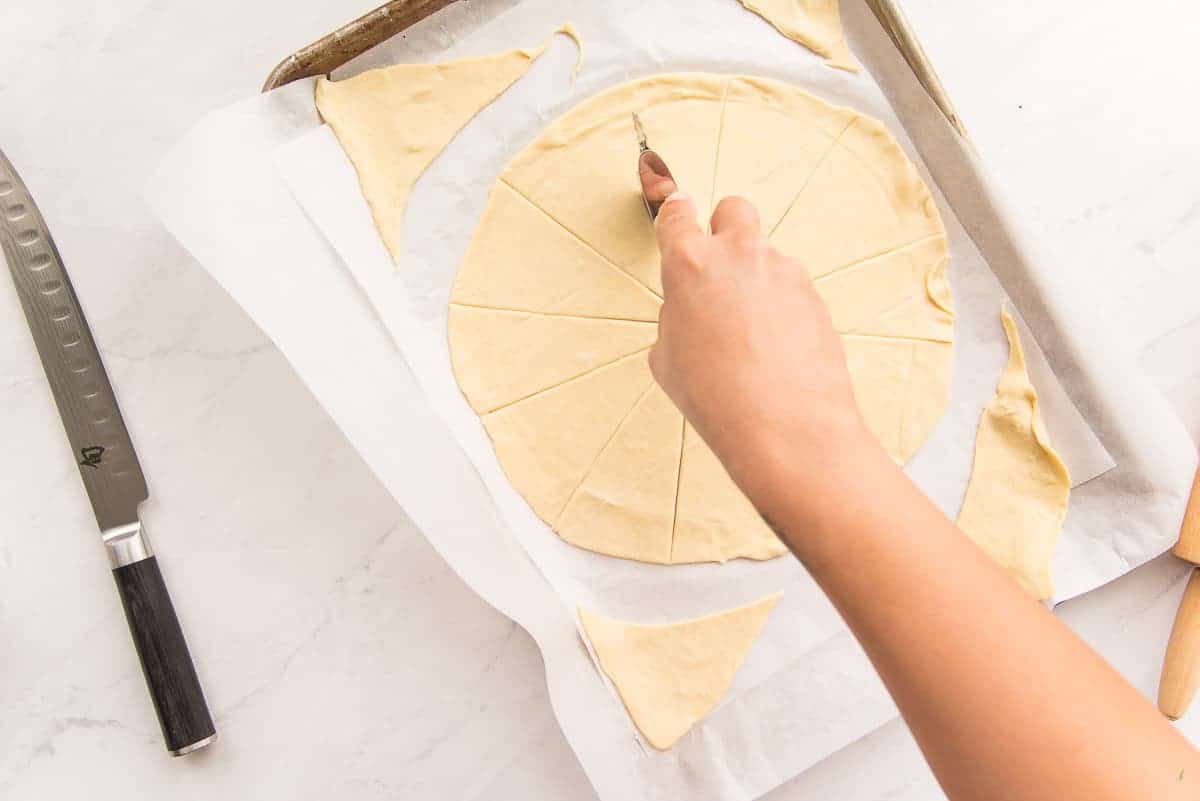
Use a pastry cutter or a very sharp knife to cut the circle out from the rectangle, then cut wedges from the circle. I cut 12, but this cheesecake will serve 8-12. You do your thing here.
It’s important to use a very sharp knife and to avoid dragging your knife through the dough. Dragging the knife seals the layers of puff pastry together, inhibiting its rise. That’s why a pastry cutter, or a pizza wheel, is a great tool to use here.
How long do I bake the puff pastry wedges?
Transfer the pan of raw pastry dough to an oven that’s been preheated to 400°F (204°C). Bake the puff pastry for 13-15 minutes, or until it’s golden brown and puffed up.
Remove the pan from the oven once the pastry is baked and allow it to cool. When you handle the puff pastry, be mindful of how flaky it is. Grab the wedges from the sides, which are stronger, instead of the tops and bottoms. The excess trimmings can be eaten on their own or topped with sugar and eaten that way.
How do I decorate the Pastelillo de Guayaba Cheesecake?
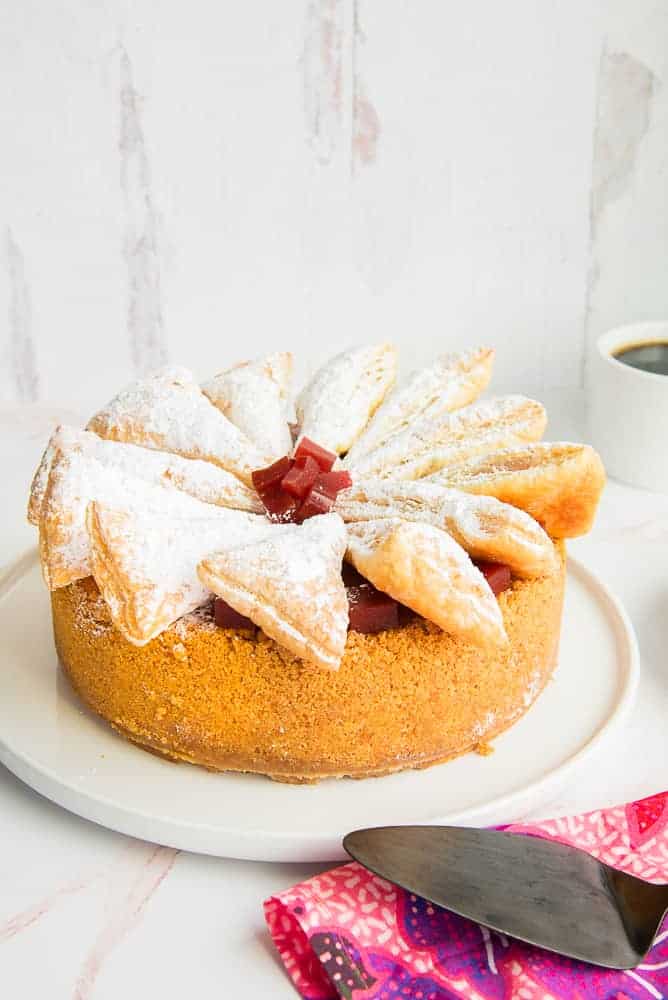
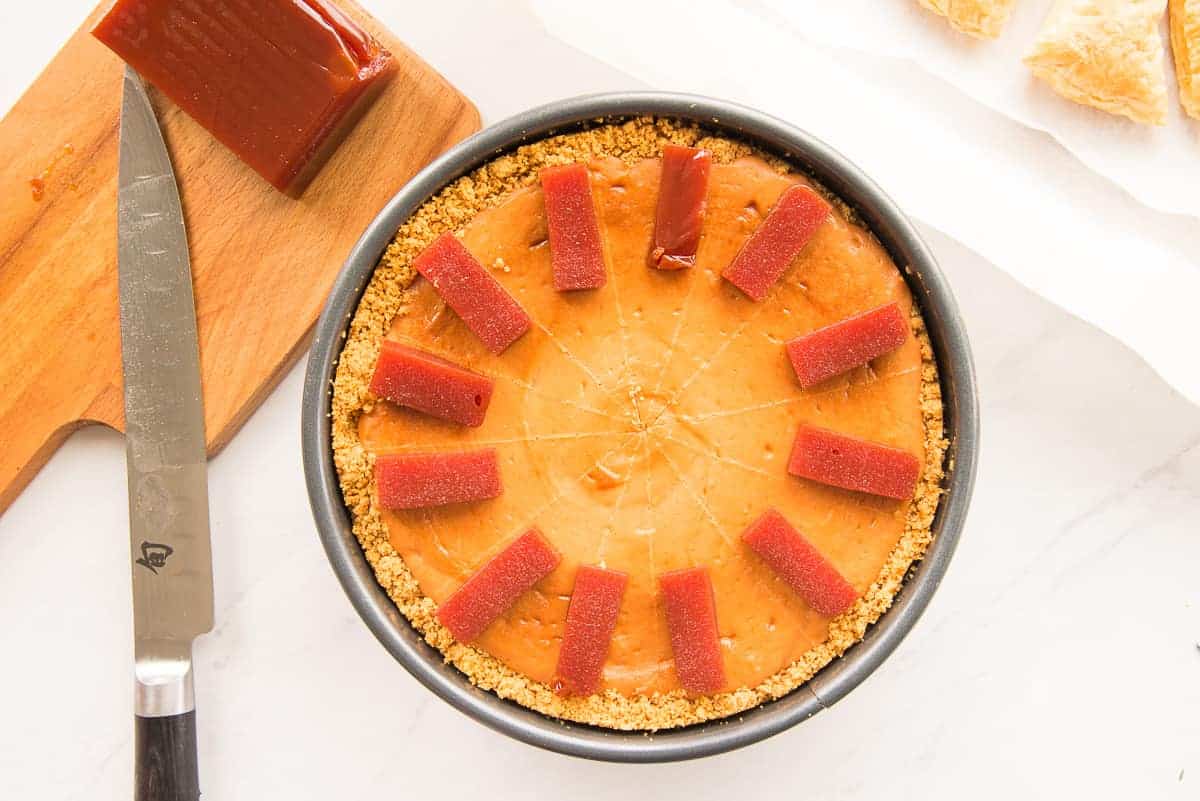
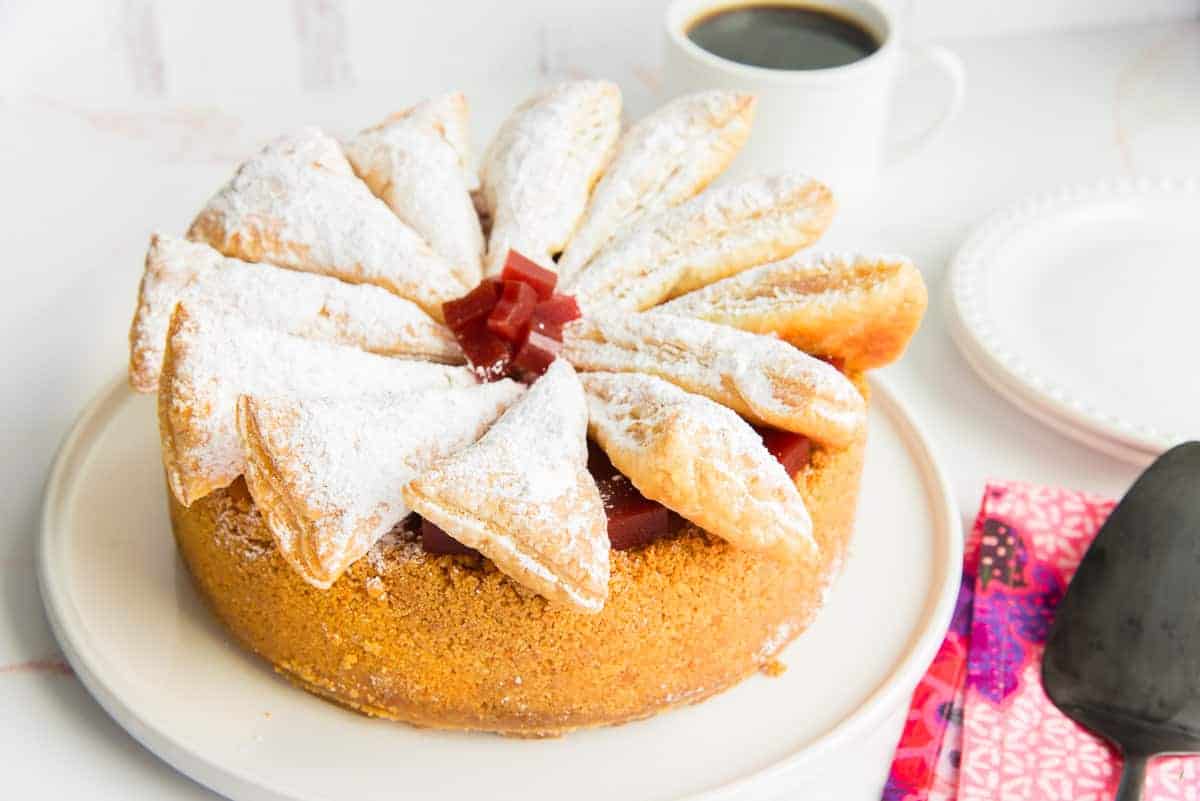
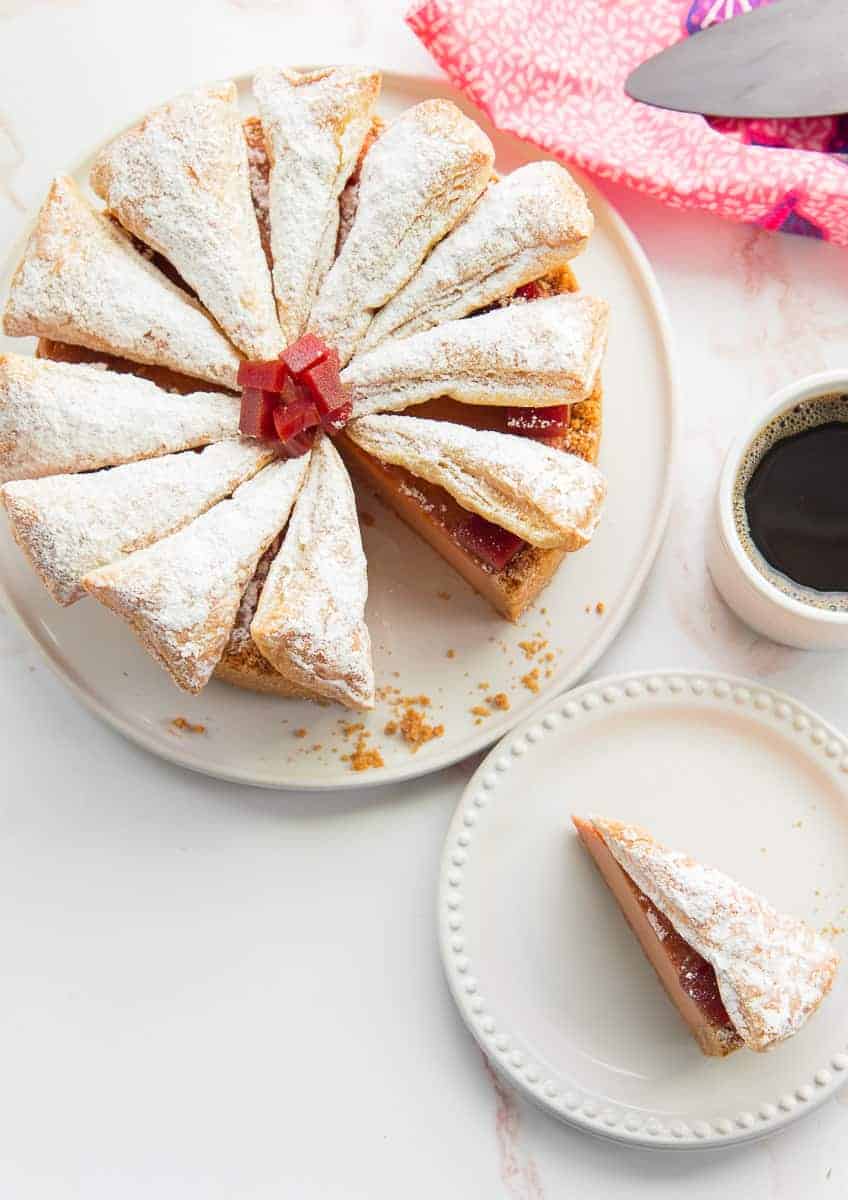
Now all that’s left is to decorate the Pastelillo de Guayaba Cheesecake. I like topping mine with batons (sticks) of guava paste, but that also means that my puff pastry won’t sit in a pinwheel pattern. I’m okay with that because I want more guava paste. You can, instead, cut 1/2-inch squares of guava paste and set them on the inner line of each slice.
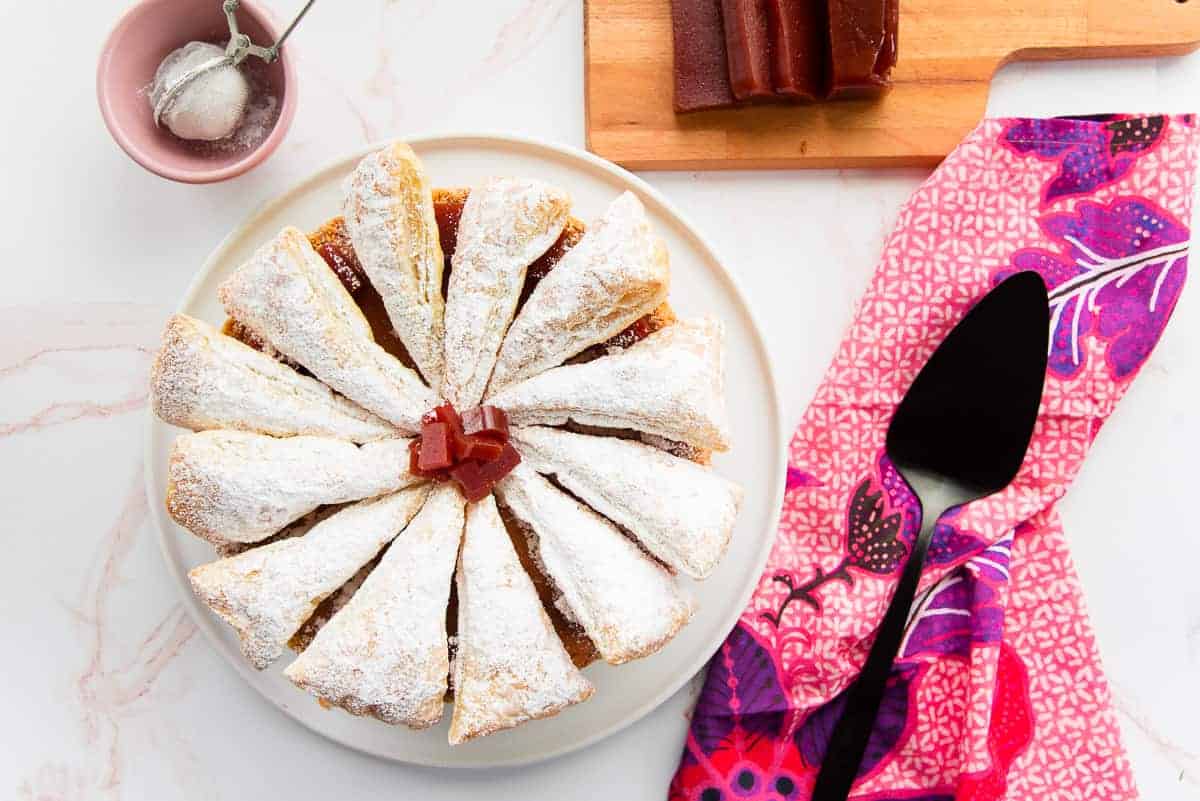
Prop a wedge of the puff pastry on top of each slice, leaning it on the square of paste. It may take some finessing to get the pattern you’re happy with but do your best.
Do I have to sprinkle the sugar on top?
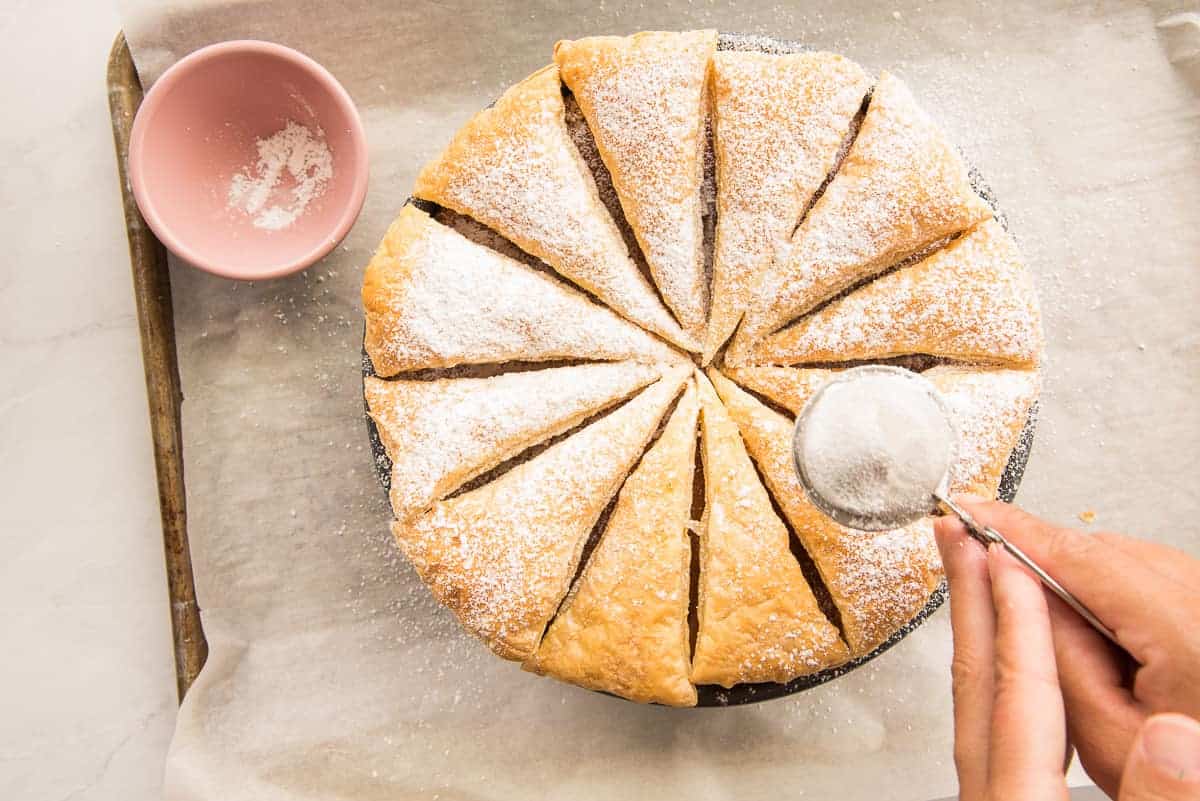
Pastelillos de guayaba always has an excessive amount of powdered sugar sprinkled on top. So much so that, in our family, it’s a tradition to watch one another to see who’ll be the first to inhale and choke on theirs. I usually lose. Sprinkle a generous dusting of powdered sugar over the puff pastry on top. I use a tea strainer as a sifter. It’s convenient and holds the perfect amount of sugar.
And don’t be a dork like me. Take the collar off the pan before you put the puff pastry wedges on it. {eye roll}
No, you don’t have to sprinkle the sugar on top, but it won’t be the same. If you use a sugar substitute, reduce the amount called for by half since sugar subs usually taste sweeter.
I add a few more squares of guava paste on top (in the center) to let folks know what they’re about to indulge in.
How do I serve this Pastelillo de Guayaba Cheesecake?
All cheesecakes need to be stored in the fridge. Once you’re ready to serve yours, remove it from the refrigerator and wiggle your knife under the puff pastry wedge. You can also pull the wedge off. Cut and serve the pastelillo de guayaba cheesecake with a glass of milk or cup of coffee.
The cheesecake is rich, dense, and creamy. It tastes like you’re biting into a milky guava fruit. After he took his first bite, Hector said, “This needs to be on the site now.” He’s a huge fan, and I think you’ll be too.
What’s the best way to store cheesecake?
Store leftover pastelillo de guayaba cheesecake in the fridge. Press a piece of plastic or wax paper against any exposed cheesecake (the inside). This will keep the cheesecake from crusting over and becoming gummy in the cool air. If you can fit a cover over it, even better, but still press that paper against the exposed cheesecake.
Leftovers need to be eaten within 3 days of baking the cheesecake.
Can I freeze leftover Pastelillo de Guayaba cheesecake?
If you want to freeze the cheesecake, do so before topping it with puff pastry. Yes, you can freeze baked puff pastry, but it tastes like cold, freezer air after thawing it. I can’t describe it. It’s just not an appealing taste.
Wrap the baked and de-panned cheesecake well in plastic wrap and store it in the freezer for 2 months. When you want to indulge, allow it to thaw in the fridge for 24 hours, then unwrap it and serve.
I hope you enjoy this mutation of the classic Puerto Rican pastry as much as we do. Be sure to pin it to your dessert boards and share it with your crew.
Let me know what you think of it in the comments, too!
Pastelillo de Guayaba Cheesecake (Guava Cheesecake)
at Sense & EdibilityEquipment
- 9-inch springform (cheesecake) pan
- rolling pin
- large pan (to hold water bath)
- sharp knife
- electric mixer
Ingredients
For the Maria Cookie Crust
- 3 3/4 cups (400 grams or 60 ea) Maria cookies pulsed to crumbs
- 3/4 cup (170 grams) unsalted butter melted
- 2 tablespoons (30 grams) granulated sugar optional
For the Guayaba (Guava) Cheesecake
- 4 8-ounce packages (904 grams) cream cheese at room temperature
- 1 1/4 cup (280 grams) granulated sugar
- 1 teaspoon ground ginger
- 1/2 teaspoon kosher salt optional
- 1 3/4 cups (615 grams) guava paste
- 4 large eggs at room temperature
- 1 tablespoon lime juice (from 1/2 of a large lime)
- 2 1/2 teaspoons pure almond extract
Topping
- 9 ounces (245 grams) puff pastry (or 1 sheet of frozen puff pastry), thawed
- 2 tablespoons powdered sugar
Instructions
Mix and Bake the Marie Cookie Crust
- Preheat your oven to 350°F (177°C).Mix the cookie crumbs, melted butter, and salt together in a mixing bowl. Before forming the crust, grip a handful of the mixture to see that it sticks together. If the mixture crumbles or doesn't hold its shape, add a tablespoon more melted butter. If butter oozes through your fingers when you squeeze the crust means the cheesecake will be oily after baking add 1/4 cup more cookie crumbs to dry it out.
- Once your crust mixture is perfect, pour it into a 9-inch springform pan. Press the crust firmly into the bottom of the pan and up along the sides of the pan using the bottom and sides of a cocktail glass or measuring cup. Bake the crust for 10 minutes.
- Remove the pan from the oven and allow the crust to cool. Don't turn off the oven.Once the pan is cool to the touch, wrap the bottom and sides in two layers of heavy-duty aluminum foil. This will keep the water bath from seeping into the pan and ruining our cheesecake.
Melt the Guava Paste, Then Cool
- Cut the disc (or square) of guava paste into 1 to 1 1/2-inch chunks. Put the chunks in a microwave-safe bowl, then heat them in the microwave for 30 seconds. Remove the bowl from the microwave and use a spatula or whisk to stir the paste a little. At this point, the paste will still be mostly solid, but you want to move it around to keep the paste on the outside from burning.
- Return the bowl to the microwave and heat it for another 30 seconds. Remove the bowl and whisk again.Continue heating the paste in short intervals until the paste is smooth and loose. The paste will never be liquid but will be the consistency of thick pudding.
Make the Guava Cheesecake
- First, set a pot filled with 5 cups of water to boil over medium-high heat. This is what you'll use to create the bain-marie (water bath) to bake the cheesecake in.
- In a large mixing bowl, blend together the cream cheese, sugar, ground ginger, and salt on medium speed. Once the mixture is smooth and free of clumps, use a rubber spatula to scrape down the bowl and beaters, then add the guava paste.
- Blend the paste into the cheese mixture at low speed until the batter turns a deep pink color, and no streaks of cream cheese are visible. Stop the mixer and scrape down the bowl and beaters once again.
- Add the eggs to the bowl, one at a time. Blend each egg in at low speed before adding the next egg. Add the almond extract and lime juice to the bowl with the final egg. Stop the mixer and scrape once again. Blend for 30 seconds to fully incorporate the eggs into the cheesecake batter. If, for some reason, you find the cheesecake batter to be too thick- like the consistency of mashed potatoes- blend in a 1/4 cup of heavy cream on low speed.
Bake, then Cool the Guava Cheesecake
- The final batter should be thick but pourable. Pour the guava cheesecake batter into the prepared pan. Use your rubber spatula to smooth the top of the batter in the pan before giving it a few taps on the countertop to expel any trapped air bubbles in the batter. Set the foil-wrapped springform pan into a larger pan. You want that larger pan to have at least a 3-inch margin from the springform pan.
- Pour the boiling water you put on the stove earlier into the larger pan. Carefully slide the pan into the preheated oven and bake the guava cheesecake.Bake the cheesecake for 1 hour.
- After 1 hour of baking, turn the oven off. But leave the pans inside.Prop the oven door open 2 to 3-inches to allow the cheesecake to gradually cool inside the oven for 1 hour. If your oven door doesn't stay open on its own, prop it open with a wooden spoon.
- After an hour, remove the pan from the oven, then remove the springform pan from the water bath.Unwrap the cheesecake pan and allow it to sit on the counter for 30 minutes to cool further.
- After 30 minutes, lay a paper towel over the pan. Don't push it down. Just let it rest on the top of the pan's rim. This will trap any steam produced from residual heat once you cover the pan.Cover the pan with plastic wrap and transfer it to the fridge to cool completely, or for at least 4 hours but 6-12 hours (or overnight) is best.
Bake the Puff Pastry, then Decorate the Pastelillo de Guayaba
- Preheat your oven to 400°F (204°C). After unfolding the sheet of thawed puff pastry, roll it out into a slightly larger rectangle. Once you roll out your dough, flip it onto a sheet of parchment for easier transfer to the pan.
- Use a plate that's a little smaller than the springform pan you baked the cheesecake in to cut a circle using a very sharp knife or a pizza (or pasta) cutter. Then cut* 8-12 wedges from the circle. Base the number you cut on the amount of servings you want from your cheesecake.
- Transfer the pan of raw pastry dough to the oven and bake the puff pastry for 13-15 minutes, or until it's golden brown and puffed up. Remove the pan from the oven once the pastry is baked and allow it to cool.
- Use a sharp knife to loosen the sides of the cheesecake from the pan, then, remove the springform collar from the cheesecake. Use the knife to score the amount of slices you want from your cheesecake. You can also cut all the way through here.
- Cut 1/2-inch squares of guava paste and set them on the inner line of each marked slice. Prop a wedge of the puff pastry on top of each slice of cheesecake, leaning it on the square of paste.
- Lastly, use a tea strainer or sifter to sprinkle a generous dusting of powdered sugar over the puff pastry on top. Garnish the top of the Pastelillo de Guayaba Cheesecake with a few more squares of guava paste.
- Enjoy the cheesecake within 3 days of baking.
Notes
Swaps and Substitutes:
- replace the Maria cookies graham crackers, vanilla wafers, or dry, crisp oatmeal cookies (in the same amount/weight)
Tips and Tricks:
- Look for guava paste (pasta de guayaba) in your local grocery store's Hispanic food section or in a market that sells Latin American products. I've also had luck finding guava paste in Middle Eastern markets and Asian grocery stores.
- Guava jelly or preserves is not what you want to use for this cheesecake. Both are too runny to produce the baked texture we want in this dessert. You'll need to add 1/4 cup of cornstarch to the batter at the very end of mixing if you can't find guava paste and have to use guava jelly.
- Don't begin melting the guava paste too far ahead of when you plan to mix the cheesecake batter because it'll begin to firm back up as it sits. Usually, before I begin mixing the cream cheese and sugar, I do this melting step. That way, the guava paste has time to cool before it goes into the batter. You can start the melting before you begin measuring your ingredients for the cheesecake, as well.
- Don't bake the puff pastry topper the same day you bake the cheesecake. I recommend waiting until an hour before you plan to serve the cheesecake to do this step.
- *It's important to use a very sharp knife and to avoid dragging your knife through the dough. Dragging the knife seals the layers of puff pastry together, inhibiting its rise.
- When you handle the puff pastry, be mindful of how flaky it is. Grab the wedges from the sides, which are stronger, instead of the tops and bottoms.
- Excess puff pastry trimmings can be eaten plain or topped with sugar.
Storage Instructions:
- Store the cheesecake in the fridge.
- Once sliced, press a piece of plastic or wax paper against any exposed cheesecake (the inside) to keep the cheesecake from crusting over and becoming gummy in the cool air.
-
To freeze the cheesecake: wrap the baked and de-panned cheesecake well in plastic wrap and store it in the freezer for 2 months.
When you want to indulge, allow it to thaw in the fridge for 24 hours, then unwrap it and serve. - For best flavor, freeze the cheesecake before topping it with puff pastry.

I normally love cheesecake so this is a must try for me, such an interesting one
Thanks so much, Mimi!
I made this cheesecake yesterday and I was so impressed with the flavors! The only thing I need to work on is my presentation for next time! Yum.
Presentation is great, but taste is everything. So glad you enjoyed it.
This was the perfect birthday indulgence for me. Sweet, creamy, and over the top!
YESS! Happy belated birthday to you!
When I want to impress a crowd, I head straight to one of your cheesecake recipes. And since I hadn’t make your Guava Cheesecake yet, I was sold! Ah-mazing as usual!
Sooooo glad you find them reliable!
This cheesecake was absolutely amazing! We love cheesecake, and we love guava, so it was amazing to combine the two! I can’t wait to make it again very soon.
I’m so glad you liked it, Tamara!
My cheesecake didn’t turn out as beautiful as yours, but it was absolutely delicious! Can I say, your food photography is gorgeous!! Every time you post a recipe it’s so pretty and I feel inspired to try it!
I really appreciate that, Lilly. I work hard on it, so that means a lot to me.