Double-hung windows. Alabaster or gunsmoke grout. LVP, hardwood, or engineered hardwood. Do these phrases keep you up at night? Well, then that means you haven’t reached the Design and Selections phase of your custom home building process.
I assure you, none of the other decisions you’ve made in your life will stress you out as these do. Did I choose the right wall paint? Will the tile pattern look stupid? Why did I go with that plumbing fixture? All questions we asked ourselves. And each and every choice we made during the design and selections phase kept us up at night.
We hope to alleviate some of that stress for you with this post, so let’s dive into the world of design and selections.
What is a Custom Home Build?
Before we get into the design and selections process, let’s recap why we’re even doing it.
If you’re reading this post, you’re either strongly considering a custom-built home, you’ve thought of doing one, or you’ve already started the process. You build a custom home when you build a home from the ground up with little to no plans. You may hire an architect (or contract your builder to do so) to plan and design your forever- we hope- home from the ground up. If you have to choose from a builder’s layout and selections, that’s not a custom home.
Why We Chose to Build Our Home Instead of Buy
A lot of our friends ask us what made us decide to build a custom home. For us, it seemed like the most logical choice. As I said in Part 1 of this Home Build Series, there were certain things we had to have in our home that we weren’t going to find in pre-fab or already built homes. These aren’t “wants,” either. I’m talking straight-up, “This is how we live and make our money,” requirements.
The Kitchen
This one is, first and foremost, the most important. I not only need a decent kitchen to work in, but I need a studio space as well. Remember, I develop, write, and shoot everything you see on this blog from home. There’s no real alternative for me. Since the home is also my workplace, I need clear boundaries between the two. I’m already a type-A personality, so telling me not to think about or do any work when surrounded by work is a joke. If I see it, I’m working on it.
Natural Gas
Somewhat tied into the kitchen/studio need is the need for natural gas. I hate cooking on an electric stove, and induction is the spawn of satan himself. Can I cook on both? Yes. Do I want to do it in my forever home? No. So, an area that had natural gas was important to me. And I didn’t want propane, either. I wanted underground natural gas. Pre-fab homes are hit and miss with this sometimes. You can have natural gas, but getting shot at on your evening walks was a real possibility. Or, you can live in a nice neighborhood with a big ol’ tank in the yard. For those who couldn’t care less, this obviously wouldn’t even register as an issue. For me, it is.
Work/Play Balance
Work/play balance is something else that matters a lot to us. We love dining out, soaking up cultural experiences, and sightseeing. Additionally, we wanted to be able to get to the city easily for my work opportunities. Hector also needed to be able to have a decent commute. As a result, we chose a near enough location to get to the city in less than 30 minutes, but far enough to not hear sirens all of the time.
Neighborhood
Finally, the neighborhood. It wasn’t the biggest factor because we have tons of friends in this city. I didn’t want to be a Stepford Wife, so we chose a neighborhood with some diversity.
For you, though, it may be the proximity to playgrounds, parks, or highly rated schools. Maybe you want to move nearer to your family. These are all factors that may lead you to choose to build your own home, too.
Something that made people laugh when I told them was that I didn’t want to live on a piece of land where people were looking down on me. Call it what you will, but I spent a lifetime up to this point feeling like I was less than. So to me, a house on a hill, even if it was a shack, is symbolic of all of our hard work and effort.
What is the Design and Selections Process?
Once you commit to working with a builder and hand over that earnest money check, the next big check you’ll write is for the design. Each company handles this differently. Our earnest money went towards the overall contracted amount for the house, but the design money was solely for the home’s design. This part of the process was a bit of a whirlwind, but if I remember correctly, the design was ours to keep, but the money to pay for didn’t roll over into the contract. So, if your earnest money was $3,000, that meant there was $3,000 taken off of the contract for the overall home. The fee for designing the house is just money lost.
We sat down with our salesperson, who again was the best ever, and designed the home after paying our earnest money. This is where you decide that you want a bathroom with an altar to put your throne. Whatever the hell you want, you can put it in your house at this stage.
Most builders have templates of floor plans that you can select from. Our builder offered us this option, and it was a relief because designing a home from nothing is extremely overwhelming. Most things within these templates are adjustable, flippable, and/or removable, so you’re still getting the custom home experience.
We fell in love with one particular model and then deconstructed it to make it suit our needs. You can do this as well. Be mindful, though, that your lot will determine quite a bit of what you can or can’t do. If you have a good salesperson, they will walk you through it. But, it doesn’t hurt to have your own architect there to make sure your vision is being adhered to.
How Long Does the Design Phase Usually Take?
The design itself doesn’t usually take that long unless you’re completely indecisive or unless you have to hire out the plans to an architectural firm. But if your builder can provide you with templates, it’s really a matter of deciding your must-haves and needs inside the home.
It’s the surveys, appraisals, HOA approvals (yep, them again), and utilities that take the most time during this phase.
You can’t lock in your construction loan until you have an appraisal done, but you can’t get the appraisal done until the house is designed. The appraiser will look at the final plans (the ones you paid for) and assess the value. Then the report is given to the bank, which decides whether or not they’re giving you that chedda’. This process, for us, was relatively quick because we knew exactly how we wanted the house. However, our survey and appraisal were the two that took the longest.
Our design phase took us a month and a half from start to finish.
How to Prepare for the Design Phase?
Here are some ways to streamline your end of the design process to ensure it goes quickly and *hopefully* seamlessly:
Decide on all of your “must-haves” before your meetings
In part one, I told you how important it is to have great communication with your partner. Throughout this whole process, you need to work as a team. That teamwork begins before the design process but is especially important throughout it. I mean, hopefully, you both will be in this forever home together. Don’t wait until the design appointment to talk about what your house needs. There’s nothing more awkward than having an argument in front of the salesperson. If your partner has a “must” that you really couldn’t care less about, let them get it and vice versa. Don’t argue or put up a fight just for S&Gs. Both of you deserve to be happy with this home.
Pin everything you see
Pinterest was a godsend for me. Every time I saw a design element online or in person, I’d pin it to my Home Build board. Later, at my leisure, I went back to see if it was something I really loved. If it was, I added it to a “final list” of must-haves.
Go out house-hunting to get a feel for your style.
You might be building a custom building a home, but that doesn’t mean you can’t keep browsing. Check out builders’ model homes to see what they’re putting in them. You will find the coolest things like hidden doors, microwave drawers, and insulated flooring. See which you love or want to avoid by popping into a model or for-sale homes on the weekends.
Analyze your current space to see what does/doesn’t work
We’ve lived in tons of homes throughout our military life. As a result, we knew we wanted a home with 48-inch hallways instead of the standard 36-inch. I need that wide hallway in case my Multiple Sclerosis progresses to the point that I’m wheelchair-bound. What we didn’t need was 5 outlets on one wall in the kitchen (apartment living). We hate squeegee-ing a shower that’s fully enclosed in glass, so we made sure to leave that out. Tons of windows were important because dark spaces depress us both.
Being huge entertainers, we designed a sizable outdoor space. We also included a library because our family (minus Hector) are avid readers.
One thing we were very intentional about is making sure this was truly a “forever” home. We want our children to come back with their spouses and children for the holidays. So, we made sure each child had an ensuite bathroom with a bathtub.
Just stop and BE in your current space or think about past spaces and what you hated or loved about each. This will help make your design process less stressful.
What You Should Know Before Starting the Selections Process?
The design and selections process are two edges of the same sword. One focuses on the overall design of the home: layout, bedrooms, bathrooms, common areas, and auxiliary spaces. The selections process deals with making all of those space livable: flooring, fixtures, paint, etc. Some builders have packages that vary in price (naturally). Our builder has their standard package, which was basic everything. The packages increased in “luxury” from silver to gold. I don’t remember if there was a platinum package, but we hovered between silver and gold depending on what room we were in. I leave you to figure out which room went gold.
When it comes to the “selections” phase of the design and selections process, you move from working with a salesperson to an interior designer. This person helps you make design choices that stay within your package allowance and make sense for your space. You’ll see in a second why it’s always important to make notes and not only rely on the designer, though.
Here are some things to remember during the selections phase:
The designer is billing every second with you.
Our designer was a gem. Again, she was the only one of two employees we actually liked in the whole company. Every time we met with her, we would spend at least a half-hour talking about stuff completely unrelated to the design. No matter how sweet or congenial your designer is, though, they’re there to do a job. Trust and believe that every minute you spend with them is being logged. You’re only given X-amount of design hours. Anything over that comes out of your pocket.
Make sure you keep track of the design-time yourself.
Because it’s easy to get caught up in unrelated conversations, be sure to keep your own log. Annotate when your designer shows up, when the vendor shows up, and when you show up. Take note or make mention of sidebar conversations not initiated by you, so it’s not charged to your time. Always keep a log of how many hours you spent with your designer. We once went on a 30-minute tirade about deep sea fishing for red snapper. I don’t think we were charged for that. Or at least I hope we weren’t. Chatting about things unrelated to your design is not billable, especially if they were initiated by your designer.
You will have to choose things you may not have considered before
Be prepared to select grout. Yes, grout. I’m over here all, “Why the hell do I care?” But it’s important. I regret the color of grout I chose for my laundry room. This is where those Pinterest boards will come in handy. The most mundane things require your selection. I couldn’t care less about tile placement until I did care. Underpadding on carpets? That’s important too. Start thinking of these things before your selections.
Levels of selections mean an increase or decrease in price.
You are always free to change your mind during your selections process. What you can’t change is what will fit into the design you’ve chosen. You also can’t change the phrase, “That’s going to be more than your allowance,” which you may hear a lot. On the other hand, when you opt for a less expensive selection, you save money. So keep detailed records of your credits you should receive for those less expensive selections.
If you have expensive tastes, start budgeting for things now. Remember, all of your overages have to be paid in full shortly after the foundation is poured.
Make sure everything you want/design has a place.
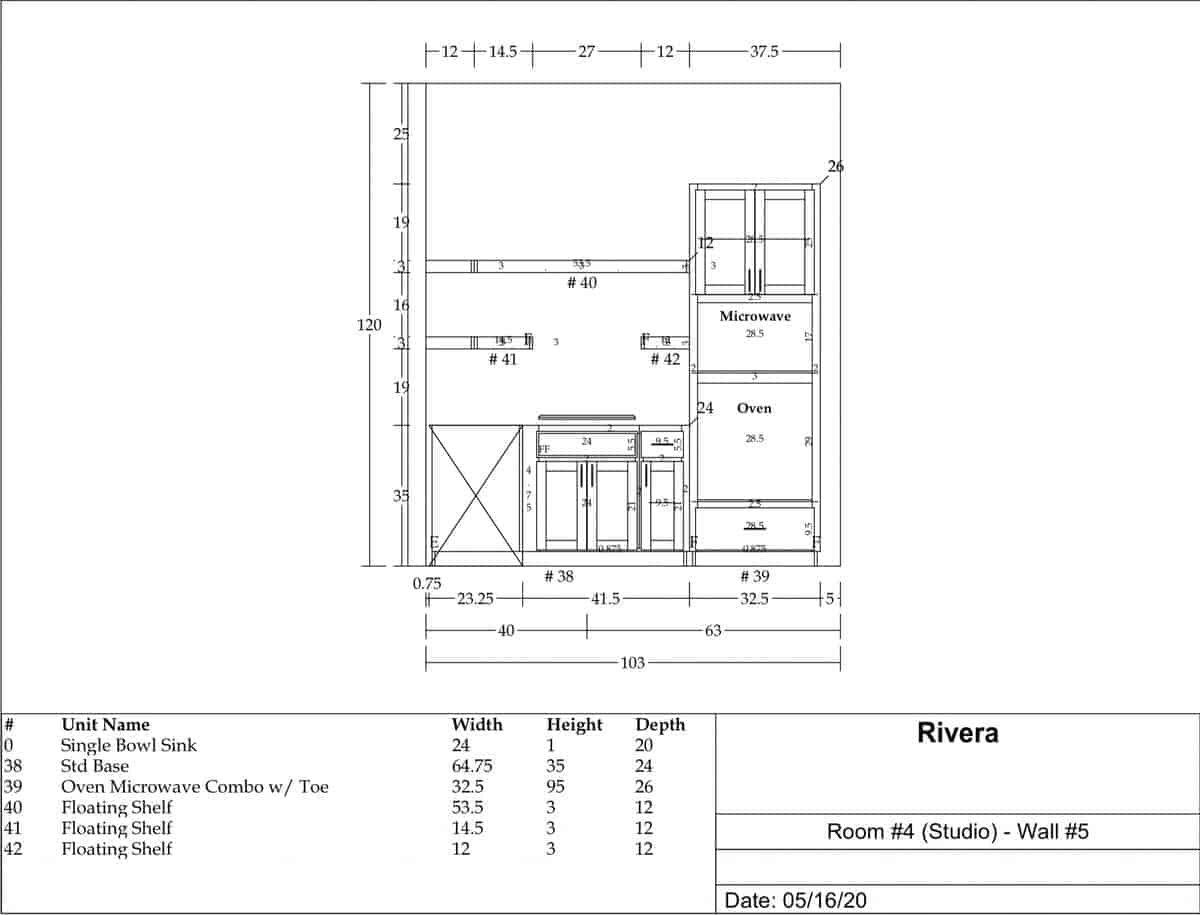
This picture is an example of not doing that. We purchased a full kitchen package for my work studio. We selected a bunch of cabinets for said studio. Unfortunately, no one- us, the designer, the cabinet maker, the project manager, no one- bothered to pay attention to the lack of space in the studio for the dishwasher. Consequently, the dishwasher is now in the pantry because I paid for it, and it’s going in this damn house. It works because when we’re entertaining, we can wash overflow dishes in there, but it was a pain in the ass to deal with.
Pay attention and make sure everything you’ve paid for has a place.
What Happens During the Selections Phase?
A quick breakdown of how the design phase goes is: meet with the sales team to discuss your design, meet up with the designer at the company’s different vendors, select your stuff, drink tons of these Mai Tais to soothe the wallet ache. That’s the long and short of it. Most home builders have design showrooms in a central location of the city where they build. All of our appointments were within 10 miles of where we lived, so they were easy to get to.
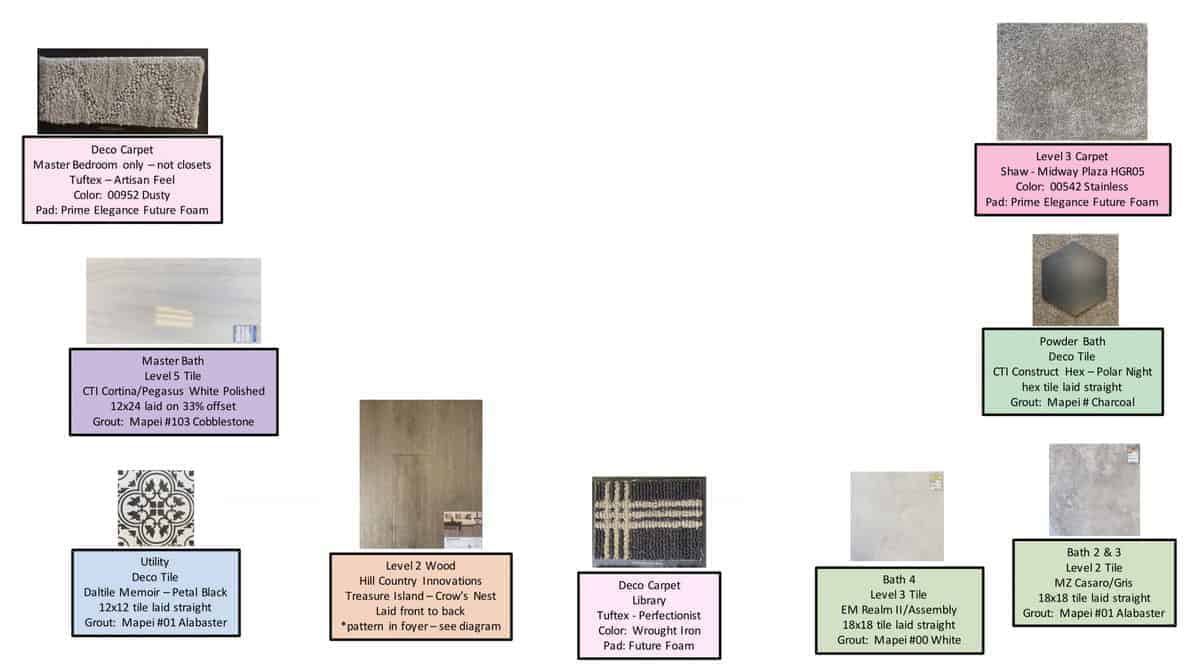
With the drama of the 2020 “pandemonium,” though, some of our selections appointments were virtual. One of those virtual selections was the cabinets, and we see- above- how that worked out for us. I remember our flooring selections appointments because they told our designer that we couldn’t touch anything. I told her, “You go ahead and tell them that’s not gonna happen.” I’m not buying 5 rooms of carpet that I can’t touch. Better go somewhere with that. You can see some of our choices above.
Here’s the more in-depth rundown:
- Meet with your designer at a location: you’ll meet up at the plumbing vendor to select ALL of the plumbing fixtures, finishes, and types for the house. That’s everything: toilets, faucets, drains, sinks, and disposals. Start pinning now. Depending on how long that takes, you may be able to squeeze in the flooring. There you’ll choose carpets, tiles, wood or wood-look floors, padding, and *duh, duh, duhhhhh* grout.
- Time starts as soon as the appointment begins: so stay focused. If the designer shows up late, make a note of that. If the vendor doesn’t start on time, make a note of that too. Get your full time. You’re paying for it, after all.
- Don’t fuss over insignificant things; instead, focus on dealbreakers. Hector didn’t care what color anything was so long as he got a rain head shower in our master bath and motion sensor lights in his closet. He didn’t fight me on a single design choice because he knows I’ve been thinking of these things for ages. In turn, I didn’t fight him on his wants because I knew if he cared enough to mention them, they were important.
My girlfriend Yolanda said during one of her selections meetings, she heard a couple get into a knock-down, drag-out fight over the media room equipment. Don’t be those people. Compromise.
Here is our advice on how to prepare for your selections appointments:
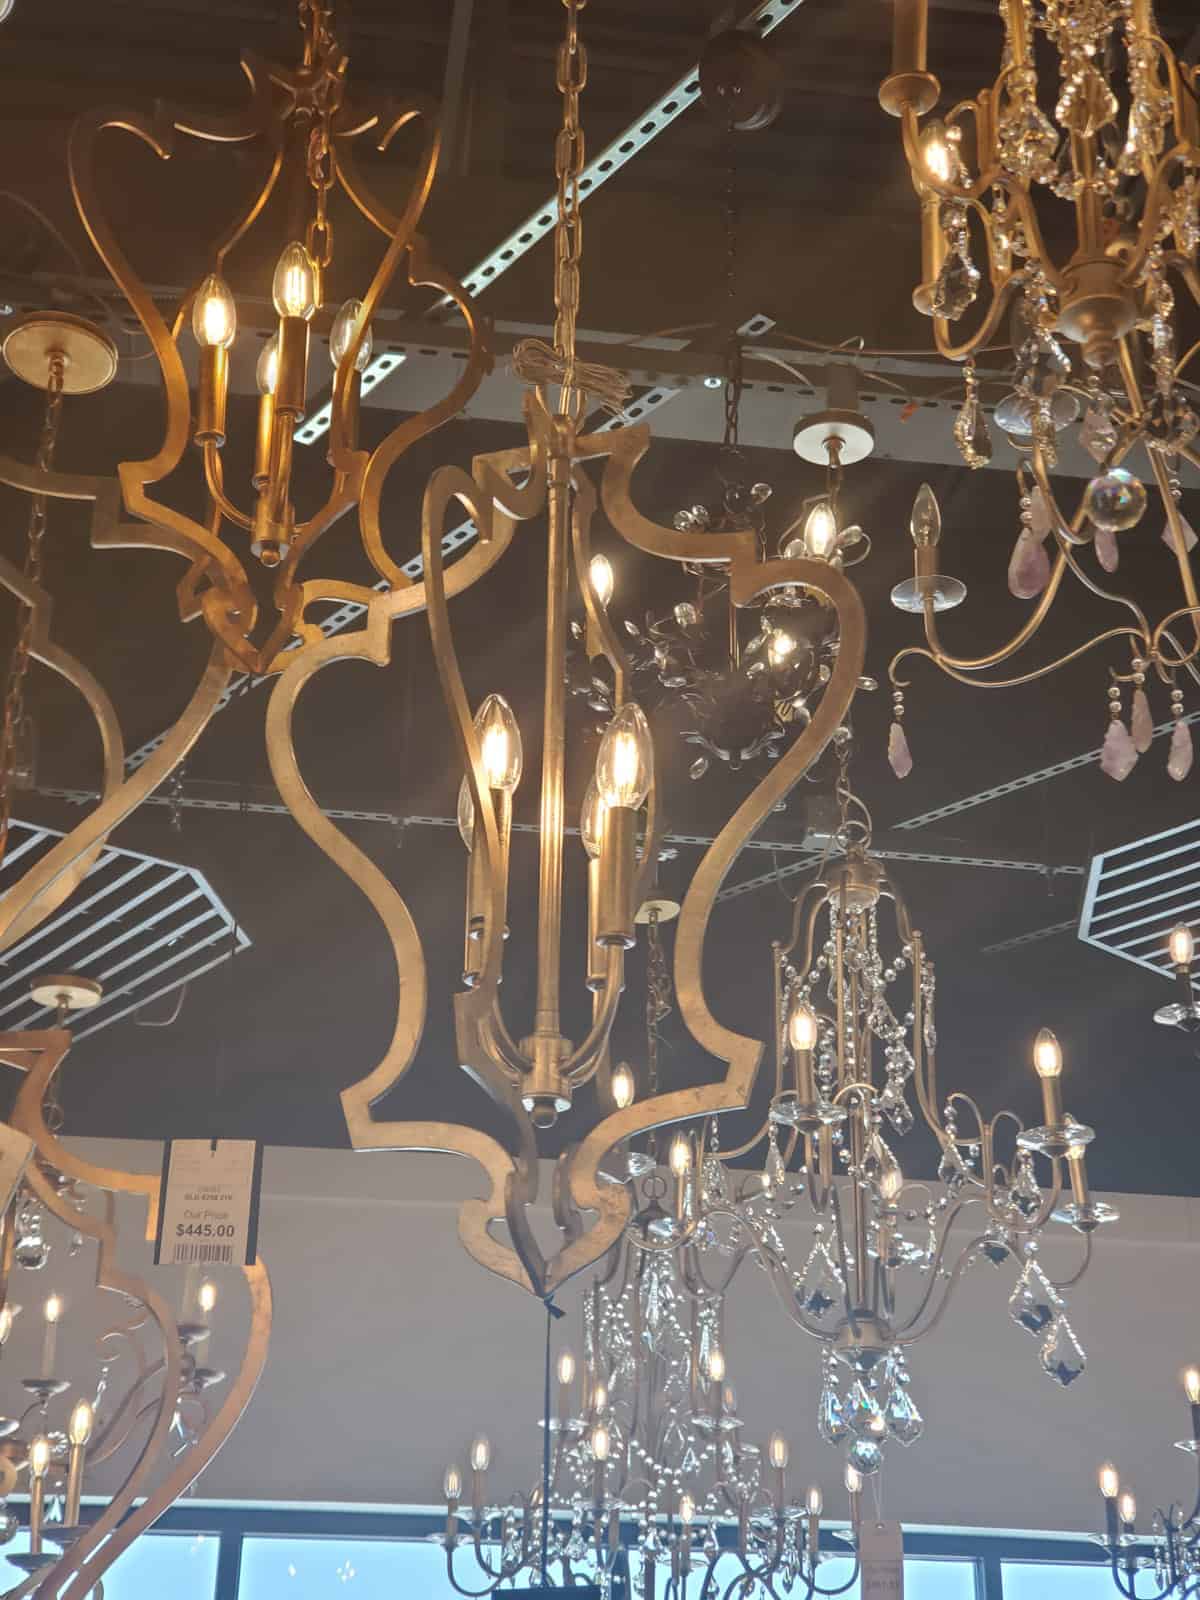
- Bring your tablet or laptop with your Pinterest boards. This helps you see things you may like in place. A lamp hanging in the lighting store doesn’t help you see it in your house. Instead, plug in the name and manufacturer, and you may be able to view it in a home so you have a better idea of what it will look like in your space. I didn’t do this with our lighting selections and had to buy a new set of pendants for the kitchen after they were installed. The ones I chose looked so stupid in place.
- Go to hardware stores to get an idea of finishes/colors/textures you like/don’t like. Touch stuff. Look closely at things. Turn them, twist them, pull, and push. You’re going to live with these for a while, so you need to make sure you love them.
- Have a top 3 in mind, so you aren’t disappointed. Remember, just because you like it doesn’t mean it’s within your allowance or fits into your home. Be flexible when it comes to certain selections. I had to give up the ghost when it came to my light fixture over my bathtub. That leads me to another point: you don’t have to buy everything through the builder. I found a few things for the house online for much less. If you opt to purchase items independently, be sure you receive a credit for not going through the builder.
Important Things to Remember About the Design and Selections Process
- Everything you choose has a price tag. This is a business transaction, so no one will “throw in” anything for free. Even if they say they will be sure to get it in writing because folks love to “forget” what they promised you.
- Where you decrease in levels, you’ll save money and vice versa. If it’s not important or a must-have, choose the lower level option. You can save money to apply to more important things later in the design and selections process. We did this with secondary bathroom tiles.
- Some of your favorites may be discontinued/unavailable when you get to the install phase, so have a backup selection ready to go. A shower head and fridge were out of stock by the time we reached the install phase. The shower head was no biggie; Hector just selected a new one. The fridge was a bit of an issue because it was going into my work studio. We were able to find a replacement, which worked out, but always have backups, especially if they are must-have items.
- Make detailed notes of all your selections- take pictures– because you’ll need to refer to them later. You know I don’t like our builder now. Part of the reason is that they tried to get over on us more than once when it came to our selections. Things we wanted weren’t installed, or they attempted to install the wrong things. When we called them on it, they tried that whole, “Well, that’s what you selected.” And Hector was all, “Oh, no, here’s what we selected!” He has everything in this huge white binder. I strongly suggest you get you a huge white binder, too!
What We Wish We Had Done Different During the Design and Selections Phases
- We wish we pre-gamed more of our design and selections choices. It would’ve helped us make more rational, well-thought-out choices and decisions. Though we didn’t argue over any of our design and selections choices, it may mitigate tons of arguments and bad feelings between you and your partner.
- Pinterest is a lifesaver when building a home. You can use it to create wishlist boards or as a reminder of the selections you chose. Pinterest can also provide inspiration if you’re having a hard time deciding what to select.
- We are very attuned to what we hate and love. The design and selections process was very easy for us. Part of that was because, while most little girls were planning their weddings, I was planning my forever home. I think traveling around the world with the military and living in everything from a tenement to a million-dollar ADA home helped us too. We knew exactly what we wanted, so this phase of the home build was our favorite part.
Hopefully, this post will help you through your design and selections process should you decide to build a home. If not, I hope it gave you some insight into what it takes to build a custom home. That way, the next time you visit your friend’s custom build, you can appreciate the attention to detail that went into it.
Be sure to share and pin this post in case you are faced with a design and selections process. And stay tuned for the next part of this home build series. Things are about to get wild.








It sounds like designing your dream home can be so much fun. These are great tips for those looking to add their styles to their home.
There are many fun things, paired with not so fun adulting things. I guess it goes hand in hand. Hope you come back for the next update.
Thank you so much for this! The design process seems like it’d be a lot, but when you have a plan and some ideas of what you want in your house it helps out a lot. So many people would benefit from reading this post if they’re building a custom home.
Jasmine,
Even people not building custom can benefit. You still have to have an idea of what you want to you can ask for it, you know? Thanks for stopping by.
This is one of the most detailed posts I’ve read about this process. Thank you for sharing so many great tips! I had to pin this because I will definitely use it for a reference (when the time comes). Congratulations on your new home!
Thank you Artney. Please makw sure you come back an pin the rest of the series. We have more drama to cover… LOL!
I am gonna do a build next and Im so excited!! we live right by the ocean so im excited to make my dream home in a couple years. Doing fixer upper right now
I’ll say this, I’m a little jealous you have an oceanview! I hope the fixer upper works out. That will work out as equity when you’re ready to start your custom.
So cool. I wish we could have custom built. There are so many changes I want to make. Maybe one day!
Amber,
It had to be that way for us and I’m glad we were able to do it. Good luck and I hope you get everything you wish for!
I am loving following your dream home building journey and I am
gathering so much inspiration to do so myself! Thanks for all the great info!!!
I’m so happy to hear that! Stay tuned for part 3. We have tons more info to share.