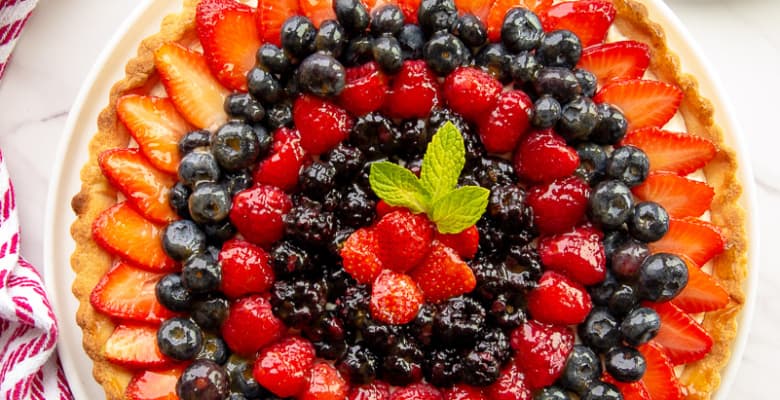
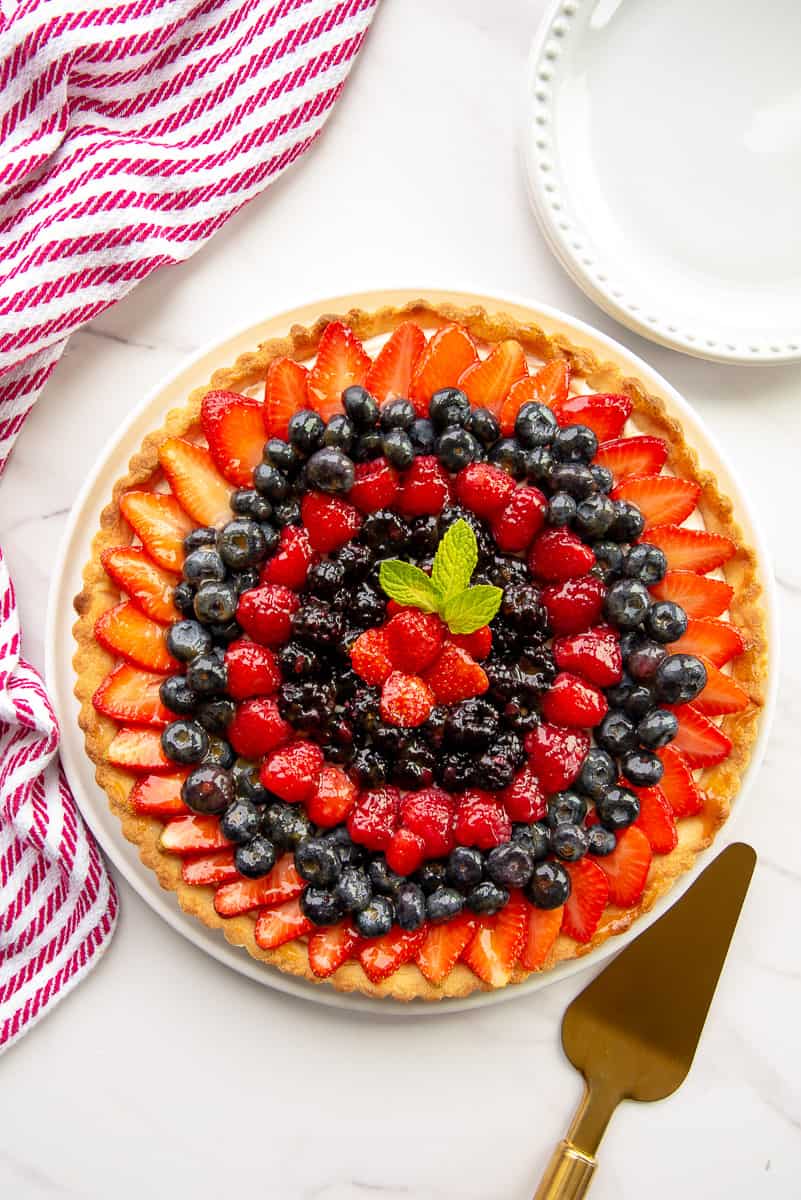
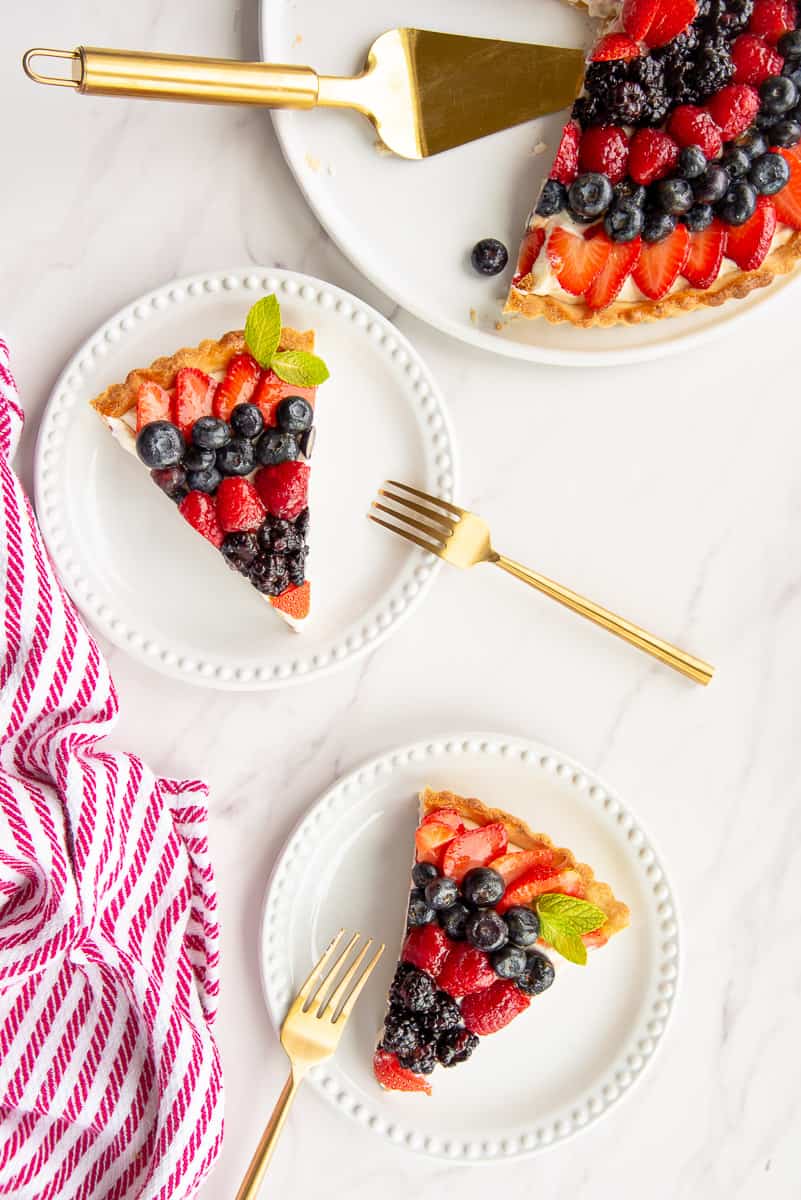
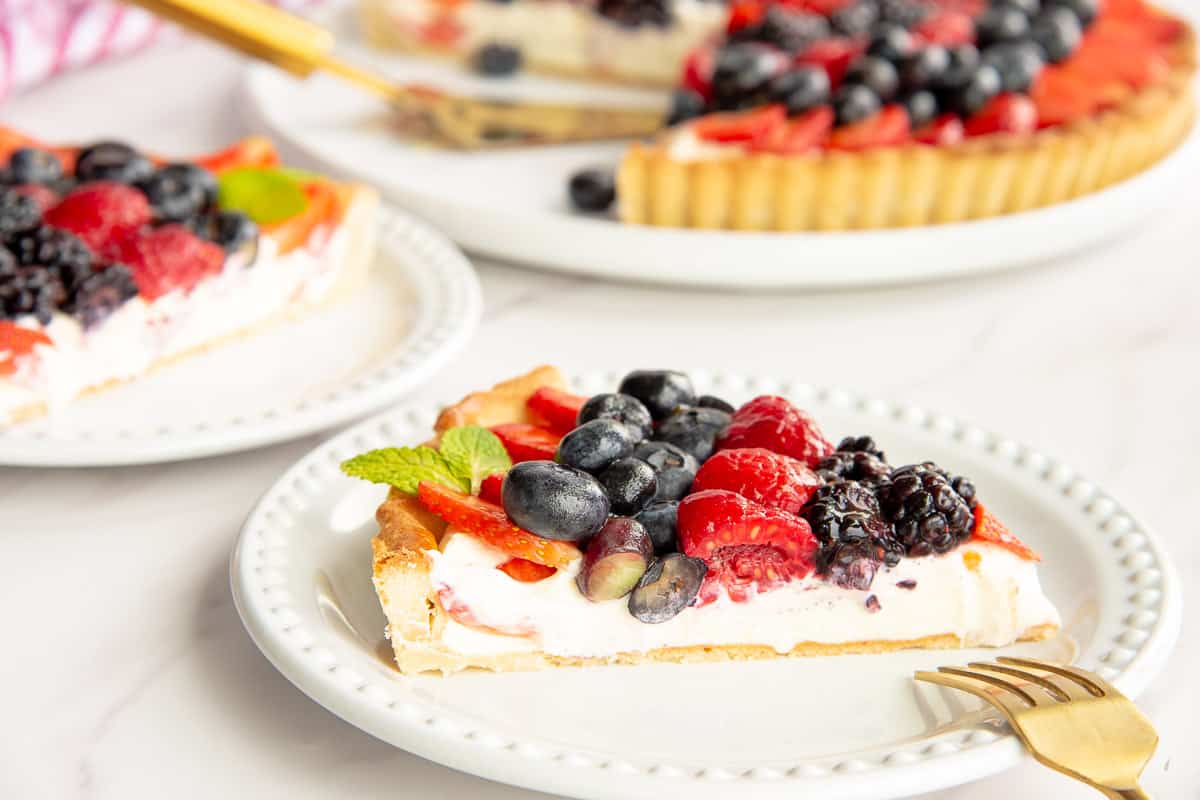
This Mixed Berry Mascarpone Tart has a crisp, buttery almond shell filled with vanilla-flecked mascarpone cream and topped with ripe, sweet berries. It’s the perfect dessert to wow your family and friends since making and assembling it is so easy. My mixed berry tart is sure to become one of your favorite desserts which you’ll turn to time and again. It’s also a great dessert to serve at your next Juneteenth, Fourth of July, or Labor Day celebrations.
*This is an update from a post published in May 2017. I’ve updated the ghastly images and rambling article and added metric measurements to the recipe card.*
What Is a Mixed Berry Tart?
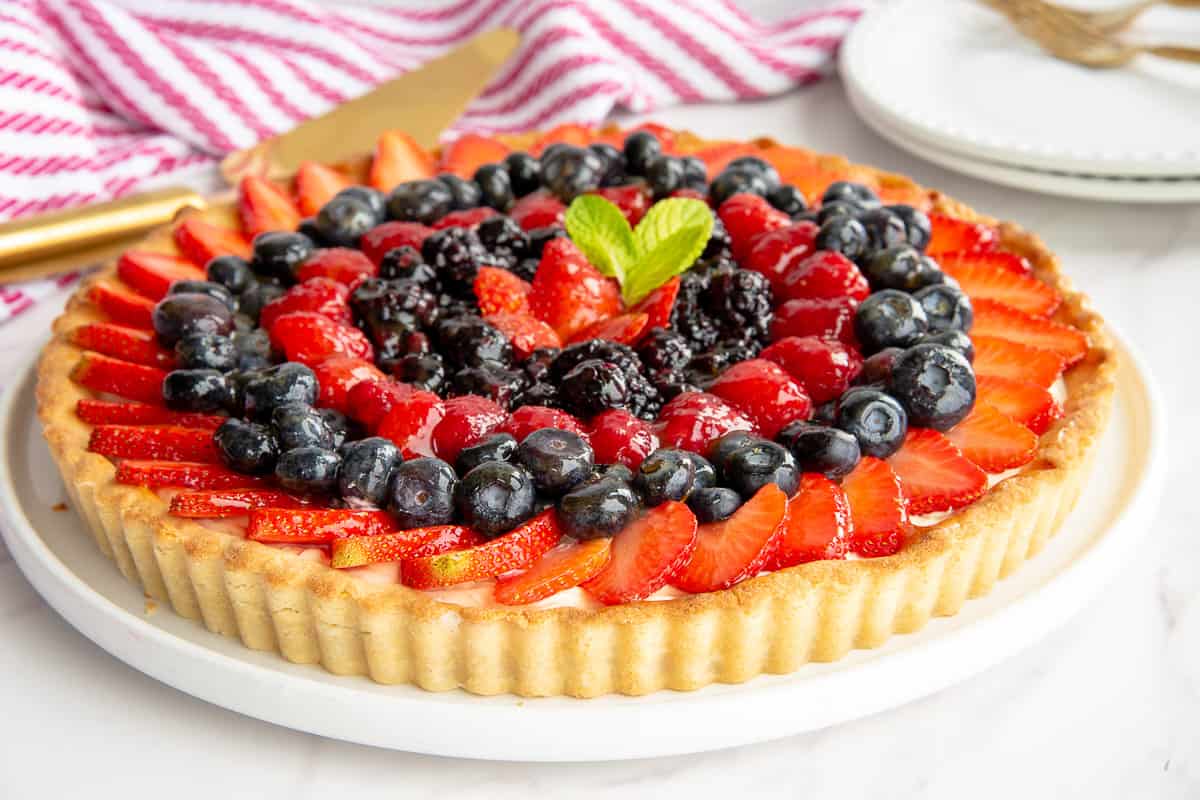
A mixed berry tart is a semi-baked dessert comprised of a blind-baked tart shell filled with pastry cream and topped with a variety of fresh berries. My version builds on a buttery almond short dough that melts in your mouth. The perfectly sweet mascarpone filling is scented with vanilla and lightened with a smidge of freshly whipped cream. My favorite berries top the mascarpone filling before an apricot glaze is brushed on to seal the freshness and add shine to the dessert.
What makes a tart different from a pie is the crust. Usually, tarts have shortbread crusts or short dough that is crumbly, whereas pie crusts are flaky. You’ll never find a tart with a top crust, but pies can come with both a top and bottom or just a bottom crust. Finally, the pan you use to bake your tart in varies from a pie plate in that it is shallower and often has a removable collar.
How Do I Make an Almond Tart Dough?
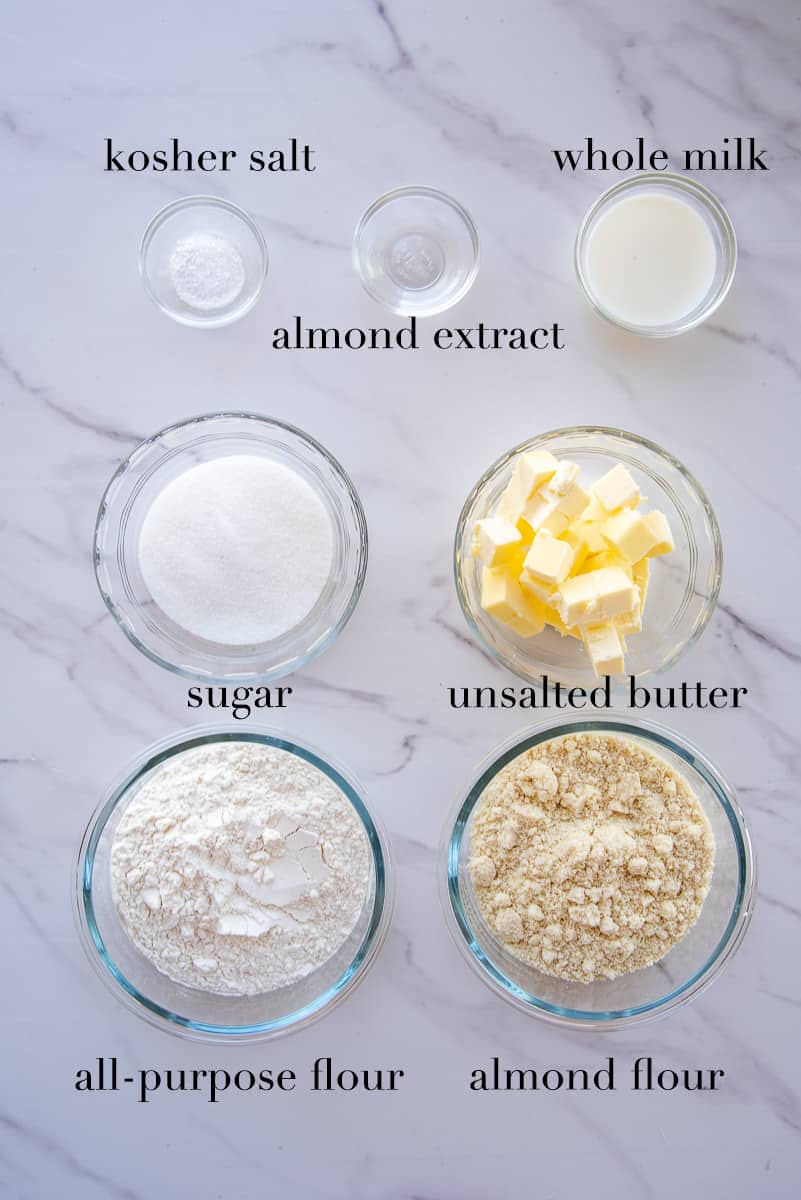
To make an almond tart dough, you need all-purpose flour, almond flour, granulated sugar, salt, cold, unsalted butter, whole milk, and pure almond extract.
It’s fast and easy to make the tart dough in a food processor, but you can also make it by hand.
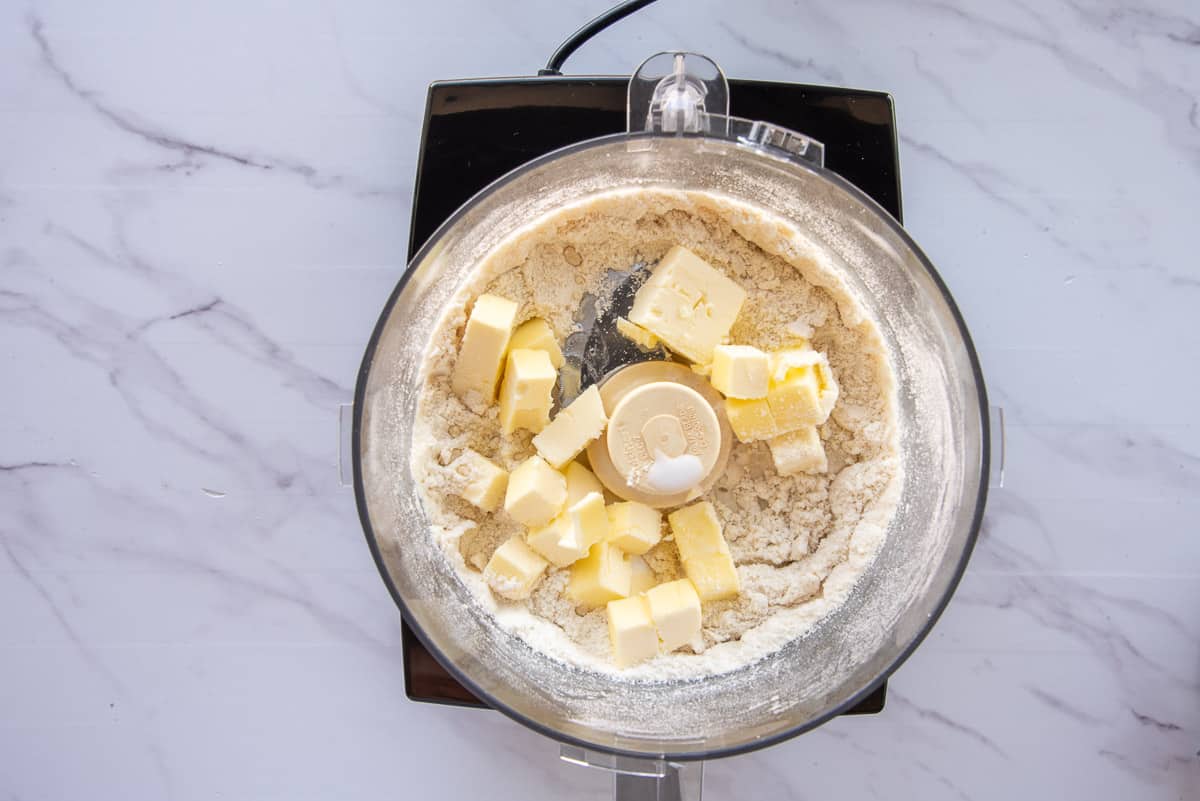
First, add the all-purpose flour, almond flour, granulated sugar, and salt to the bowl of a food processor fitted with a plastic or metal blade. Using a plastic blade when making dough in a food processor is best because it doesn’t heat up the dough. Pulse the dry ingredients together 5 to 6 times to combine them and break up any lumps.
Next, add the unsalted butter, milk, and almond extract to the bowl.
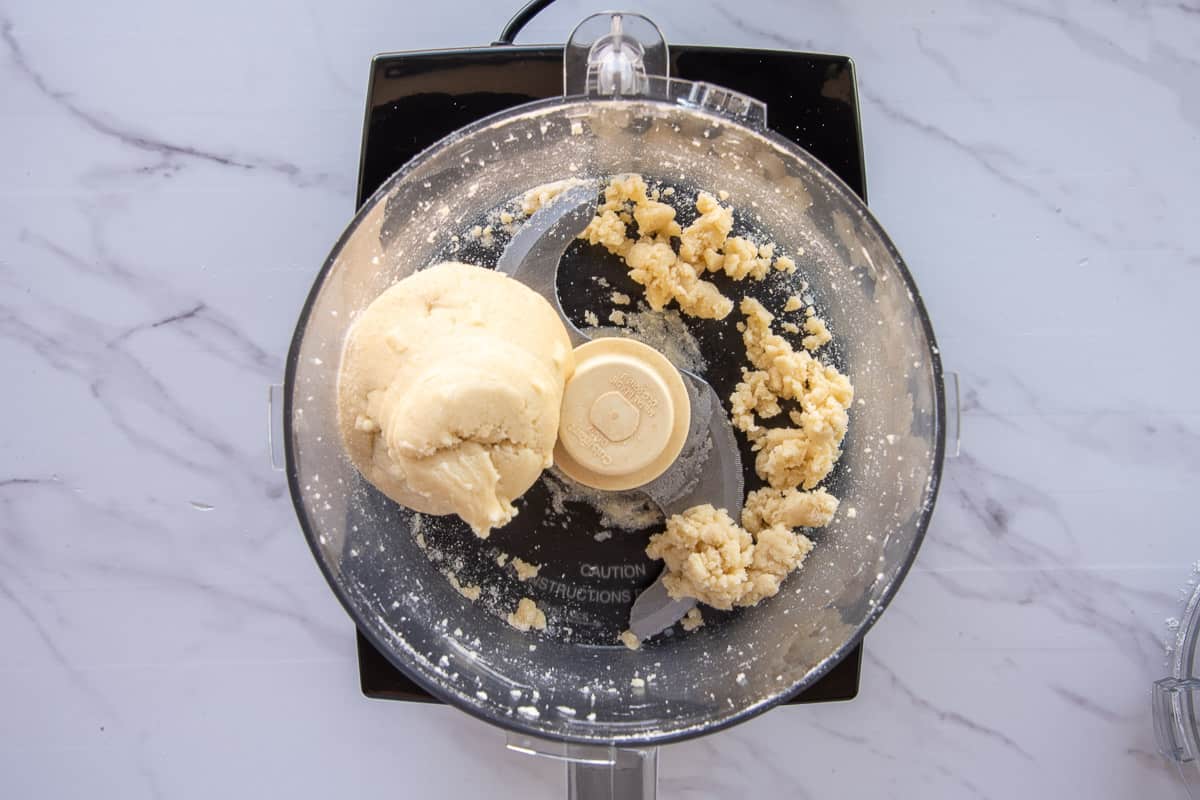
Pulse the tart dough ingredients together 9 or 10 times or until the dough forms a ball in the food processor.
How Far Ahead Can I Make the Tart Dough?
Remove the ball of tart dough from the food processor and place it onto a sheet of plastic wrap. Press it down to form it into a 5 to 6-inch disc and wrap it completely in plastic wrap.
Chill tart dough for at least 30 minutes before using it to give the gluten in the all-purpose flour ample time to relax. A relaxed tart dough won’t shrink back as it bakes, so resting it is important.
You can make your tart dough as far ahead as two days before using it. You can also freeze the tart dough for 2 months after wrapping it well in plastic wrap or aluminum foil.
Can I Use a Pie Dish if I Don’t Have a Tart Pan?
Tart shells are usually blind-baked and then filled. Blind baking means baking pastry dough without any filling, first covered with weights, then finishing it without the weights.
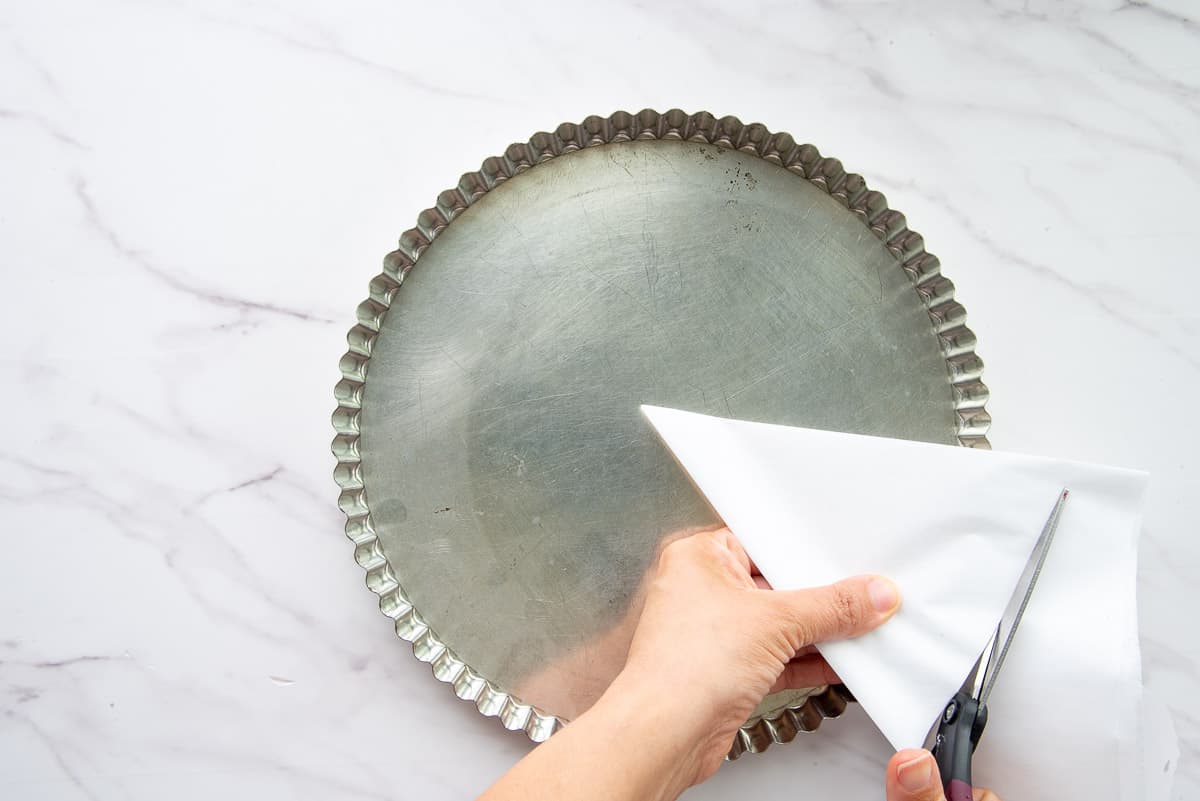
Before you blind-bake a tart dough, cut a piece of parchment paper into a circle that overlaps your tart pan by 2 to 3 inches.
You can use a pie tin for baking your tart if you don’t have a tart pan, but the results won’t be as good. Pie plates usually don’t have removable collars, so you’ll have to cut and lift the slices of tart out of the tin. Usually, because you’re using a short dough for the tart shell, you experience more breakage. The sides of the tart also won’t be as pretty as they are when you use a tart shell.
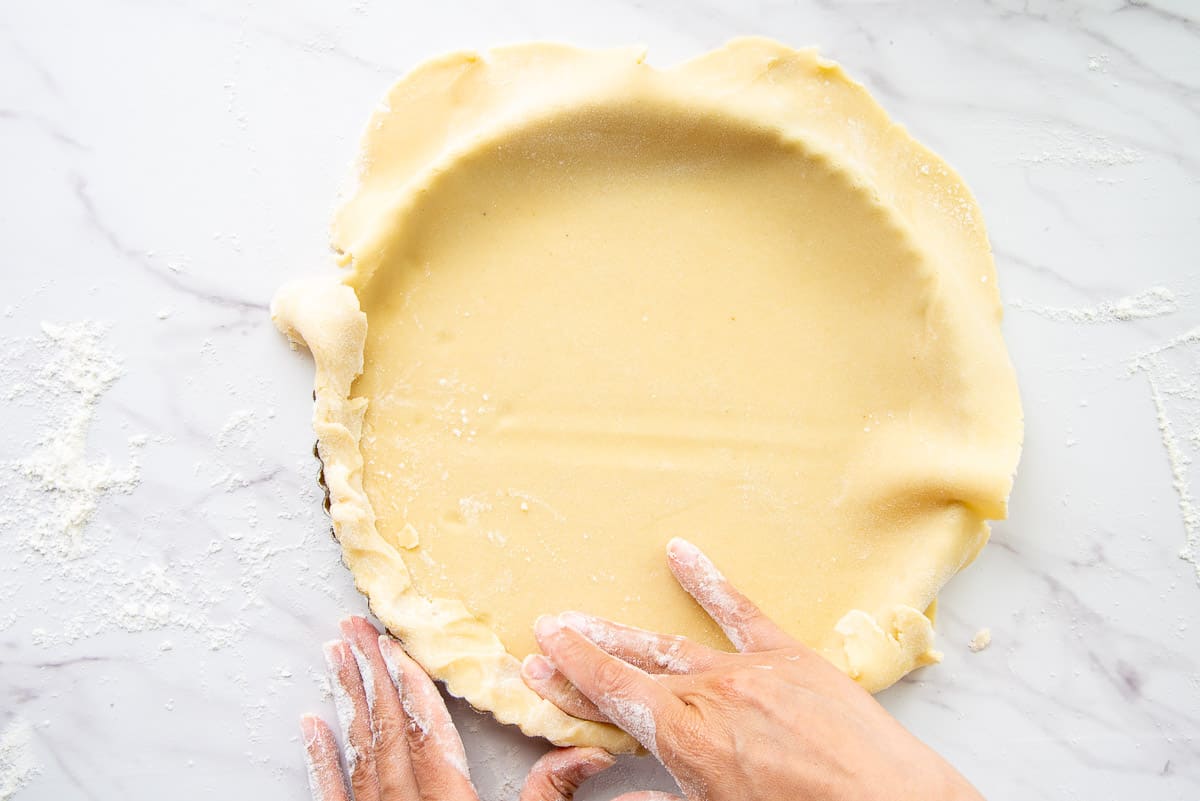
Knead the tart dough 2 or 3 times after chilling it and unwrapping it. Roll it out into an 11-inch circle on a lightly floured surface and carefully transfer it to the tart pan. Try not to let the tart dough drape over the edges of the tart pan because it’s sharp and will cut into the dough. Instead, lift the dough up and let it fall into the pan from the center out.
Press the dough into the bottom of the tart pan. Fold any excess tart dough towards the center of the pan to create a thick edge. Press this excess dough against the fluted edge of the tart pan to seal it and create the edge. I LOVE tart dough with a passion, so I leave no scraps behind.
How Long Do I Bake the Almond Short Dough?
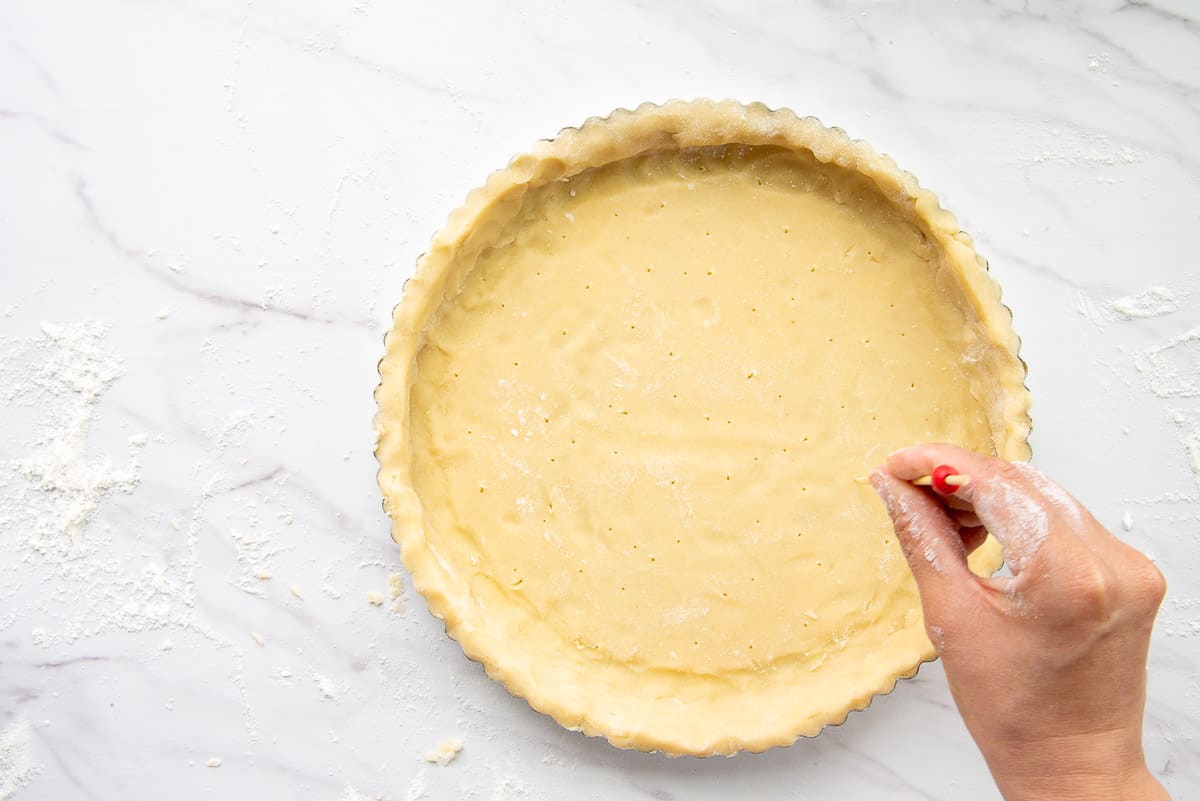
Before lining the shell to begin baking it, use a toothpick or a skewer to prick holes in the bottom of the dough. These holes allow steam, caused by moisture in the dough, to vent without puffing up the shell.
Chill your dough for 15 to 20 minutes while you preheat your oven to 400°F (204°C).
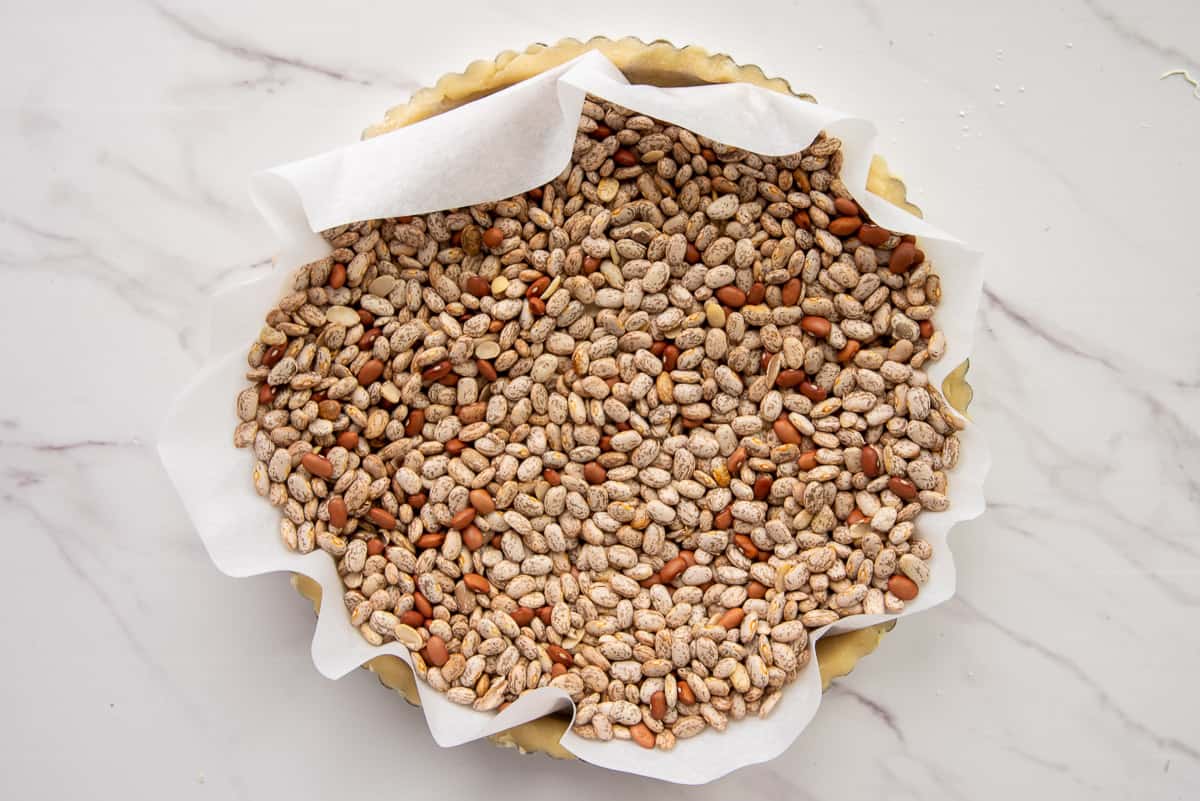
Carefully place the circle of parchment paper into the tart shell and fill it with dried beans. You can use dried beans, ceramic pie weights, or even sugar to weigh down your dough when blind-baking it. Always make sure to have parchment paper or aluminum foil as a barrier between the weights and the dough.
Bake the tart shell for 15 minutes with the weights. Remove the pan after 15 minutes and carefully lift the paper with the weights up and out of the shell. Return the pan to the oven and continue baking it for 10 more minutes or until it’s light brown and crisp. A fully baked tart shell helps prevent a soggy tart crust.
If your tart shell puffs up as it’s baking, after baking, remove it from the oven and see if the bubbles will deflate as it cools. Press down on any bubbles remaining in your tart shell after 5 minutes while the dough is still warm. The shell will crack and break open if you wait until it cools.
What Do I Need to Make the Mascarpone Filling For This Mixed Berry Tart?
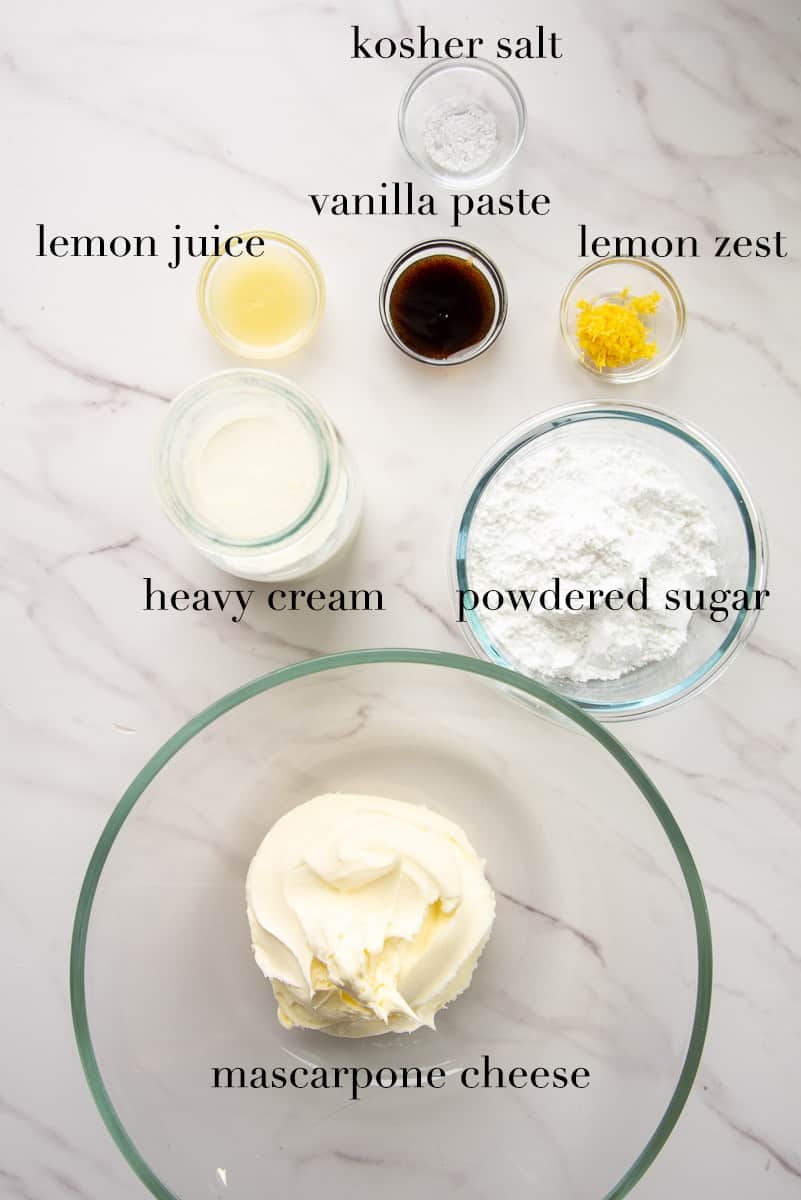
To make the mascarpone filling, you need mascarpone cheese, heavy cream, powdered sugar, the juice and zest of 1 lemon, vanilla bean paste, and kosher salt. You can replace the vanilla bean paste with vanilla extract if that’s all you have.
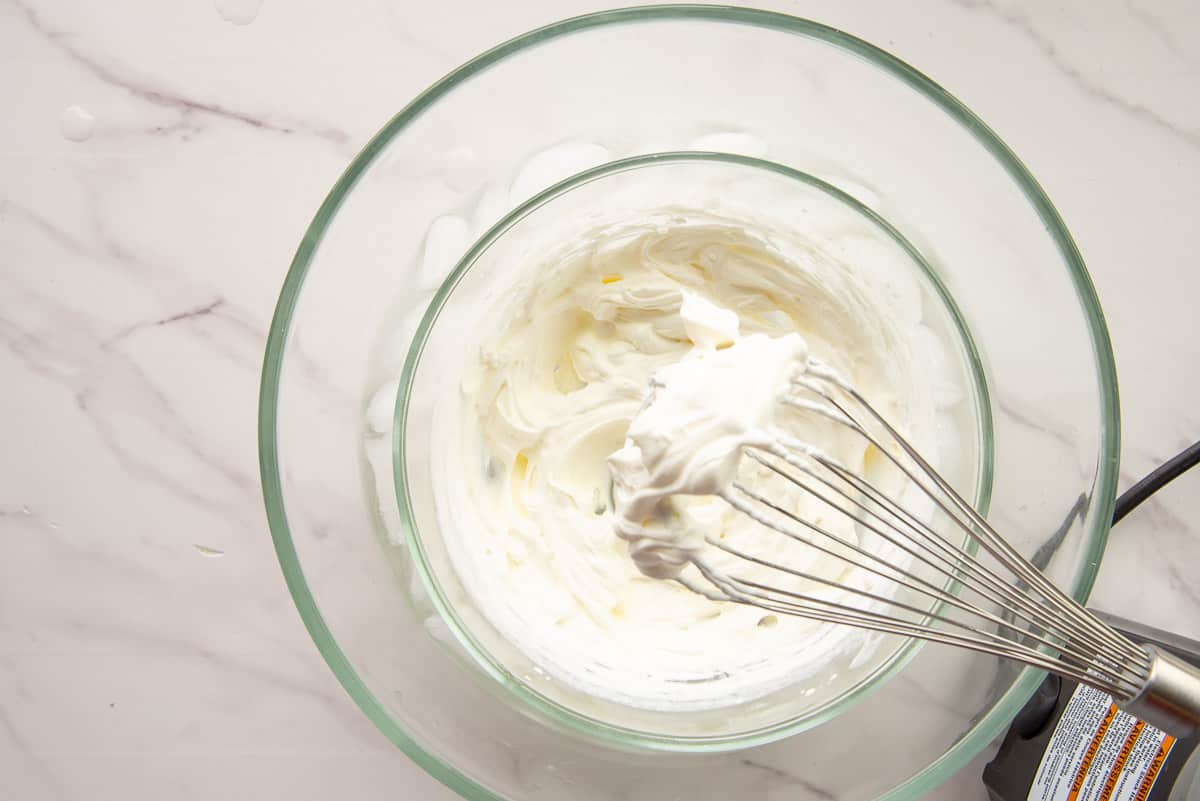
Whip the heavy cream to stiff peaks before blending the mascarpone filling.
Set a medium bowl filled with the heavy cream inside a large bowl filled with ice water. Whip the cream with the electric hand mixer on medium speed for 5 to 6 minutes or until stiff peaks form. The whipped cream will be firm and stick out from the whip when it’s lifted from the bowl.
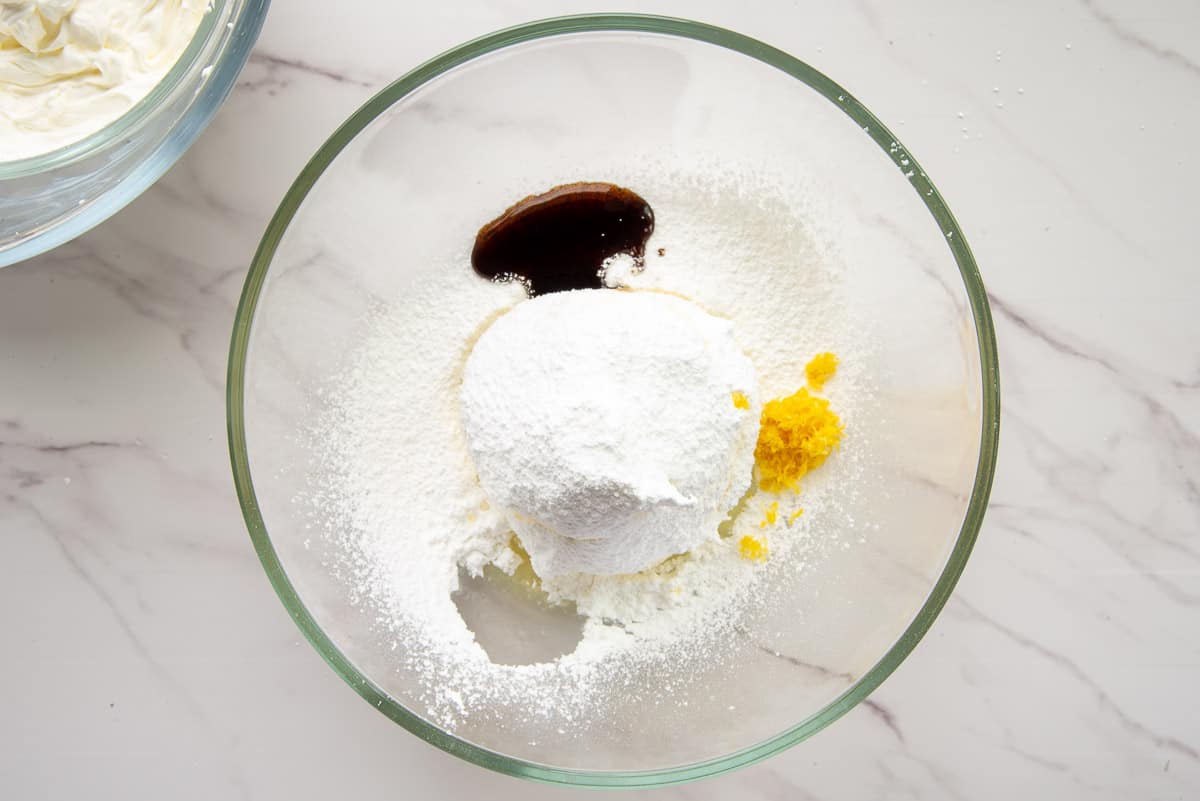
Next, prepare the mascarpone-vanilla filling base for your mixed berry tart. In a large bowl (I just dump and wipe out the bowl that held the ice water), add the cold mascarpone cheese, powdered sugar, lemon zest, a teaspoon of lemon juice, the vanilla bean paste, and the salt. You can replace the mascarpone with 2 packages of cream cheese. Make sure the cream cheese is at room temperature before using it. Unlike the mascarpone, cream cheese must be at room temperature to blend smoothly.
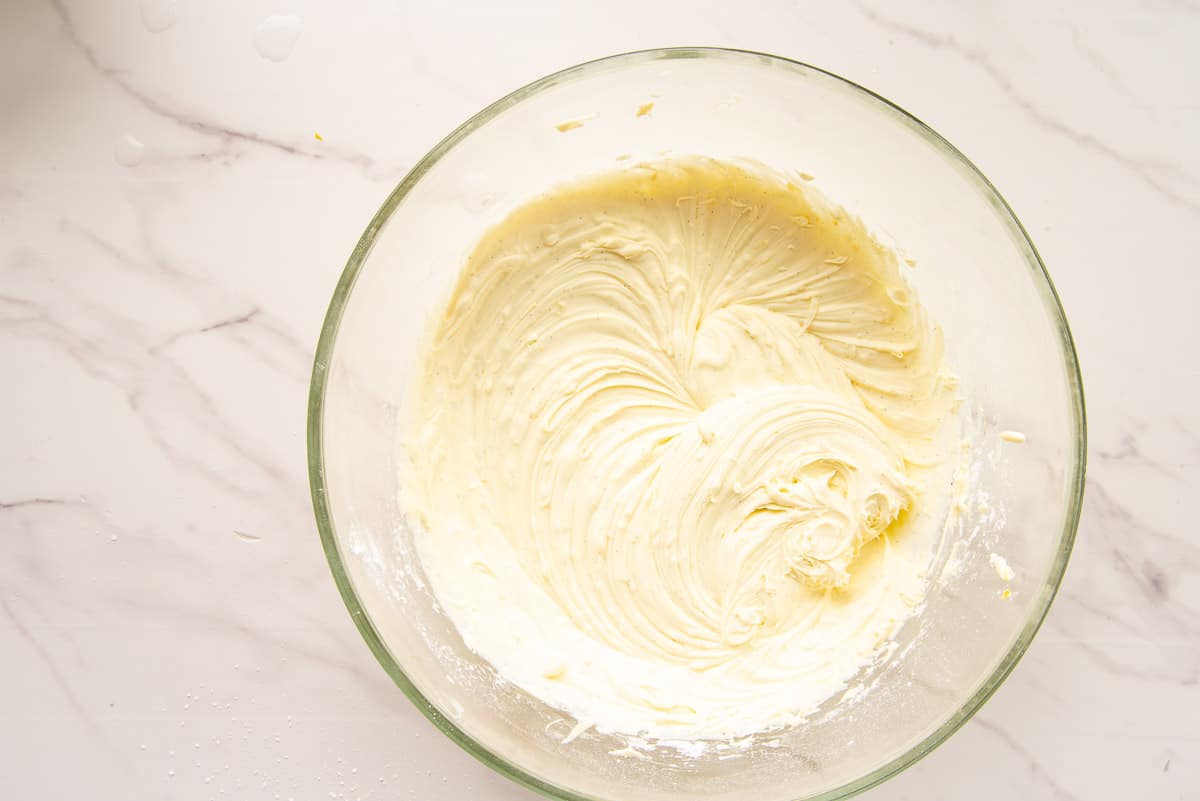
Blend the ingredients together on low speed with the electric mixer fitted with the beaters. Stop the mixer and scrape down the bowl and beaters once the mixture comes together. Return the mixer to the bowl and increase the mixing speed to medium-low. Blend the mascarpone-vanilla base until thick, creamy, and well combined.
How Far Ahead Can I Make the Mascarpone Filling for My Mixed Berry Tart?
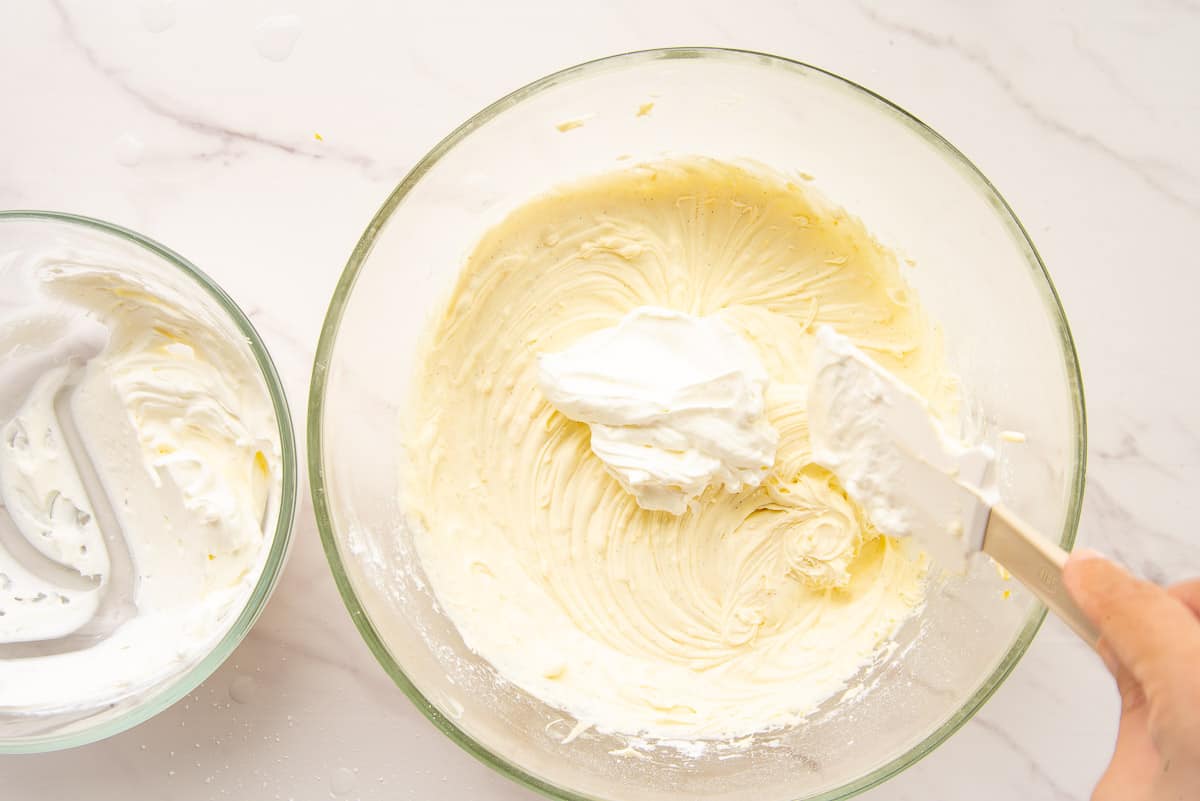
Use a rubber spatula to gently fold the whipped cream into the mascarpone filling. The mascarpone filling is ready to go into your cool tart shell.
You can make your tart filling 1 to 2 days ahead and store it in a covered container in the refrigerator before using it. Be sure to give the filling a good stir before using it.
If you’re looking for another filling to use, this Meyer Lemon Curd is a great alternative.
What Kind of Berries Do I Use For My Mixed Berry Tart?
I like to use a variety of fresh fruit for my mixed berry tart. Fresh blueberries, blackberries, raspberries, and strawberries are the most common berries to use on this tart. You can use all four or just your favorites for your tart.
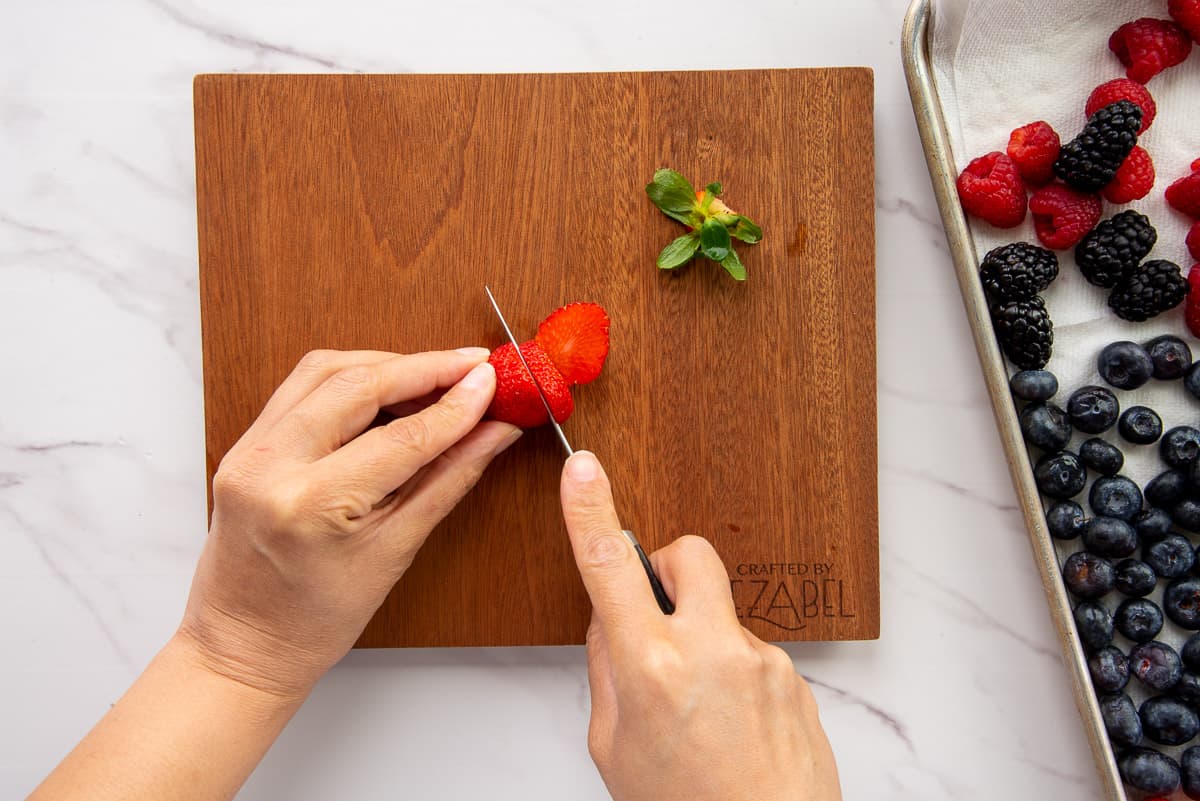
Prep the berries by slicing them into bite-sized pieces or slices. Check out this cute cutting board I bought from my friend in Philadelphia! If you’re ever in Philly, stop by Jezabel’s Empanadas and pick up a few empanadas and a board. Jezabel makes them all!
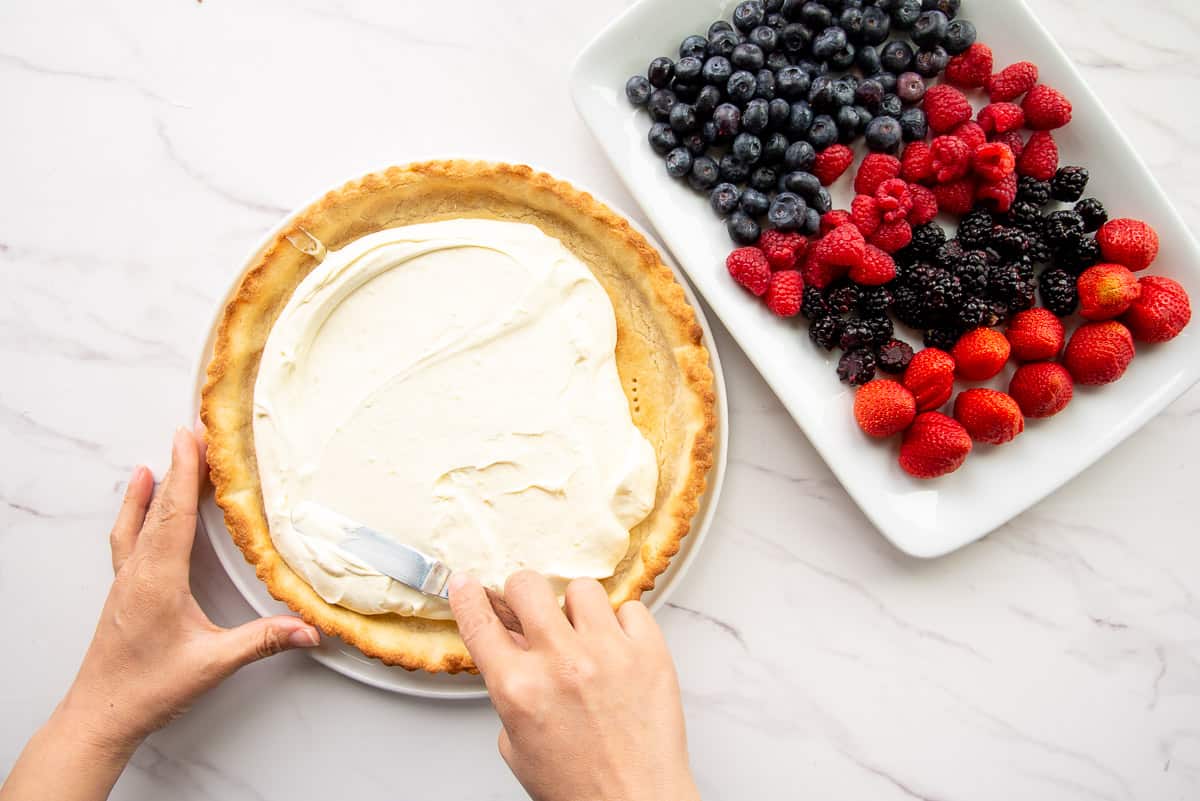
Scrape the mascarpone filling into the cooled tart shell. Use an offset spatula or the back of a spoon to smooth the filling into the tart shell. Next, arrange the fresh berries in a decorative design on top of the smooth filling.
Once you’ve tried this traditional tart recipe, get creative with your fruits. Top your mascarpone filling with your favorite fruits and make it your own. The best way to decorate your tarts is with an assortment of colorful fruit. I like using fresh mango, kiwi, mandarin oranges, or cherries whenever I want to switch things up.
How Do I Keep the Mixed Berry Tart Looking Fresh?
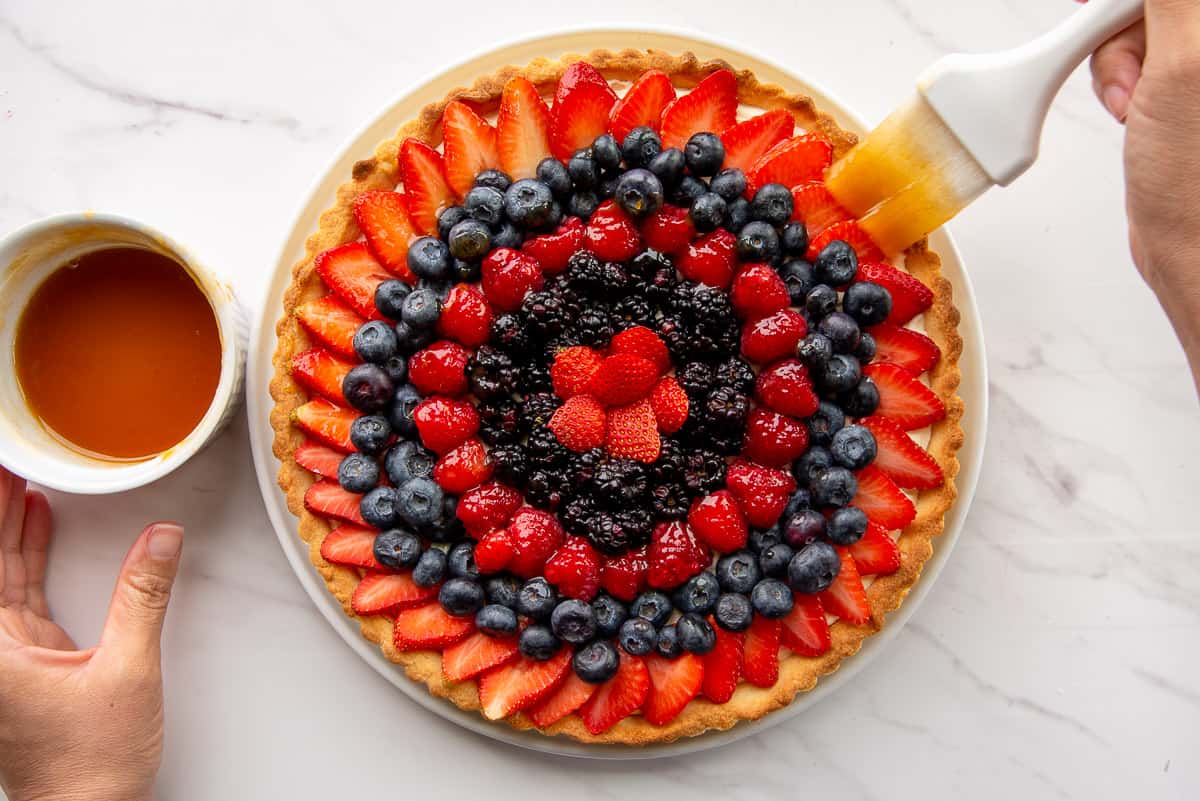
The secret to making those glossy tarts you see in the bakery is a fruit glaze. A fruit glaze is a mixture of fruit jam or jelly and a little water, sometimes with a little lemon juice, melted together to form a syrup. The syrup is brushed on top of fruit tarts to give them a glassy finish. Fruit glazes also protect the berries from drying out and shriveling up in the chilly air of the refrigerator.
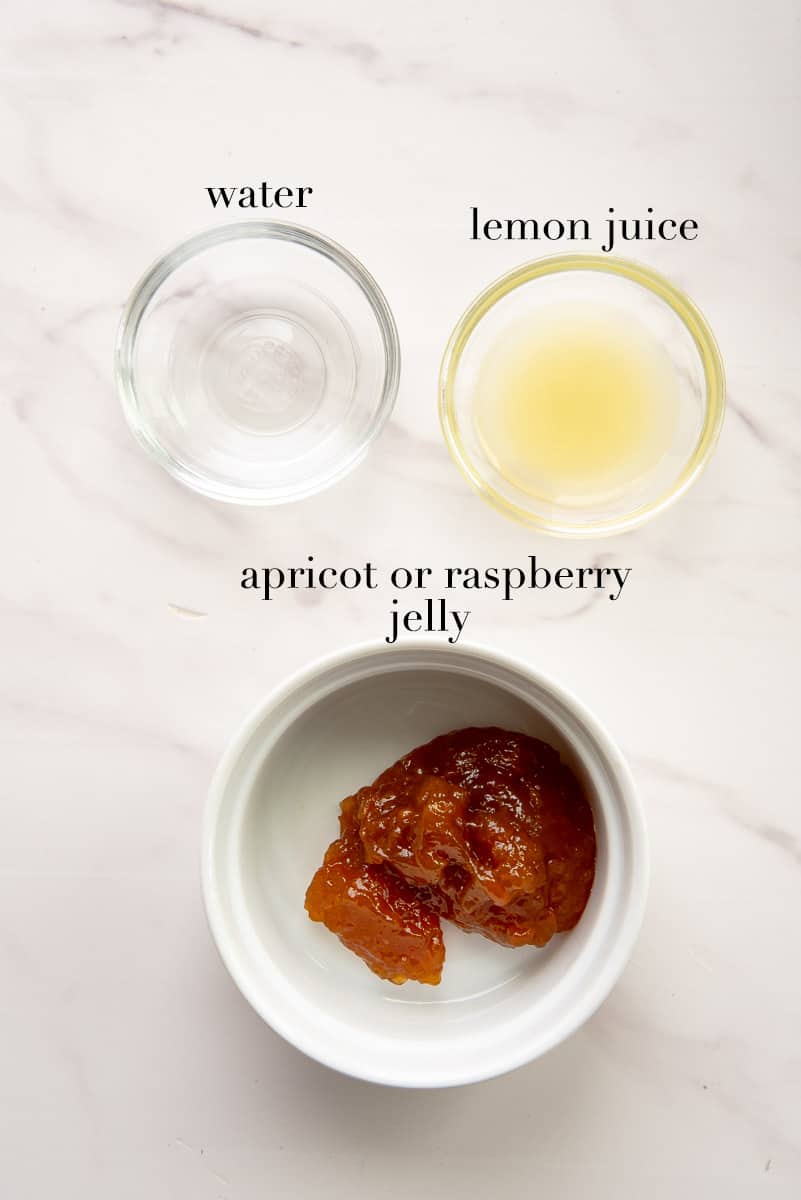
To make a fruit glaze, you need apricot or raspberry jelly, water, and lemon juice. It’s important to use fruit jam or jelly, not preserves, so you don’t have to strain it later. Jam is usually strained, whereas preserves have the whole fruit and will add another step to making a fruit glaze.
Heat these together in a small bowl in the microwave for 30 seconds. Stir the mixture to combine the ingredients, then return it to the microwave. Microwave it for another 15 seconds and stir once more.
Allow the glaze to cool to just above body temperature, then use a pastry brush to brush it over the fruit topping.
How Do I Serve This Mixed Berry Tart?
The mixed berry tart is ready to serve after topping it with the berries, but glazing is recommended.
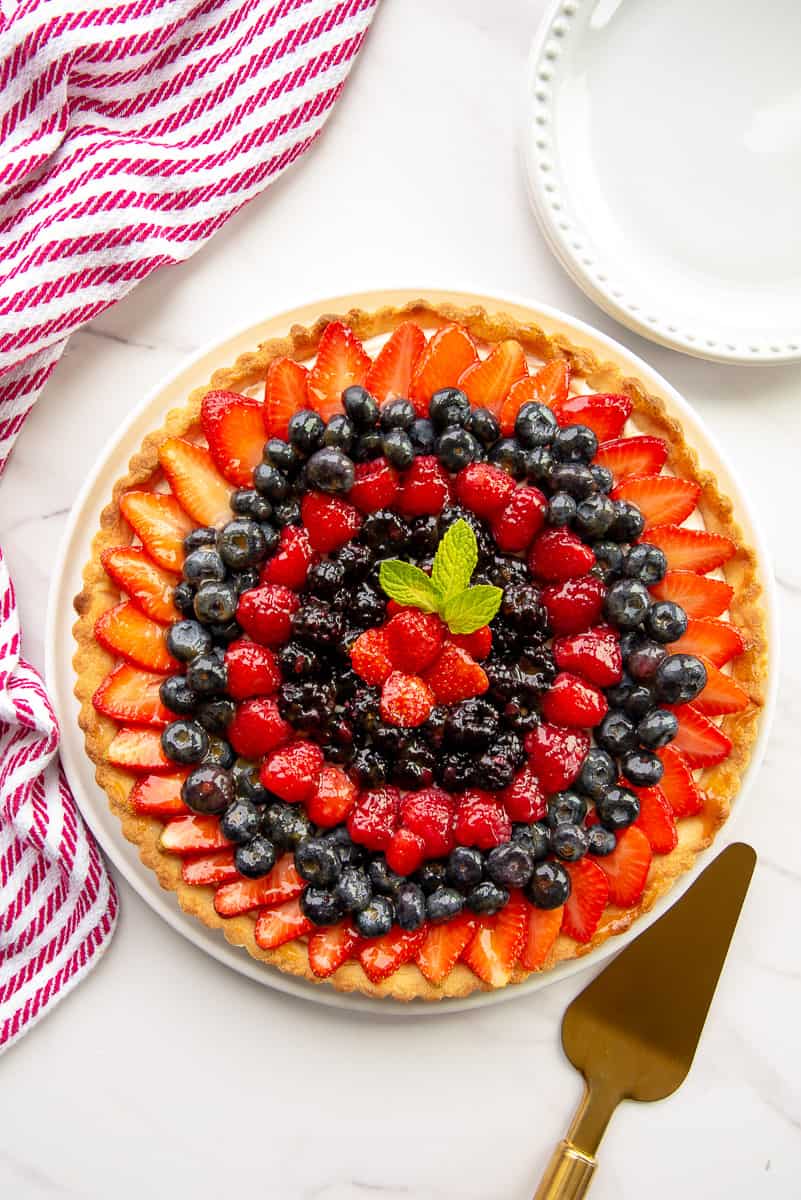
Slice and serve the fruit tart and serve it on its own or with a garnish of fresh mint sprigs.
How Do I Store Leftover Mixed Berry Tart?
To store leftover mixed berry tart, press a piece of wax paper or parchment against the exposed interior. This keeps the filling from becoming gummy in the refrigerator. You can store fruit tart, lightly covered, in the refrigerator for up to 3 days.
When serving a fruit tart, cut the slices you wish to serve and return the covered tart to the refrigerator immediately. This will prolong the life of your fruit tart.
Can I Freeze My Mixed Berry Tart?
You can freeze a mixed berry tart for up to 2 months. Wrap it in plastic wrap and aluminum foil or transfer it to a freezer-safe container. To thaw, put the mixed berry tart in the refrigerator overnight and serve as normal. The berries will leak slightly upon thawing.
If you’re looking for a unique fruit dessert, look no further than this Mixed Berry Tart with Mascarpone Filling. All of the components of this dessert come together to create a recipe that will satisfy any sweet tooth. It’ll be the star of any event, be they summer parties, birthday parties, baby showers, bridal showers, or even a mother’s day celebration.
Whatever event you serve it at- even if it’s just for Sunday night dessert- be sure to let me know what you think of it in the comment below. Don’t forget to pin and share it, too!
Mixed Berry Tart with Mascarpone Filling
at Sense & EdibilityEquipment
- 9 1/2-inch tart shell
- rolling pin
- electric hand mixer
Ingredients
For the Almond Tart Dough
- 1 cup (130 grams) all-purpose flour plus more for rolling out dough
- 2/3 cup (60 grams) almond flour
- 1/3 cup (65 grams) granulated sugar
- 1/4 teaspoon kosher salt optional
- 1/2 cup (1 stick or 113 grams) unsalted butter sliced and very cold
- 2 tablespoons (30 milliliters) whole milk or water
- 1 teaspoon (5 milliliters) almond extract
For the Mascarpone-Vanilla Filling
- 1/2 cup (120 milliliters) heavy cream cold
- 8 ounces (452 grams) mascarpone cheese cold
- 1/2 cup (65 grams) powdered sugar sifted
- 1 tablespoon (13 grams) vanilla bean paste or 1 tablespoon vanilla extract
- 1 medium lemon juiced and zested (juice divided)
- 1/8 teaspoon kosher salt optional
For the Mixed Berry Topping
- 1/2 pint blackberries rinsed, dried, and large berries cut in half across the width of the berries
- 1/2 pint blueberries rinsed, dried and stems removed
- 1/2 pint raspberries rinsed and dried
- 1 pint strawberries rinse, dried, hulled, and thinly sliced
Fruit Glaze (optional):
- 1/2 cup (170 grams) apricot jam or jelly
- 2 tablespoons (30 milliliters) water
Optional Garnish
- fresh mint sprigs
Instructions
Make the Almond Tart Dough
- Add the all-purpose flour, almond flour, granulated sugar, and salt to the bowl of a food processor fitted with a plastic or metal blade. Pulse the dry ingredients together 5 to 6 times to combine them and break up any lumps.
- Next, add the unsalted butter, milk, and almond extract to the bowl.Pulse the tart dough ingredients together 9 or 10 times or until the dough forms a ball in the food processor.
- To mix the dough by hand: stir together the dry ingredients using your hand. Add the butter to the bowl and use your fingers to pinch it into the dry ingredients until the mixture resembles a coarse meal.Add the milk and almond extract to the bowl and knead until the dough comes together.
Chill the Almond Tart Dough
- Remove the ball of tart dough from the food processor and place it onto a sheet of plastic wrap. Press it down to form it into a 5 to 6-inch disc and wrap it completely in plastic wrap.Chill tart dough for at least 30 minutes before using it to give the gluten in the all-purpose flour ample time to relax.
Roll Out the Tart Dough
- Before you blind-bake a tart dough, cut a piece of parchment paper into a circle that overlaps your tart pan by 2 to 3 inches. Knead the tart dough 2 or 3 times after chilling it and unwrapping it. Roll it out into an 11-inch circle on a lightly floured surface and carefully transfer it to the tart pan. Try not to let the tart dough drape over the edges of the tart pan because it's sharp and will cut into the dough. Instead, lift the dough up and let it fall into the pan from the center out.
- Press the dough into the bottom of the tart pan. Fold any excess tart dough towards the center of the pan to create a thick edge. Press this excess dough against the fluted edge of the tart pan to seal it and create the edge.
- Use a toothpick or a skewer to prick holes in the bottom of the dough. The holes allow steam, caused by moisture in the dough, to vent without puffing up the shell. Chill your dough for 15 to 20 minutes while you preheat your oven to 400°F (204°C).
Bake the Tart Dough
- Carefully place the circle of parchment paper into the tart shell and fill it with dried beans. Bake the tart shell for 15 minutes with the weights.
- Remove the pan from the oven after 15 minutes and carefully lift the paper with the weights up and out of the shell. Return the pan to the oven and continue baking it for 10 more minutes or until it's light brown and crisp. Remove the pan from the oven and allow the tart shell to cool for 15 minutes. After 15 minutes, carefully remove the collar of the pan by lifting up the center plate. Allow the tart shell to cool completely.
Make the Mascarpone-Vanilla Filling
- Set a medium bowl filled with the heavy cream inside a large bowl filled with ice water. Whip the cream with the electric hand mixer on medium speed for 5 to 6 minutes or until stiff peaks form. The whipped cream will be firm and stick out from the whip when it's lifted from the bowl.
- To a large bowl, add the cold mascarpone cheese, powdered sugar, lemon zest, 1 teaspoon of lemon juice, the vanilla bean paste, and the salt. Blend the ingredients together on low speed with the electric mixer fitted with the beaters. Stop the mixer and scrape down the bowl and beaters once the mixture comes together.
- Return the mixer to the bowl and increase the mixing speed to medium-low. Blend the mascarpone-vanilla base until thick, creamy, and well combined. Use a rubber spatula to gently fold the whipped cream into the mascarpone filling.
Fill the Tart Shell and Decorate
- Scrape the mascarpone filling into the cooled tart shell. Use an offset spatula or the back of a spoon to smooth the filling into the tart shell. Next, arrange the fresh berries in a decorative design on top of the smooth filling.
Make the Fruit Glaze, Then Glaze the Mixed Berry Tart
- Heat the apricot jam, water, and 1 teaspoon of the lemon juice together in a small bowl in the microwave for 30 seconds. Stir the mixture to combine the ingredients, then return it to the microwave. Microwave it for another 15 seconds and stir once more.
- Allow the glaze to cool to just above body temperature, then use a pastry brush to brush it over the fruit topping. Slice and serve the fruit tart and serve it on its own or with a garnish of fresh mint sprigs.
Notes
Swaps and Substitutions:
- Replace the apricot jam with raspberry or blueberry jam or jelly.
- You can use a pie tin for baking your tart if you don't have a tart pan, but the results won't be as good.
- You can replace the mascarpone with 2 4-ounce packages of cream cheese.
- Use any variety of colorful fruits to top your tart with.
Tips and Techniques:
- You can use dried beans, ceramic pie weights, or even sugar to weigh down your dough when blind-baking it. Always make sure to have parchment paper or aluminum foil as a barrier between the weights and the dough.
- If your tart shell puffs up as it's baking, after baking, remove it from the oven and see if the bubbles will deflate as it cools. Press down any bubble that remain after 5 minutes while the dough is still warm. The shell will crack and break open if you wait until it cools.
- If you're using cream cheese instead of mascarpone, make sure it is at room temperature before using it. Unlike the mascarpone, cream cheese must be at room temperature to blend smoothly.
- It's important to use fruit jam or jelly, not preserves, for your fruit glaze so you don't have to strain it later.
- The mixed berry tart is ready to serve after topping it with the berries, but glazing is recommended.
- To prolong the life of your tart: cut the slices you wish to serve and return the covered tart to the refrigerator immediately.
Make-Ahead Instructions:
- You can make your tart dough as far ahead as two days before using it. You can also freeze the tart dough for 2 months after wrapping it well in plastic wrap or aluminum foil.
- Bake and wrap your cooled tart shell in plastic wrap up to 2 days ahead of filling it. You can also freeze a baked tart shell for 2 months.
- You can make your tart filling 1 to 2 days ahead and store it in a covered container in the refrigerator before using it. Be sure to give the filling a good stir before using it.
Storage Instructions:
- To store leftover mixed berry tart: press a piece of wax paper or parchment against the exposed interior. This keeps the filling from becoming gummy in the refrigerator.
- Store fruit tart, lightly covered, in the refrigerator for up to 3 days.
Freezing Instructions:
- Wrap the tart in plastic wrap and aluminum foil or transfer it to a freezer-safe container.
- Freeze the mixed berry tart for up to 2 months.
- To thaw: put the mixed berry tart in the refrigerator overnight and serve as normal. Note: The berries will leak slightly upon thawing.





This recipe was so easy to follow it felt like you were holding my hand! Took the tart to my friend’s dinner party and it was a big hit!
So glad to know this, Jazz!
Love your food blog. So many great recipes. Now I’m definitely following along
I’m glad to have you on this journey with me, Erika!
It looks (and sounds) absolutely perfect! I might have to convince my mother to make this for a special occasion. Sundays are a special occasion, right?
I firmly believe they are, Kendel! I’ll help you convince her! 😉
Your tart looks a-ma-zing! A true piece of art. I will definitely try your recipe soon.
Thank you, Ana! I Hope you love it as much as I do!
Mascarpone Cream is definitely a miracle ingredient
For sure, Lauren!
This looks like such an amazing desert! Heavenly!
It IS pretty divine! Thanks, Lauren!