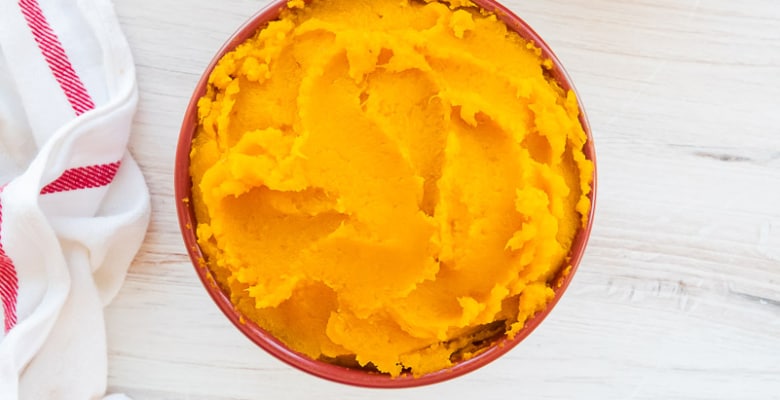
Pumpkin Puree is a single-ingredient recipe of pumpkin roasted until soft that’s mashed or pureed to a smooth consistency. Pumpkin puree is a must-add to your bread, muffins, desserts, and drinks, especially during the fall season.
*This post is an update from one I published in October 2018. It includes more relevant information, new pictures, and one less step.*

What is Pumpkin Puree?
Roast a pumpkin, then process it to a smooth pulp to create pumpkin puree. Pumpkin puree is the key ingredient in fall desserts, like this Pumpkin Cheesecake, or in comforting dishes like my Pumpkin Manicotti.
Where Do Pumpkins Originate?
Pumpkins come from Mexico and Central America and date back nearly a decamillennium. Additionally, Indigenous people of the Americas often incorporate pumpkins or gourds in their everyday cooking.
This isn’t a surprise to those of us who come from a Hispanic background. Pumpkins of all shapes, sizes, and colors are frequently used in our kitchen to add savory beans, soups, breakfast cereals, and desserts or baked goods.
A pumpkin is, botanically, a fruit. As a matter of fact, anything that grows from a flower is a fruit. The pumpkin flower becomes the actual fruit itself. After becoming a highly professional gardener this year, not really, I can say all of this with 100% certainty.
What’s great about the fruit is that you can use every part of the plant. The leaves, seeds, rind, and the flesh of the fruit is all edible and can be consumed.
Is Pumpkin Good For You?

Pumpkin is pretty healthy for you because it contains tons of beta-carotene, which means it’s a great food for your eyeballs.
Pumpkin is a great source of Vitamin A and Vitamin C. It’s also a good source of fiber. Pumpkin is cholesterol-free, fat-free, sodium-free, and pretty low in calories.
That’s pretty healthy, no?
Why Bother Making My Own Pumpkin Puree?
Have you ever gone into the grocery store looking for your can of pumpkin puree for a holiday pie, only to come away empty-handed? Yeah, that’s the number one reason.
But, even when you can find canned pumpkin, making homemade pumpkin puree is a great option if the price is too steep. Which, HELLO!?!? Have you seen the prices of groceries lately?
Not only that. Making your own pumpkin puree means you know what’s in it. You don’t have to check ingredient labels or worry about what other squashes are mixed in (yeah, it’s a thing).
Cutting and pureeing your own pumpkin at home reduces food waste because you can roast the seeds as a snack, use the flesh in many recipes, and compost the rest for your gardening.
When you roast your pumpkin puree, it allows you to control the amount of water in the puree, which also means you can make pumpkin puree that is thick or thin, concentrated or light in flavor.
Plus, it freezes beautifully for future use.
What Are the Best Pumpkins for Puree?
Even though you might be used to seeing the “as-big-as-your-head” pumpkins at the grocery store because they’re grainier in texture and are generally flavorless, those are best for carving jack-o-lanterns.
The best pumpkin varieties to make puree are Autumn Gold, Blue Doll, Blue or Golden Hubbard, Sweet Sugar Pie, or Sugar Pie pumpkins. They all have the profound flavor and creamy texture you’re looking for in pumpkin puree.
What Do I Need to Make Pumpkin Puree?

Equipment-wise, you need a sharp chef’s knife, cutting board, sheet pan, fork, food processor, or blender to make the actual puree.
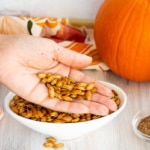
Start by cutting the pumpkin half lengthwise. Use a large, wide spoon to scrape out the guts and seeds. Don’t discard the seeds. Instead, wash them, roast them, and enjoy them as a snack.
Does Fresh Pumpkin Puree Taste the Same as Canned Pumpkin?

After you scrape the seeds and stringy innards from the pumpkin halves, flip them over onto a clean sheet pan, preferably one lined with a silicone baking mat.
Roast the pumpkin for 40 minutes at 425°F (218°C). Depending on how thick the flesh in the pumpkin is, the longer you will have to roast it. Thicker flesh requires longer roasting, but it shouldn’t take longer than 1 hour.
Both canned pumpkin and pumpkin puree made at home are the same product (pumpkin) unless you have a nefarious brand that sneaks other squash into their mix.
Canned pumpkin has a darker color and thicker texture than the pumpkin puree you make at home, but depending on how long you roast your homemade pumpkin puree, you can achieve the same flavor and depth of color in the homemade version.
Can I Use a Food Processor or Blender?

The pumpkin peel will begin to pull up from the flesh and this is when you know it’s soft enough to mash.
Use a pair of tongs or the tines of a fork to remove the rind after 40 minutes of roasting. Add the rind to your compost bin, or chuck it into the garbage.

I’m lazy, so I use a fork to mash the tender fruit to a pulp. You can also blend it super smooth in a food processor using the metal blade attachment. A blender will also work, but it requires more shifting around with a spoon or rubber spatula to rid the puree of the chunks.
How Do I Change the Flavor of Pumpkin Puree?

To create a deeper, more pronounced flavor in your pumpkin puree, decrease the oven temperature to 350°F (177°C).
Use an offset spatula to spread the mash into an even layer on the same baking mat you roasted the halves on earlier.

Roast the puree for 20 minutes, scooping it up and spreading it back into an even layer after the first 10 minutes of roasting.
This method helps evaporate more water from the puree than not doing it. Once it’s nice and thick, allow the pumpkin to cool completely at room temperature.
How Long Does Pumpkin Puree Last?

You can use the pumpkin right away in any recipe that calls for it, store it in an air-tight container in the fridge for 1 week, or transfer it to a freezer-safe storage container and store it for up to 6 months.
I always suggest freezing it if you don’t plan to use it within a few days so it doesn’t go to waste.
After freezing and thawing, the pumpkin may release some liquid. If this happens, simple strain it through cheesecloth set in a fine-mesh sieve to drain the excess liquid away.
Can I Use It Like I Use Canned?

This pumpkin puree is totally interchangeable with the canned stuff. You can use it exactly as called for in any recipe calling for canned puree.
Need more puree? Throw another pumpkin onto the sheet pan and make a double-batch. You might have to increase the second roasting (the drying and concentrating phase) to 40 minutes to evaporate enough water.
What Recipes Can I Use This Pumpkin Puree In?
You can use this pumpkin puree recipe to make any recipe, from sweet to savory. Here are a few of my favorites:
- Pumpkin Scones with Cinnamon-Maple Cream Cheese Glaze
- Spiced Pumpkin Muffins with Streusel Topping
- Fruit and Grain Pumpkin Bread
Try this Pumpkin Puree recipe for yourself. You’ll see how easy it is to supply yourself with everything you need for the season. Let me know what you think of it in the comments below, and remember to save it to your Pinterest boards and let me know what you made with it!
How to Make Pumpkin Puree
at Sense & EdibilityEquipment
- sheet pan
- silicone baking mat
- food processor or blender or fork
Ingredients
- 1 3 to 4 pound (1 to 1.3 to 1.8 kilograms) pie pumpkin
Instructions
- Preheat your oven to 425°F (218°C). Line a sheet pan with a silicone baking mat and set it aside.
Prep the Pumpkin for Roasting
- On a cutting board, use a chefs knife to remove the stem of the pumpkin, then pumpkin half lengthwise. Use a large, wide spoon to scrape out the stringy innards and seeds. You can discard the seeds or wash and roast them and enjoy them as a snack.
- After you scrape the seeds and stringy innards from the pumpkin halves, flip them over onto the prepared sheet pan.
Roast the Pumpkin Halves
- Roast the pumpkin halves for 40 minutes. Depending on how thick the flesh in the pumpkin is, the longer you will have to roast it.
- Once the peel begins to pull away from the bottom of the pumpkin halves, use a pair of tongs or the tines of a fork to remove the rind from the flesh. Compost or discard the rind.
Puree the Pumpkin
- Use a fork to mash the roasted pumpkin until smooth, or carefully transfer the soft pulp to a food processor fitted with a metal blade or to a blender. Vent the lid to avoid an explosion and puree the pumpkin until smooth.
Give the Pumpkin Puree More Flavor and Texture
- To create a deeper, more pronounced flavor in your pumpkin puree, decrease the oven temperature to 350°F (177°C).Use an offset spatula to spread the mash into an even layer on the same baking mat you roasted the halves on earlier.
- Roast the puree for 20 minutes, scooping it up and spreading it back into an even layer after the first 10 minutes of roasting.Once it's nice and thick, allow the pumpkin to cool completely at room temperature. Use this homemade pumpkin puree in any recipe calling for canned puree.
Notes
Swaps and Substitutions:
- Replace the (Sugar) Pie Pumpkin with Autumn Gold, Blue Doll, Blue or Golden Hubbard, Sweet Sugar Pie pumpkins.
- Avoid Jack-o-Lantern pumpkins. They don't have the right texture or flavor for this recipe.
Tips and Techniques:
- Thicker-fleshed pumpkins requires longer roasting, but it shouldn't take longer than 1 hour.
- Roasting the puree helps evaporate more water from the puree than not doing it.
- To make a double-batch: add one or two more pumpkins to 1 or 2 two sheet pans. Increase the second roasting (the drying and concentrating phase) to 40 minutes to evaporate the added water.
- After storage, some water may develop in the container, especially if you have frozen and thawed it. Simply strain it through a cheesecloth set inside a fine-mesh sieve to remove excess liquid.
Storage and Use:
- Store the cooled pumpkin puree in an air-tight container in the fridge for 1 week.
Freezing Instructions:
- Transfer the cooled puree to a freezer-safe storage container and store it for up to 6 months.
- Thaw it completely in the fridge overnight before using it in recipes.


Love how easy it was to make this puree! Definitely going to come in handy for the holidays!
It’s proved to be a useful addition to my repertoire, Evi.
This is the best recipe to make all of my favorite holiday foods! So many great tips and it’s easy!
Enjoy, Tristin!
This pumpkin puree is so versatile and perfect for the fall season. I’m already thinking of some recipes I can use this with.
Sounds like you’re in the right track, Moop!
So flavorful and so easy! Perfect for fall baking! Thanks for sharing your tips!
Anytime, Lori!
So many great things to use this is. Thanks! It really comes in handy before Thanksgiving!
You’re welcome, Lisa.