
Naturally, I set aside time to prepare these cannolis and, usually, that time spans a couple of days. They take time to prepare and since their separate components can be made up to three days in advance, that is how I prefer to tackle them.
Authentic-ish Cannolis
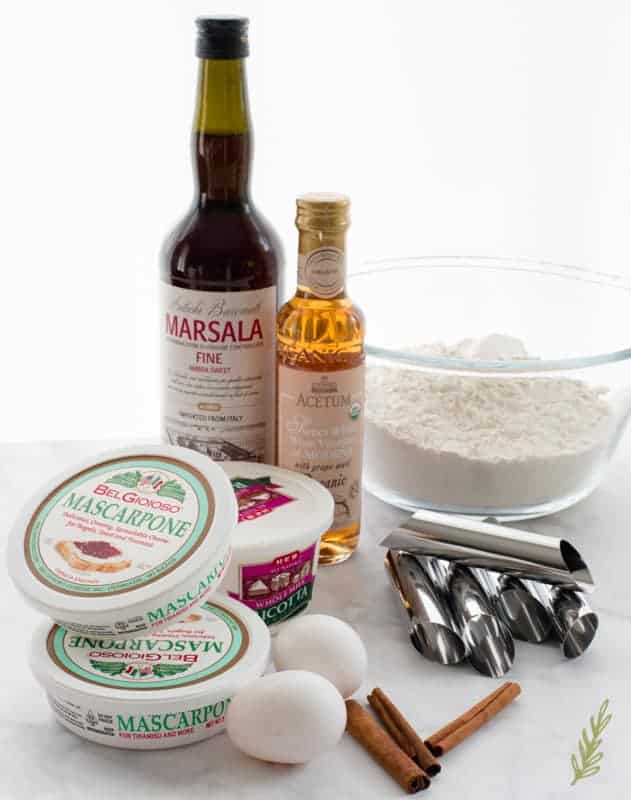
I tend to have a haughty attitude when it comes to the filling one uses in their cannoli. The last time I ordered one at an Italian restaurant, I almost spit it out into my napkin. It was so bad I sent it back. The filling was cream cheese. Ew. Cannoli filling should be ricotta, not cream cheese. I balance mine by mixing in mascarpone cheese. Still, no cream cheese should ever touch a cannoli. At least, that’s my opinion.
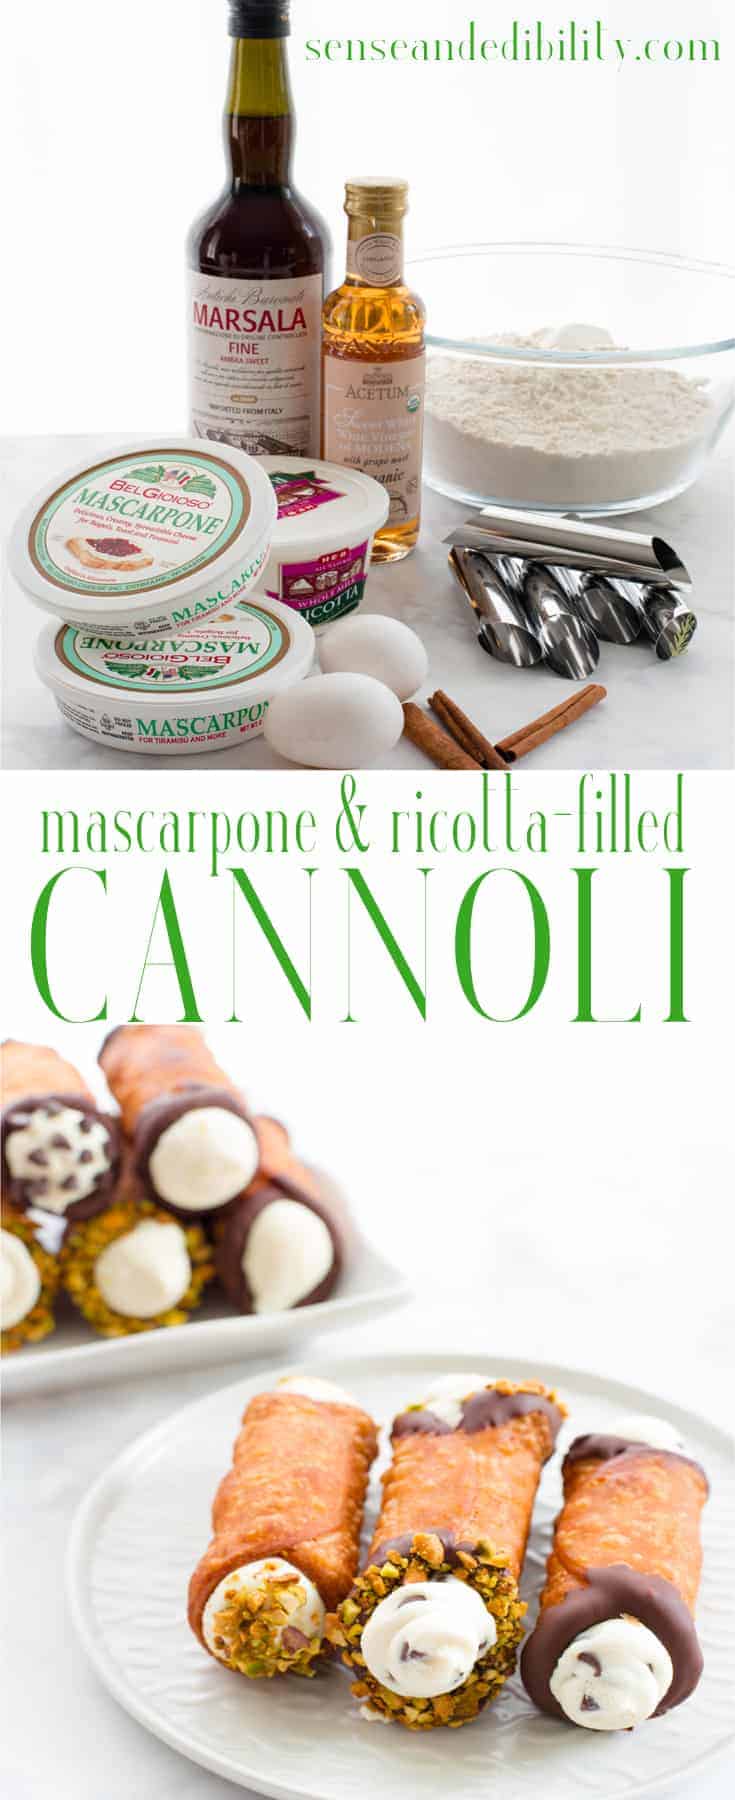
I use marsala wine and white wine vinegar to create the classic bubbly and crisp shell. The dough for the shell can be made up to forty-eight hours in advance and kept wrapped and refrigerated. After frying the shells, you can keep them an additional forty-eight hours (in a container) before filling. Additionally, the filling can be made twenty-four hours in advance. Besides the ricotta (whole milk) and mascarpone, I flavor the filling with a touch of lemon zest, sugar, and vanilla.
The variety of ways you can customize both the filling and the shells are a whole ‘nother animal- but, we’ll get to that later.
Starting the Dough (as Far as Forty-Eight Hours in Advance)
The best way to make cannolis (especially if you’re OCD about it and don’t want anyone else to help) is to break the process down into parts. Spread the prep over the course of two, or three, days. I do this every time I make cannolis and it works divinely.
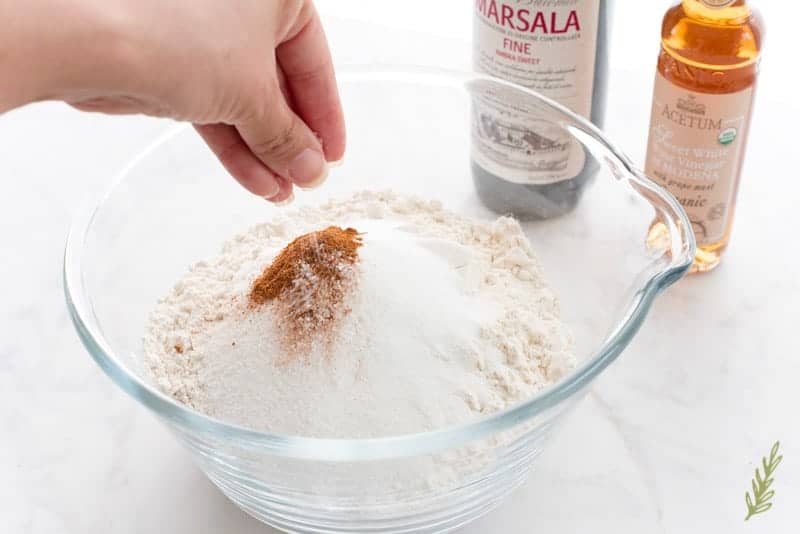
In a large mixing bowl combine your dry ingredients: the all-purpose flour, sugar, cinnamon, nutmeg, and salt and mix them together to blend everything evenly.
Finishing the Cannoli Dough
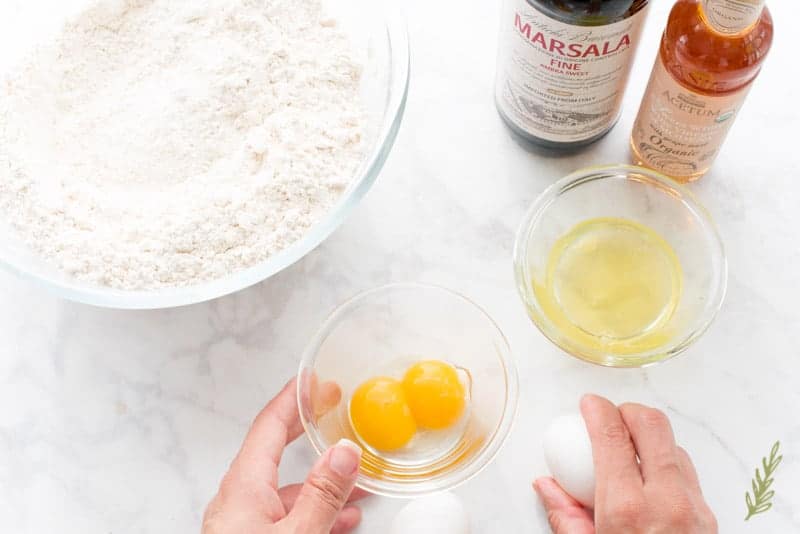
Separate your eggs into smaller prep bowls. Add the egg yolk to one of the bowls*. The solo (whisked) egg white will be used later to seal our cannoli shells before we fry them.
*don’t pay attention to my eggs here. I doubled this recipe (because we’re greedy) so my egg count is more.*
Set the bowl with the egg white to the side. And add the whole egg to your solitary yolk.
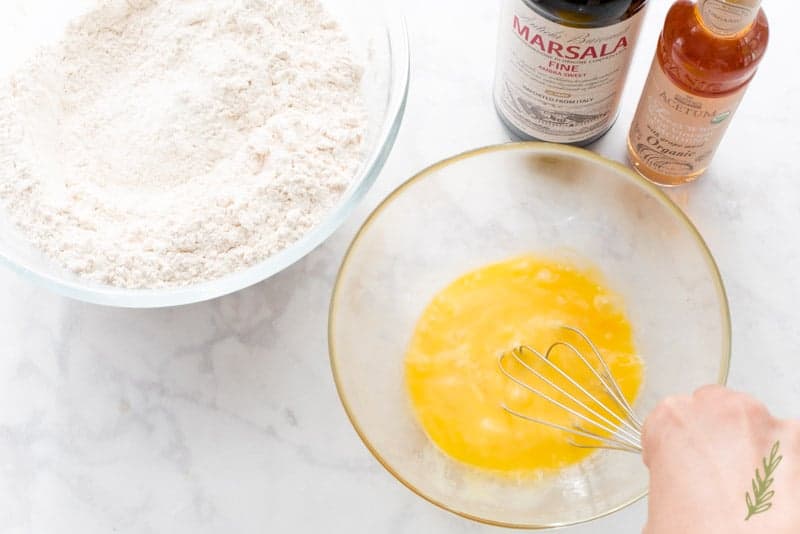
Whisk together the egg yolk and the whole egg until smooth.
Add a half-cup of the sweet marsala wine to the eggs. Don’t use dry marsala because it’ll make the shells taste boozier than they should. You should be able to find sweet marsala in most liquor stores.
Add one tablespoon of white wine vinegar. I’m using a sweet white wine vinegar, but if you can’t locate sweet, just use regular. In a pinch you can substitute regular distilled white vinegar, or apple cider vinegar.
Whisk all of this together to create a smooth egg mixture.
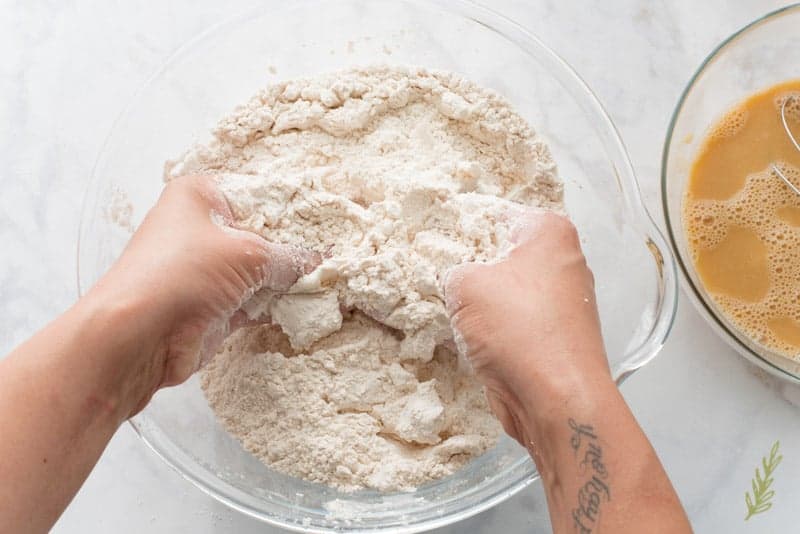
Use your fingers to cut the fat into the flour mixture. I use lard in my cannoli shells because it causes the dough to puff up beautifully- no, you can’t taste it, at all. But, if you prefer not to use pork products, you can use vegetable shortening instead. Pinch the fat into the flour to “cut it in”. It should look like a coarse cornmeal when you’ve finished.
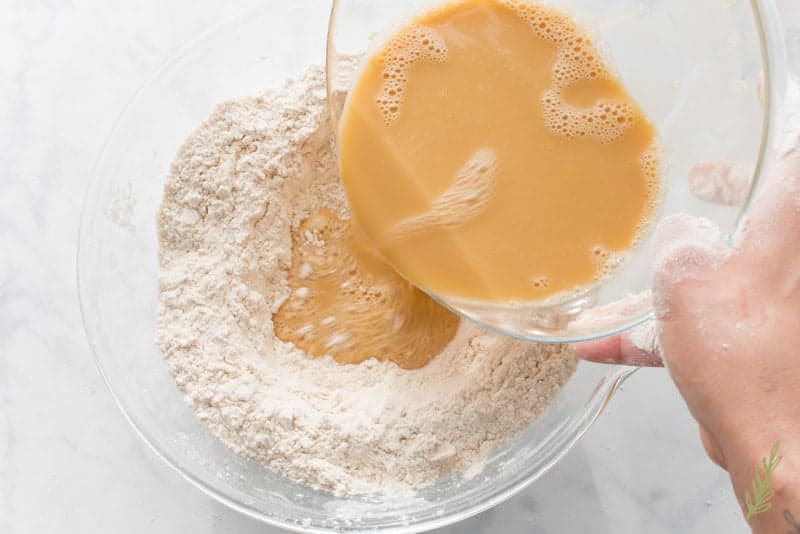
Create a well in the center of your flour/fat mixture. Add the egg mixture to the flour.
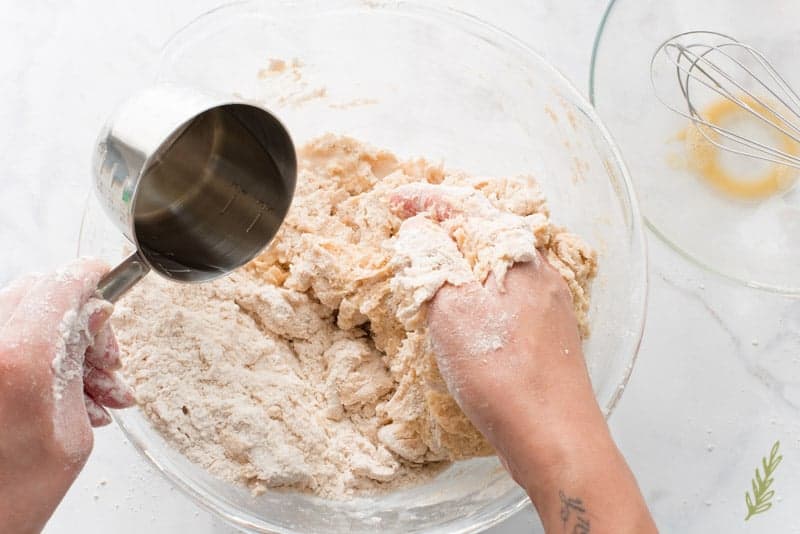
Use your fingers to fold the flour into the egg mixture. Your dough should begin coming together and will look shaggy.
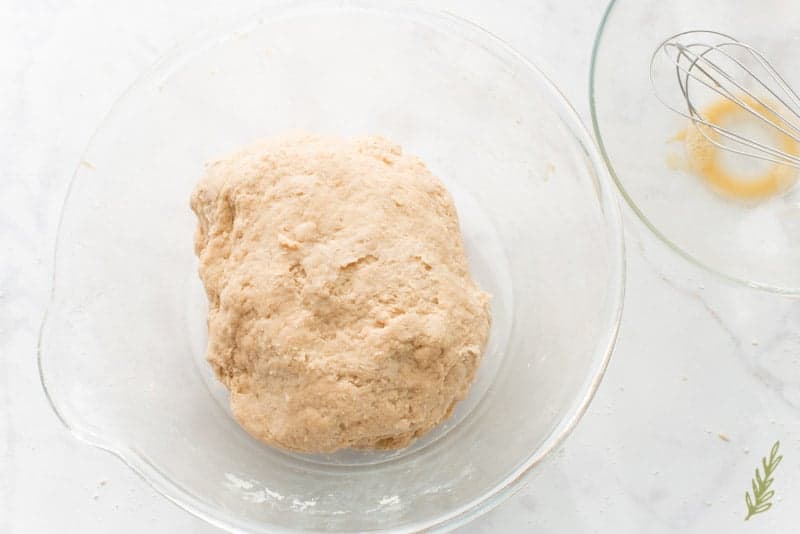
Add two tablespoons of water- you may need a little more, or a smidge less, depending on the level of humidity in the air. Knead the dough until it is soft, supple, and no longer tacky.
Rest, Roll, then Cut
Divide the dough into two balls, then wrap each in two layers of plastic wrap. Allow the dough to rest for at least twenty-four hours. This gives the gluten, which was formed during kneading, a chance to relax. The dough can rest up to forty-eight hours before it needs to be rolled and fried.
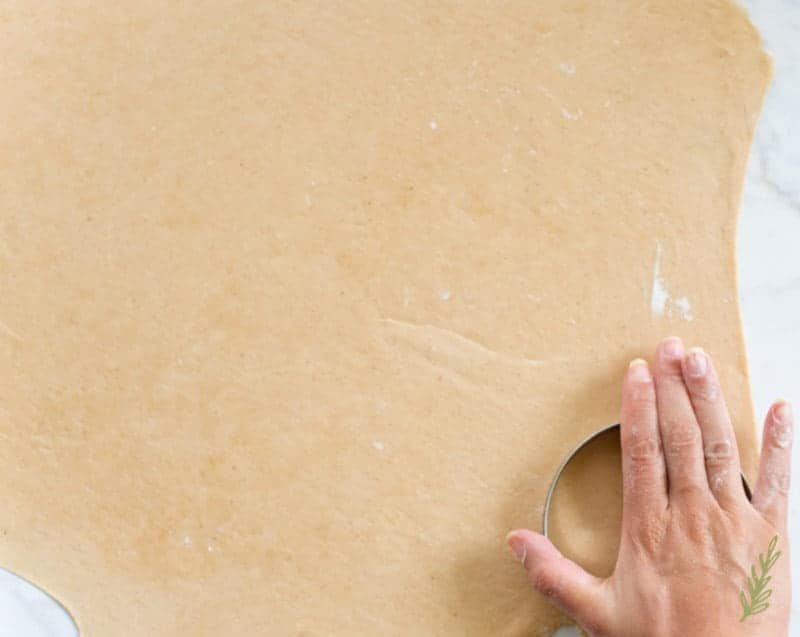
Once the dough has relaxed fully, use a rolling pin to roll it out into a large rectangle. The dough should be an eighth of an inch thick. Any thinner and it’ll crumble instead of crunch. Too thick and it’ll be gummy instead of crispy.
Use a six inch round cutter (or purchase a whole cannoli set, like this one) to cut the dough into circles.
Remove the trimmings and press them together to re-roll later (after they’ve had another chance to relax).
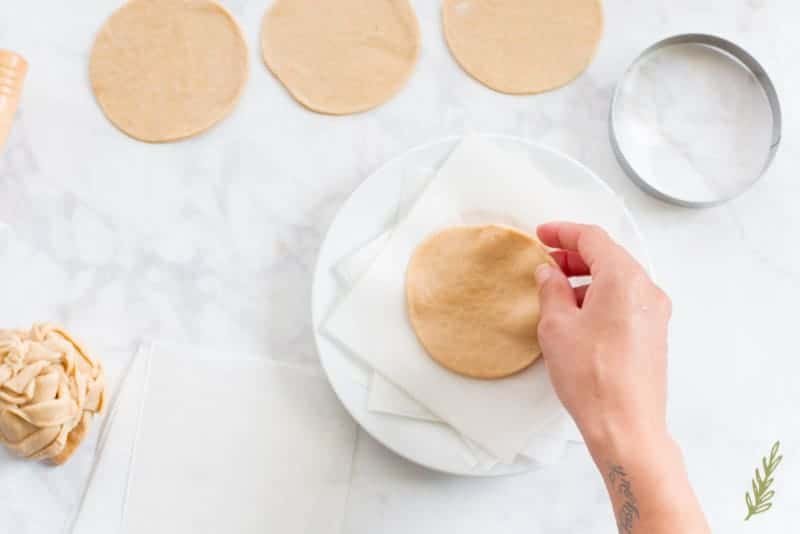
Pile the circles of cannoli dough on top of one another (separate each circle with a piece of wax paper to keep them from sticking together). Cover the pile of dough with a piece of plastic wrap, then place a damp kitchen towel over the plastic. This will keep the dough from drying out while you finish rolling and cutting the rest of the dough.
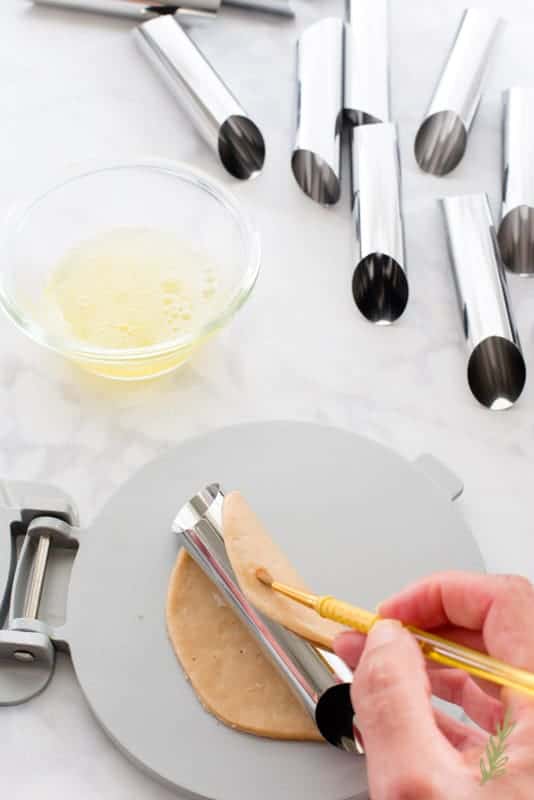
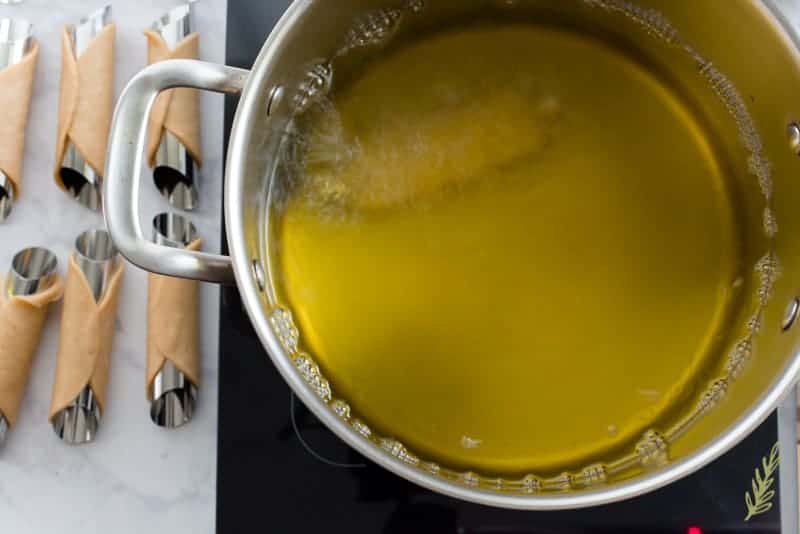
I like to press my cannoli dough between a tortilla press once I’m ready to form them. It stretches out the dough a little bit more, since the dough tends to shrink back after cutting. You can also re-roll it if it’s shrunk considerably. Wrap the circle of dough around the cannoli tube. Use a small brush to brush the whisked egg white onto the edge of the dough. Try to avoid getting the egg white onto the tubes because it’ll burn, and may cause the cannoli dough to stick to the tube after frying.
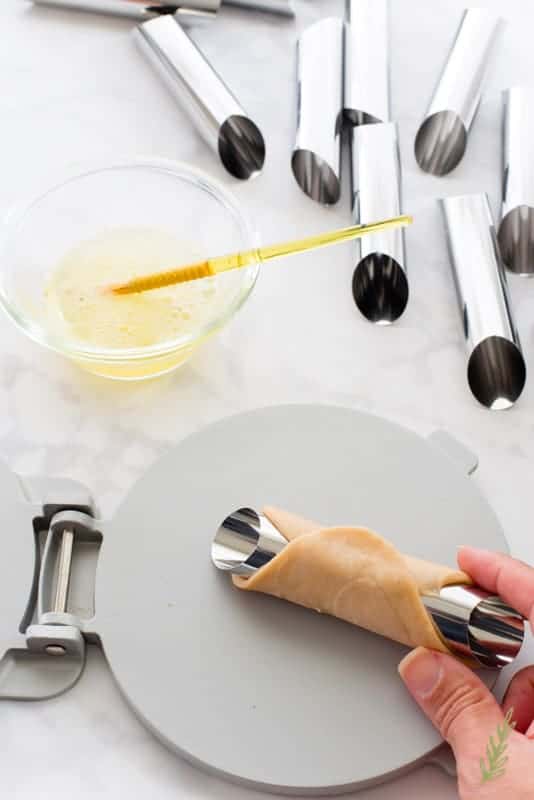
Finish wrapping the remainder of the dough around the tube overlapping the dough you’ve brushed with the egg white. Be sure to press firmly. If you fail to properly seal the dough together, it’ll open once you get it in to the oil.
Preheat the Oil, then Fry
In a six quart pot heat your vegetable, or canola, oil to 350°F. Use a deep frying thermometer to make sure you keep the oil at, or just under, 350 degrees. Any higher and your cannoli shells will brown too quickly without cooking fully. Too low and the dough will absorb too much oil and come out greasy and soggy.
Fry the shells in batches of four for four to five minutes, or until they float up to the surface of the oil and are a dark golden brown.
Remove the shells from the oil, using a pair of tongs, and transfer them to a cooling rack placed over a cookie sheet. This allows any of the excess oil to drain off, and gives those metal forms a chance to cool off. Once they’ve cooled, carefully push them out of the center of the dough. You can continue re-rolling the dough and frying until all your dough has been used up.
After rolling out the dough scraps a second time, it’s best to discard any leftover trimmings. After the second roll, the dough tends to become too tough to be of any further use.
Once all of your shells have been fried and completely cooled, you can fill them, or store them in an air-tight container for up to two days. If you want to coat them in anything, it’s best to do that just before filling and serving.
Dipping Your Shells
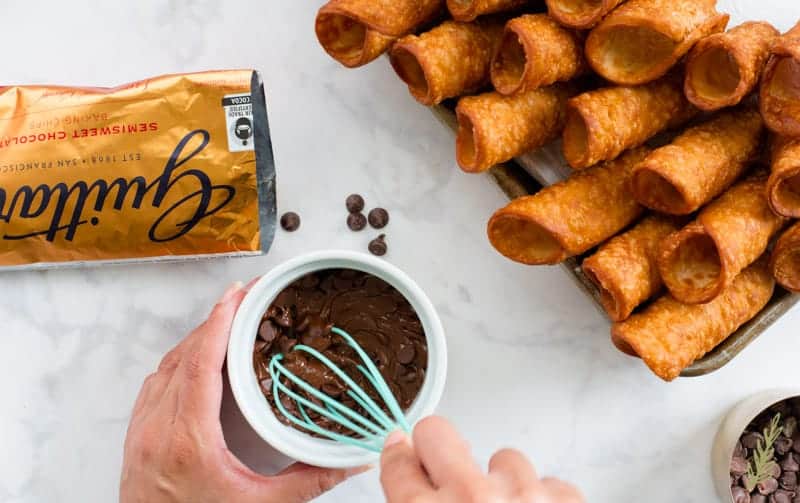
Because chocolate that’s been tempered more than once has a tendency to bloom (look ashy and grey), it’s best to dip your cannoli shells just before you’re ready to fill them. In a small dish, or ramekin, add one cup of semi-sweet chocolate chips. Heat in the microwave for one minute. Remove the dish from the microwave and stir. Return the ramekin to the microwave and heat on high for thirty second burst, once or twice more.
Once the chips are completely melted and fluid, whisk in a half-cup more of the chocolate chips. This is a quick way to temper chocolate, which helps it set up to a hard shell when it’s cool.
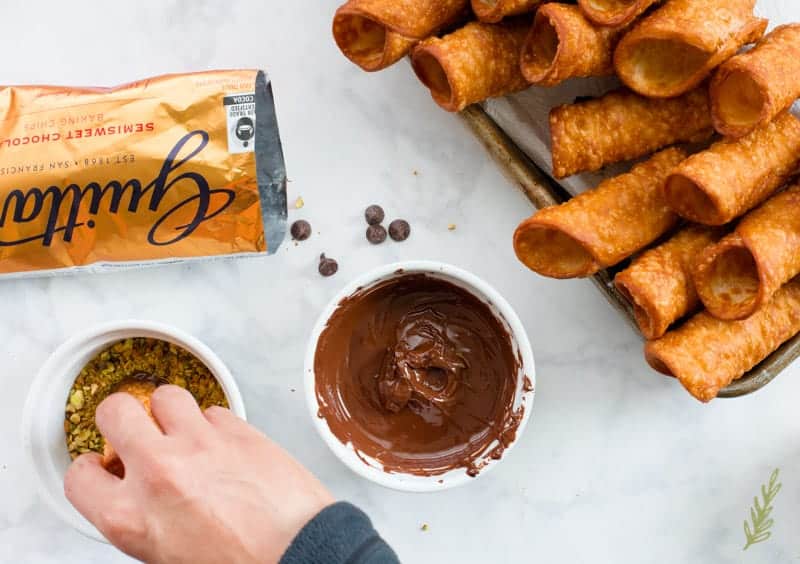
Dip all, or just some, of the cannoli shells into your melted chocolate.
You can leave them plain, dipped only in chocolate, or dip the chocolate shells into crushed pistachios or toasted coconut. I dipped a third of mine in the chocolate and added pistachios to a separate third that I first dipped in chocolate. I left the remaining third plain.
Set these shells to the side to allow the chocolate to cool and set up.
Prepare the Ricotta-Mascarpone Filling
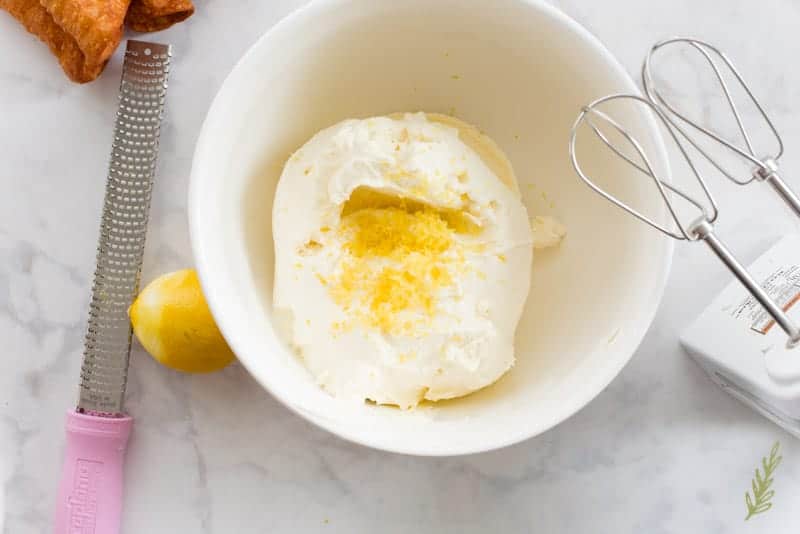
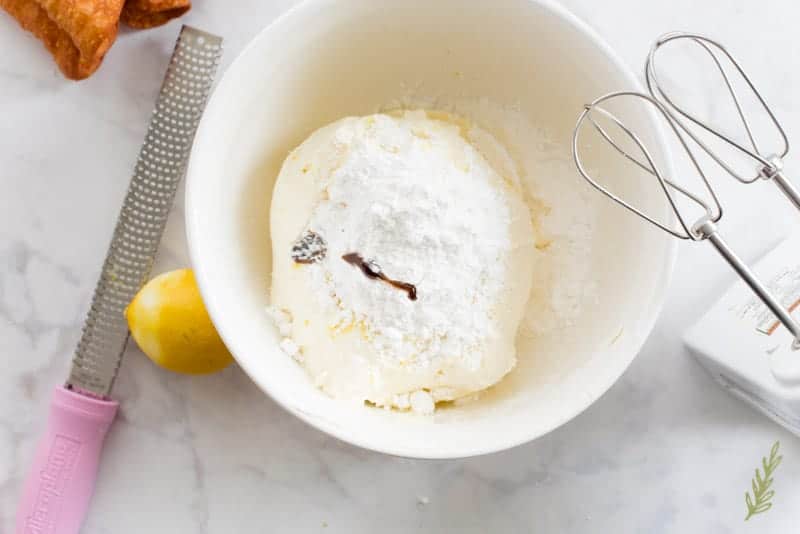
To make the NON-CREAM CHEESE filling, add the whole milk ricotta and mascarpone to a mixing bowl.
Use a microplane to zest one tablespoon of lemon rind into the cheeses.
Sweeten the mixture with powdered sugar, then highlight the sweet with a pinch a kosher salt.
Finally add a half-teaspoon of vanilla bean paste or vanilla extract to the filling. Use a hand mixer, on low speed, to blend together the ingredients until the filling is smooth and free of lumps.
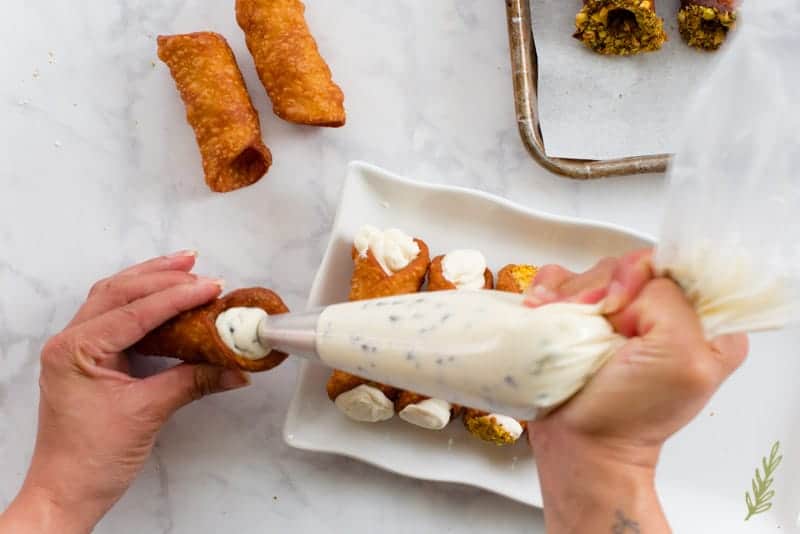
If you’d like, stir in a cup of mini semi-sweet chocolate chips. You can also leave the filling as is. Use a rubber spatula to scoop the filling into a pastry bag that’s been fitted with a plain round tip.
Grab one of the cannolis and begin piping the filling into the center. Flip it around and fill the opposite end to make sure the cannoli is filled completely. Continue filling the cannolis until you’ve run out of both filling and shells.
Keep Refrigerated, then Enjoy
Once your cannolis have been filled, you can sprinkle powdered sugar over them, or serve them as is. I can do without all the additional sugar. If you’re not going to serve the cannolis immediately, make sure you keep them refrigerated.
Cannolis are best enjoyed within twenty-four hours after you’ve filled them. Any longer, and they tend to become soggy and stale from the filling. If you know you won’t be able to eat them within the twenty-four hours, hold off on filling them. Pin this recipe for cannolis so you can make them for your Christmas festivities.

Cannolis
at Sense & EdibilityIngredients
Cannoli Shell Dough
- 3 cups all-purpose flour
- 1/4 cup granulated sugar
- 1/4 teaspoon ground cinnamon
- 1/8 teaspoon kosher salt
- pinch ground nutmeg
- 2 large eggs, separated
- 1/2 cup sweet marsala wine
- 1 tablespoon sweet white wine vinegar
- 2 tablespoons cold water (plus more, as needed)
- 3 tablespoons lard (or vegetable shortening)
- 1 1/2 quarts vegetable or canola oil, for frying
Ricotta-Mascarpone Filling
- 15 ounce whole milk ricotta
- 8 ounces mascarpone cheese
- 3/4 cup powdered sugar
- 1 tablespoon grated lemon zest
- 1/2 teaspoon vanilla bean paste (or vanilla extract)
- pinch kosher salt
- 1 1/2 cups mini semi-sweet chocolate chips, optional
For Dipped Shells (Optional)
- 1 1/2 cups semi-sweet chocolate chips, melted see note
- shelled pistachios, crushed
- toasted coconut flakes
- rainbow sprinkles
Optional Garnishes
- powdered sugar
- mini semi-sweet chocolate chips
Instructions
Begin the Cannoli Dough
- In a large mixing bowl combine the flour, sugar, cinnamon, salt and nutmeg. Mix them together to blend evenly.
- Add the yolk of one egg and one whole egg to a separate bowl. Whisk, then save the extra egg white for sealing the cannoli dough later. Whisk the eggs until smooth.
- Add the sweet marsala, white wine vinegar, and 2 tablespoons of water to the egg mixture and whisk to combine.
- Pinch the lard (or shortening) into the flour until the flour resembles a coarse cornmeal.
- Create a well in the center of your flour/fat mixture, and add the egg mixture to the flour.
- Use your fingers to incorporate the egg mixture into the flour. Your dough will look shaggy, then should begin coming together into a ball that's soft, supple, and no longer tacky. If the dough feels too dry, add more water, a tablespoon at a time until it's soft, but not sticky.
Rest, Roll, then Cut the Dough
- Separate the dough into two balls, then wrap each in two layers of plastic wrap. Allow the dough to rest for at least 24 hours, up to 48 hours.
- Once the dough has relaxed fully, use a rolling pin to roll it out into a large rectangle that's a 1/8" thick. Use a six inch round cutter to cut the dough into circles.
- Remove the excess trimmings and press them together to re-roll later (after they've had another chance to relax).
- Pile the circles of cannoli dough on top of one another, separating them with a piece of wax paper. To prevent the dough from drying out, cover the pile with a piece of plastic wrap, followed by a damp kitchen towel.
Fry the Shells
- In a 6 qt pot, heat the oil to 350°F-375°F. Insert a deep-fry thermometer to ensure you maintain an accurate temperature.
- If you notice that the discs of dough has shrunk during handling, re-roll a bit more to stretch it out. Wrap the circle of dough around the cannoli tube, and brush a small amount of the reserved, whisked egg white onto the edge of the dough.
- Wrap the dough around the tube overlapping and pressing firmly onto the dough that's been brushed with the egg white. Be sure to press firmly, or the shell will open once during frying.
- Fry the shells in batches of four for 4-5 minutes, or until they float up to the surface of the oil and are a dark golden brown.
- Use tongs to remove the shells from the oil, and transfer them to a cooling rack placed over a cookie sheet to allow them to drain of excess oil.
- Once cooled enough to handle, carefully push the tubes from the center of the shells. You can continue re-rolling the dough and frying until all your dough has been used up.
- Once all of your shells have been fried and completely cooled, you can fill them, or store them in an air-tight container for up to 2 days.
Dip the Shells (Optional)
- In a small, microwavable dish, heat 1 cup of the semi-sweet chocolate chips for 1 minute. Remove the dish from the microwave and stir.
- Return the ramekin to the microwave and heat on high for 30 second bursts, once or twice more. Once the chips are completely melted and fluid, whisk in the remaining chocolate chips until they are melted.
- Dip the ends of all, or just some, of the cannoli shells into the melted chocolate; followed by the pistachios, toasted coconut, or the rainbow sprinkles- if desired.
- Allow the chocolate to cool and set up.
Prepare the Ricotta-Mascarpone Filling
- Combine the ricotta, mascarpone, lemon zest, powdered sugar, salt, and vanilla bean paste (or extract) to a mixing bowl.
- Blend the mixture together with a hand mixer on low speed until the filling is smooth and free of lumps.
- Stir in mini semi-sweet chocolate chips, if desired, or leave the filling plain.
Fill and Enjoy
- Use a rubber spatula to scoop the filling into a pastry bag that's been fitted with a plain round tip.
- Pipe the filling into the center of an empty cannoli shell- it will probably only fill it 3/4's of the way. Flip it around and fill the opposite end to fill the cannoli shell completely. Continue filling the cannolis until you've run out of both filling and shells.
- Once your cannolis have been filled, you can sprinkle powdered sugar over them, or serve them as is.
- If you're not going to serve the cannolis immediately, be sure to refrigerate them until you're ready to serve.
Notes
- Try to avoid getting the egg white onto the tubes because it'll burn, and may cause the cannoli dough to stick to the tube after frying.
- After rolling out the dough scraps a second time, it's best to discard any leftover trimmings. After the second roll, the dough tends to become too tough to be of any further use.
- If you want to dip the shells, it's best to do so the same day you plan to fill them.
- Cannolis are best enjoyed 24 hours after you've filled them, they will become soggy and stale the longer they sit.





Great photos! These look amazing!
Thanks, Karly!
OMG! I know someone who i am going to tell about this because she loves canolis. I don’t know if she would make them but she does love eating them.
What better thing to share, Shalama? She can have an endless supply of cannolis!!
They are my absolute favourite! My uncle is from Sicily and he makes them every year despite the fact that he’s 95!!
OM I truly love cannolis 🙂
I love them too, Marina!
Yummy! These look fun to make for the holidays and I love how you can have a variety of fillings.
I agree, Ayanna! They’re perfect for the holidays!
Cannolis are my absolute favorite! But they’re so intimidating to make…thanks for making it look a lot easier!
I think you’d do fine, Amanda! It’s all about breaking up the process.