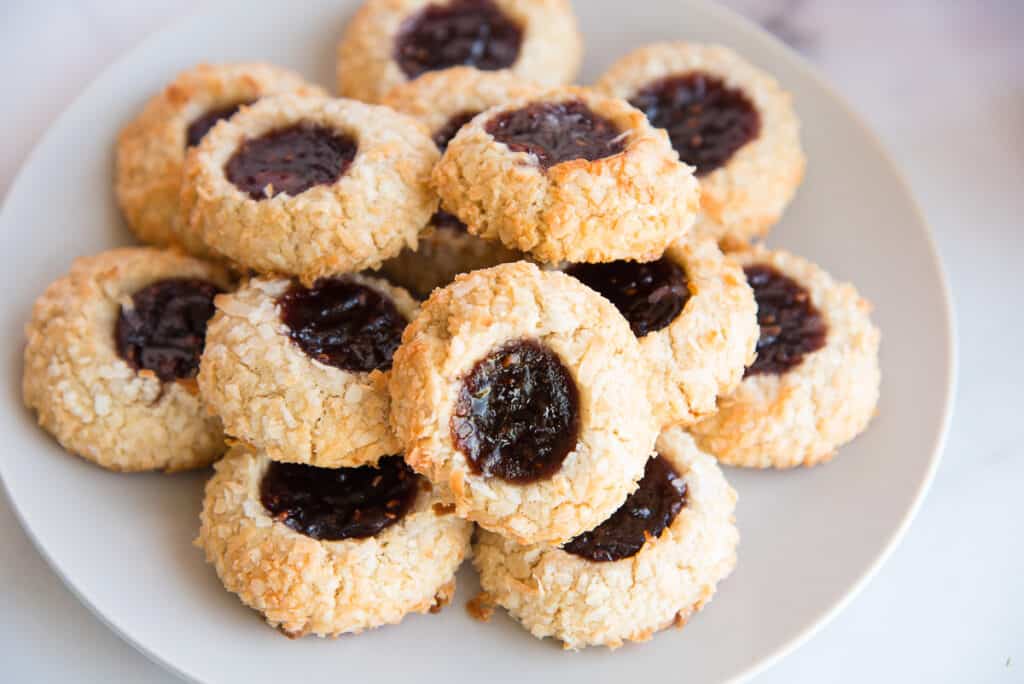
These buttery, bright Coconut Raspberry Thumbprint Cookies are a hit wherever they’re served. This needs to be in your recipe box if you’re into cookie baking. The cookie dough has sweetened coconut flakes mixed in and gets a generous outer coating of the coconut just before baking. The result is a toasted coconut shell with a fresh-tasting raspberry jam center. These two-bite wonders are a great way to elevate tea time, serve drop-in guests for dessert, or eat while hiding in your closet.
*This post was originally published in January 2019. I’ve updated the images and the copy.*

What are Coconut Raspberry Thumbprint Cookies?
I used to own a small pastry business called Taste & See Pastry Shoppe. My signature cookie was a Coconut Guava Thumbprint that was to die for. It was an unexpected flavor in a very familiar form. These cookies are a spin on my signature dessert. I’m replacing the guava jelly (which isn’t easy to locate) with raspberry, but I’m still clinging to the coconut flakes surrounding the cookie. Now, if you want to make it with guava, I fully support that.
Any thumbprint cookie looks just like it sounds. Like somebody went and shoved a thumb into the top of some cookie dough. Sure, that would gross me out, but the dent in the cookie is later filled with tasty fruit jam, so I calm down a little. The cookie dough itself is almost shortbread in texture. It’s crumbly and tender. This version is buttery and nutty (from the coconut), with a tender crumb. You can make this straightforward dough in advance and freeze it into little balls if you want. I’ll explain that later.
What do I need to make these thumbprint cookies?
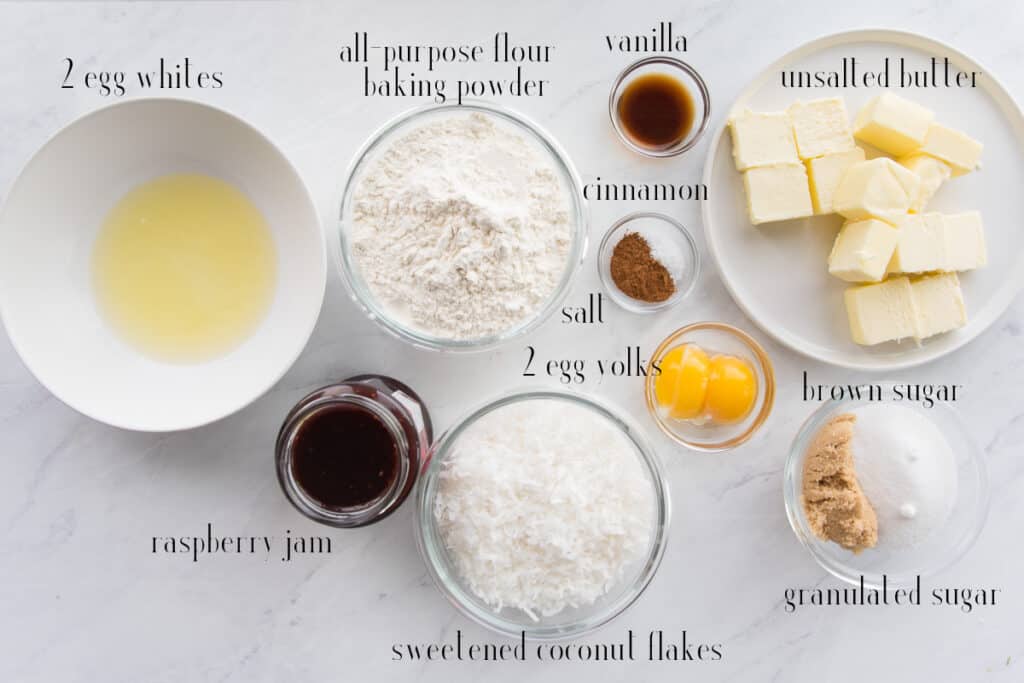
To make these coconut raspberry thumbprint cookies, you need sweetened coconut flakes, all-purpose flour, baking powder, ground cinnamon, kosher salt, unsalted butter, brown sugar, granulated sugar, vanilla extract, raspberry jam, and two eggs. You will separate the egg whites from the yolks and use them in two different stages during this recipe.
I mix the cookie dough with an electric hand mixer for the images, but I recommend using the paddle attachment in a stand mixer. It’s just easier. You also need a couple of sheetpans and silicone baking mats.
What’s the best kind of coconut to use in these cookies?
The best coconut to use in this recipe is sweetened coconut flakes. You can find them in the baking aisle next to the chocolate chips. Buy coconut flakes with “unsulfured” on the label if you can. That means the coconut flakes weren’t preserved with sulfur dioxide. It’s often difficult to find sweet flakes without sulfur, but if you can, definitely use those. Don’t substitute desiccated, unsweetened coconut in the recipe, either, because they won’t work with the sugar ratio. The cookies won’t be sweet enough.
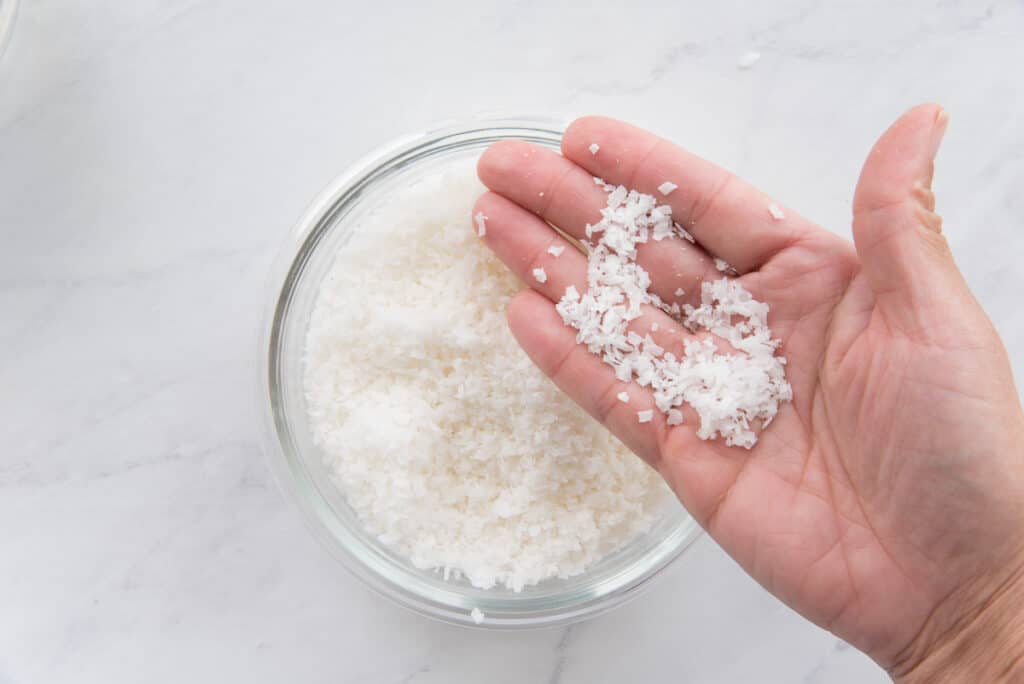
Before using the coconut in this cookie dough, the first thing you need to do is to mince the flakes using a food processor or a blender. Sweetened coconut flakes, as they come, are fairly long. Pulsing them for 30 seconds breaks them down, which helps them mix into and coat the cookie dough more efficiently. Add the coconut flakes to the food processor fitted with the blade attachment. Pulse the flakes in the food processor until you have small pieces- about a quarter of an inch long- or until they look like the image above.
I don’t like coconut. Can I replace it with something else?
Never mind that you clicked on a coconut raspberry thumbprint cookie recipe, LOL! You can replace the coconut flakes in this recipe with toasted hazelnuts or almonds processed to a fine crumb. Not a powder, mind you, but into small pieces. You want the nuts to look like the coconut in the image above. Use the same measurement as the coconut flakes.
Remove 1/2 cup of the coconut flakes to use in the dough. Save the remaining flakes to roll the cookie dough in later.
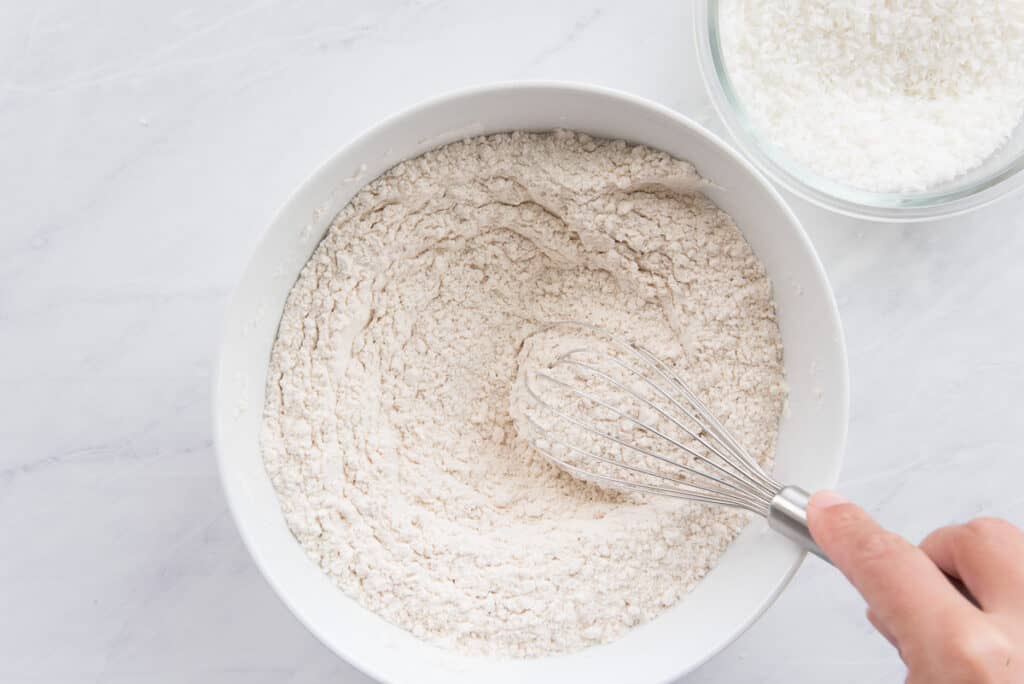
Once you get past the coconut prep, the rest of the dough is fast and easy to make. Use a whisk to combine the all-purpose flour, coconut, baking powder, and ground cinnamon together in a mixing bowl.
Why do you make coconut raspberry cookies with two types of sugar?
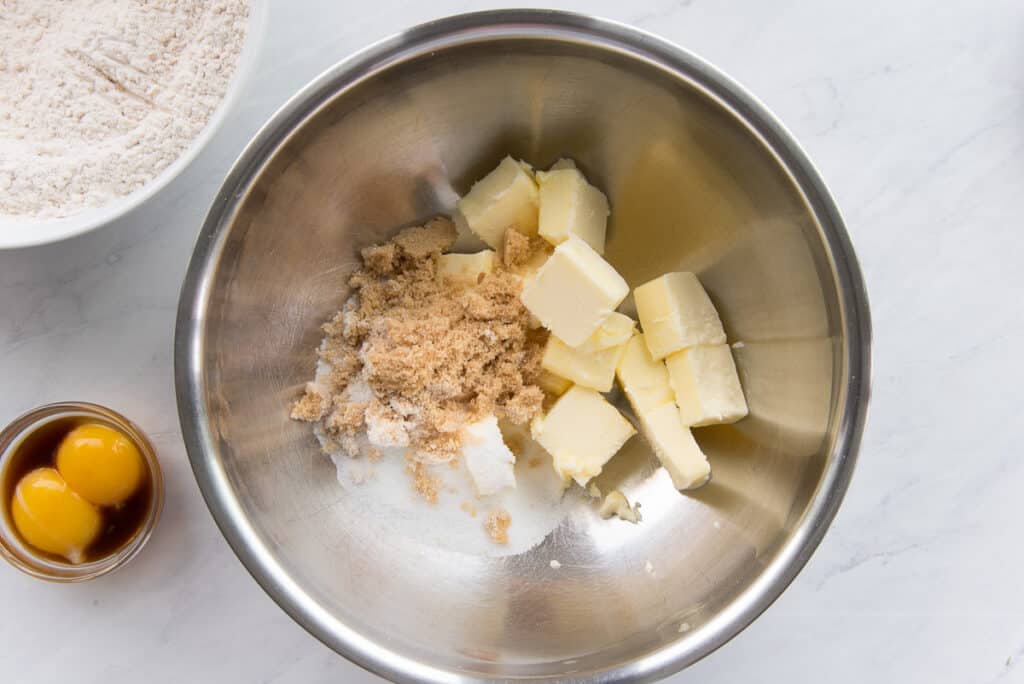
Add the granulated sugar, brown sugar, and room temperature butter to a separate mixing bowl.
I use these two sugars because I want the caramel flavor and moisture of the brown sugar, but I don’t want that caramel flavor to be overly prominent. Brown sugar contains molasses- and invert sugar- which also helps make the cookies stay tender after they bake.
Blend the sugars and butter together at medium-low speed until they form a thick paste. Stop the mixer and scrape down the bowl and beaters.
Why do I need to separate the eggs in this recipe?
Baking nerd time!! The lecithin in egg yolks is what makes doughs and batters tender. Adding the eggs to the cookie dough gives the baked product that tender crumb that makes these coconut raspberry thumbprint cookies so addictive. Because egg yolks are emulsifiers, they help distribute and blend the other ingredients into the dough. Since we need to adhere the coconut flakes to the cookie dough later, we separate the yolks from the whites and use the whites as glue.
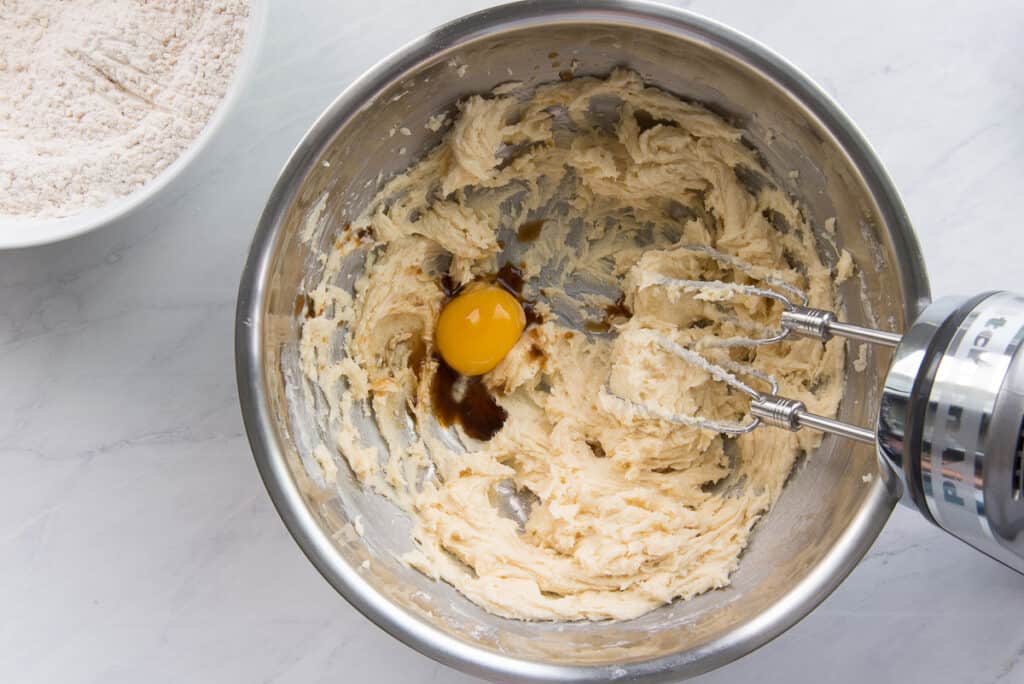
Add the yolks, one at a time to the butter-sugar mixture in the bowl. Blend on low speed to mix the egg yolk into the butter thoroughly, then stop the mixer and scrape down the bowl and beaters before adding the next yolk. Add the vanilla extract with the last yolk.
Can I use something other than vanilla extract in this recipe?
To switch up the flavors, you can replace the vanilla in this recipe with almond, lemon, or even rosewater. After you blend in the final yolk and the extract, stop the mixer and scrape down the bowl and beaters once again.
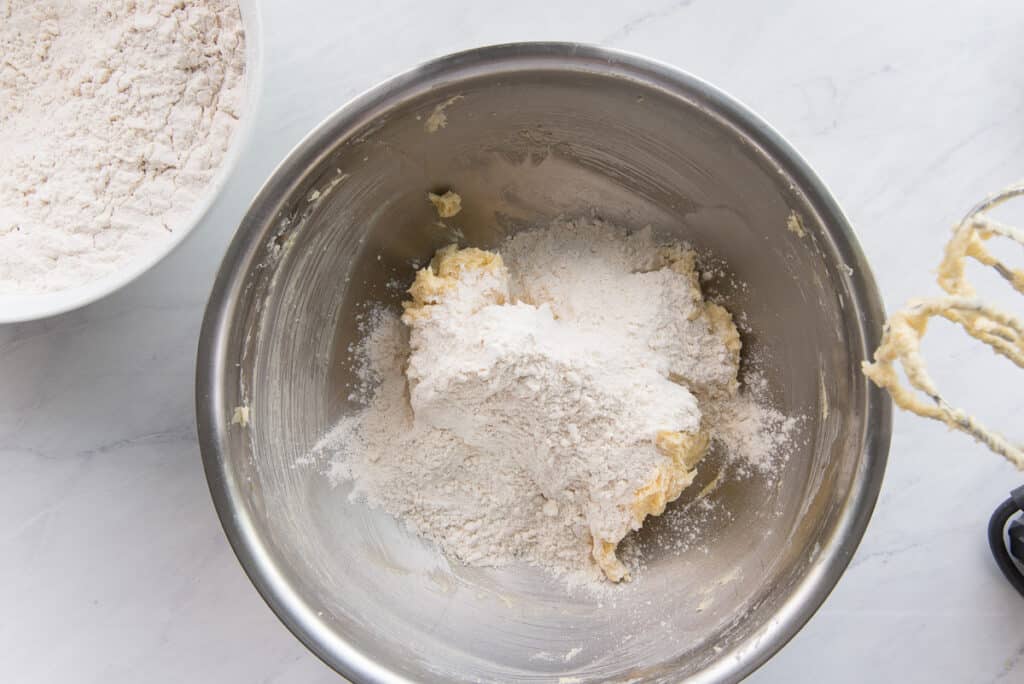
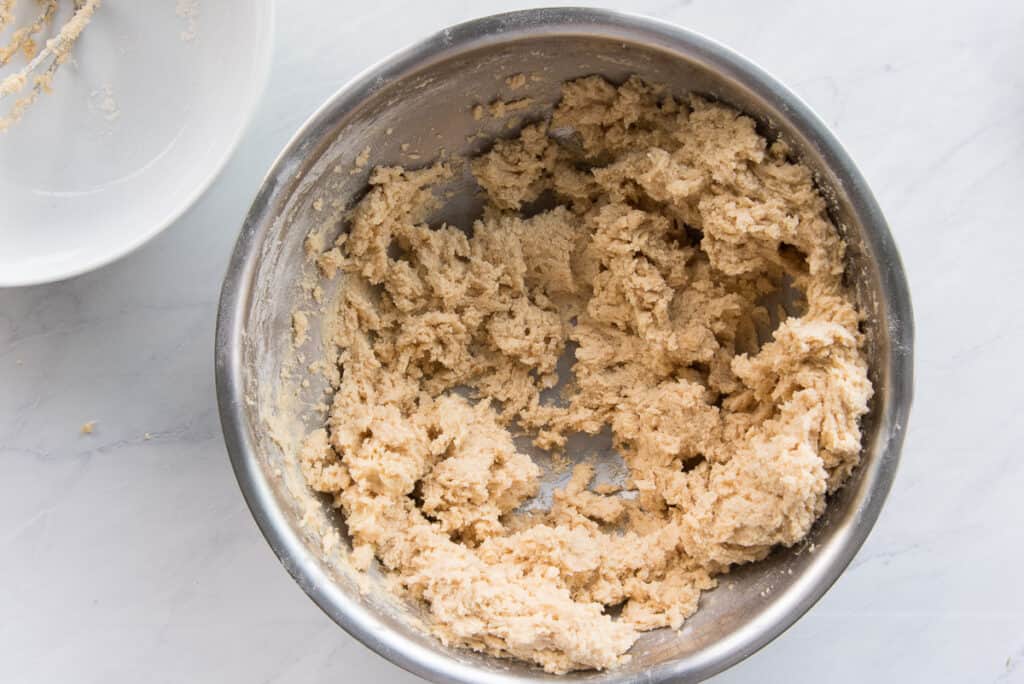
Next, add the dry ingredients to the butter mixture in three stages. After each addition, blend the mixture on low speed just until the flour is mixed in. Scrape down the bowl and beaters before adding the next third. Continue this process until all of the dry ingredients are blended in.
Why do you have to chill coconut thumbprint cookie dough?
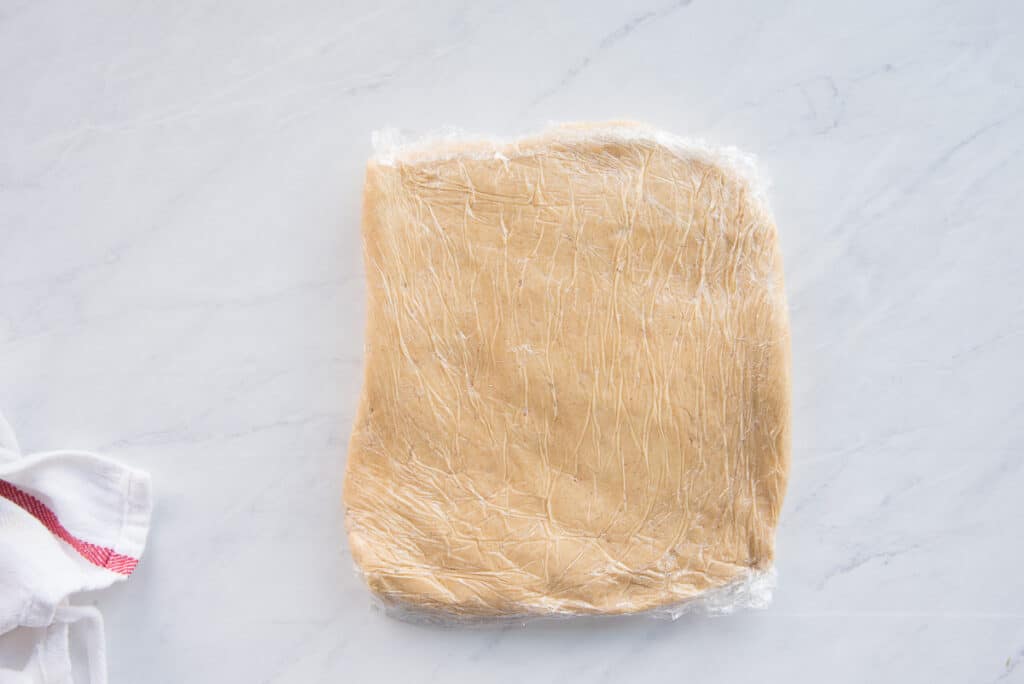
The final dough will be thick but still slightly sticky. Scrape it onto a sheet of plastic wrap and form it into a square. Wrap the dough in the plastic and refrigerate it for at least 30 minutes.
It’s important to chill cookie dough before baking it if you can. Chilling (or resting) the dough gives the flour in the dough a chance to absorb the liquids and plump up. That eliminates that flour taste in your cookies and makes room for the buttery goodness to shine through. You don’t have to chill the dough, but you also don’t have to have amazing cookies. Beautifully tasting cookies are the reward for your chilling patience.
You can chill the dough from 30 minutes up to 24 hours.
Can I freeze raw cookie dough?
If you want to chill the dough any longer than 24 hours, I recommend freezing it. You can freeze thumbprint cookie dough for up to 3 months.
Follow the instructions below to form the chilled dough into 1-inch balls. Arrange the dough balls onto a silicone-lined sheetpan and freeze them until solid. Once frozen, transfer the cookie dough to a freezer storage bag and freeze them for up to 3 months. To use the cookie dough, arrange the frozen balls on a silicone lined sheetpan and let them thaw for 20-30 minutes at room temperature before coating and filling.
If you don’t want to roll the thumbprint cookies before freezing them, you’re going to force yourself into baking the entire batch at once. Freezing the dough individually, as described above, means you can bake the cookies in onesies or twosies. I mean, you’ll still have to coat and fill them, so that’s a personal choice, but I like having options.
How far ahead can I roll the cookie dough in the coconut?
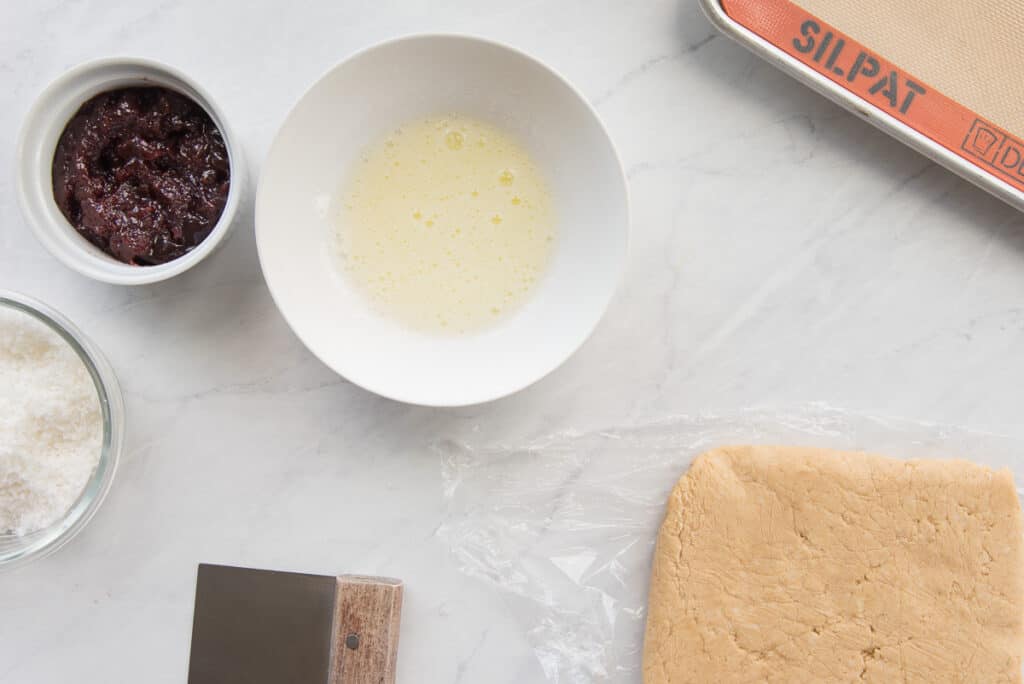
Pull the chilled dough out of the fridge about 15 minutes before you plan to bake the cookies. After you pull out the dough, vigorously beat the egg whites until they are foamy and run smooth. The goal is to eliminate that clumpy texture that egg whites have. Clumps will coat your cookie dough unevenly.
Next, allow the egg whites to sit while you cut and roll your cookie dough. The egg whites need a few minutes for that foam to dissipate, so this is a perfect time to cut and form the cookies. You want to roll the cookie dough in the coconut just before baking them. You don’t want to do this step hours ahead because the egg whites will dry, and you’ll end up with a cracked-looking surface on your cookies. It’s not going to affect the taste, but it’s also not a cookie goal, you know?
Do you fill Coconut Raspberry Thumbprint Cookies before or after baking?
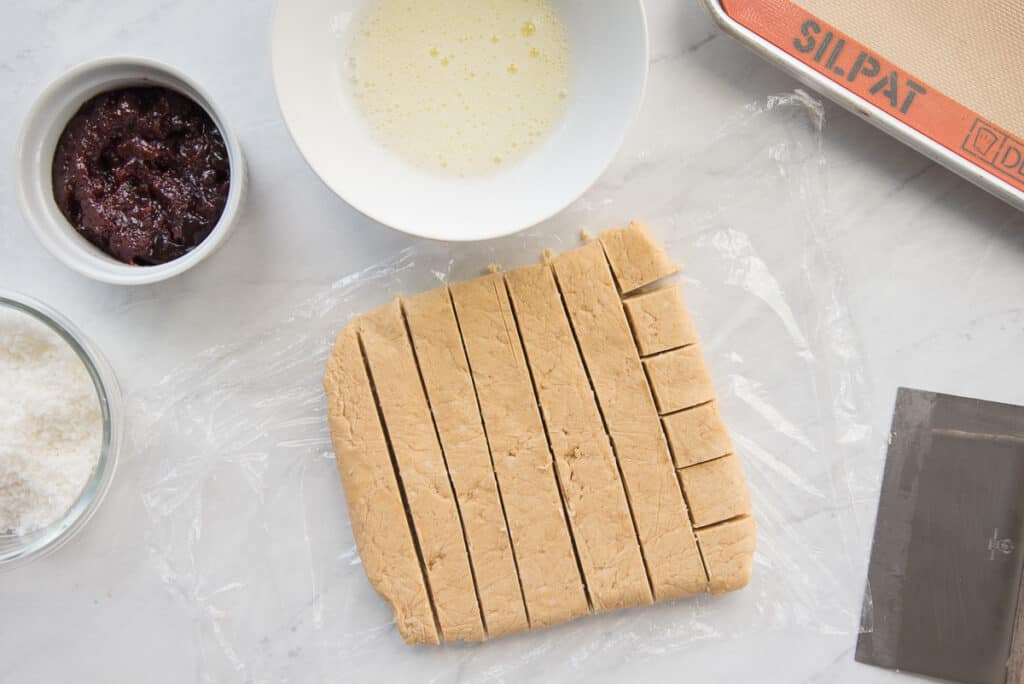
Cut the dough into 1-inch squares or chunks the size of walnuts. I use a bench scraper, but you can use a knife. You can also just tear the dough from the square.
Once the dough is cut, pinch the squares between your thumb and forefinger and middle finger to loosen it up a bit. Next, roll the dough square between the palms of your hands to form it into a ball. Set the ball on the silicone-lined baking mat and continue forming the rest of the dough into balls.
Thumbprint cookies should be filled before baking. It helps set the filling in place and dries it out slightly, so it’s not goopy and runny when you try to eat the coconut raspberry cookies.
What’s the easiest way to make the “thumbprint” in these cookies?
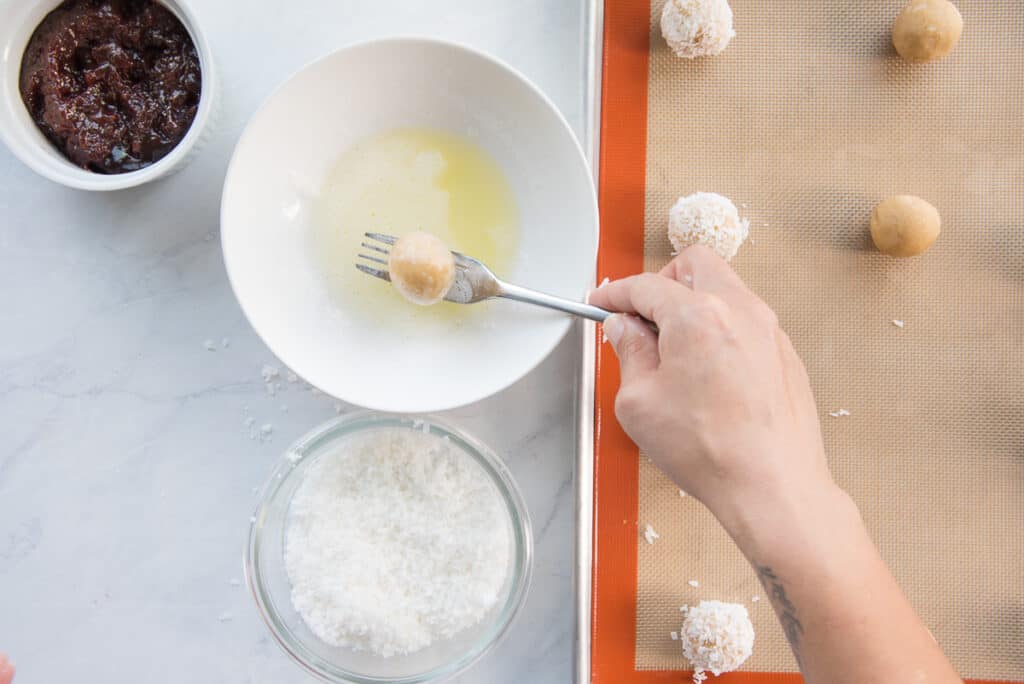
After the dough balls are formed, toss them into the beaten egg whites. I do this thing where I put the ball in the bowl of whites and use the tines of a dinner fork to move it to the side of the bowl. Once the ball is near the side, I use the fork to lift it up and let it roll in the egg whites. That ensures the ball is evenly coated without being soaked in the whites. Allow the excess whites to drip off.
Transfer the wet balls of dough to the bowl of coconut flakes. This recipe has just the right amount of coconut flakes to coat the dough. But you can’t be all aggressive with the coconut. After adding the ball to the coconut flakes, use your fingers to roll it around to coat the entire surface. It will look like a snowball. Lift the ball out and toss it between your hands to shake off excess coconut flakes.
Lay the coated dough ball onto the sheetpan and continue dipping and coating the remaining balls.
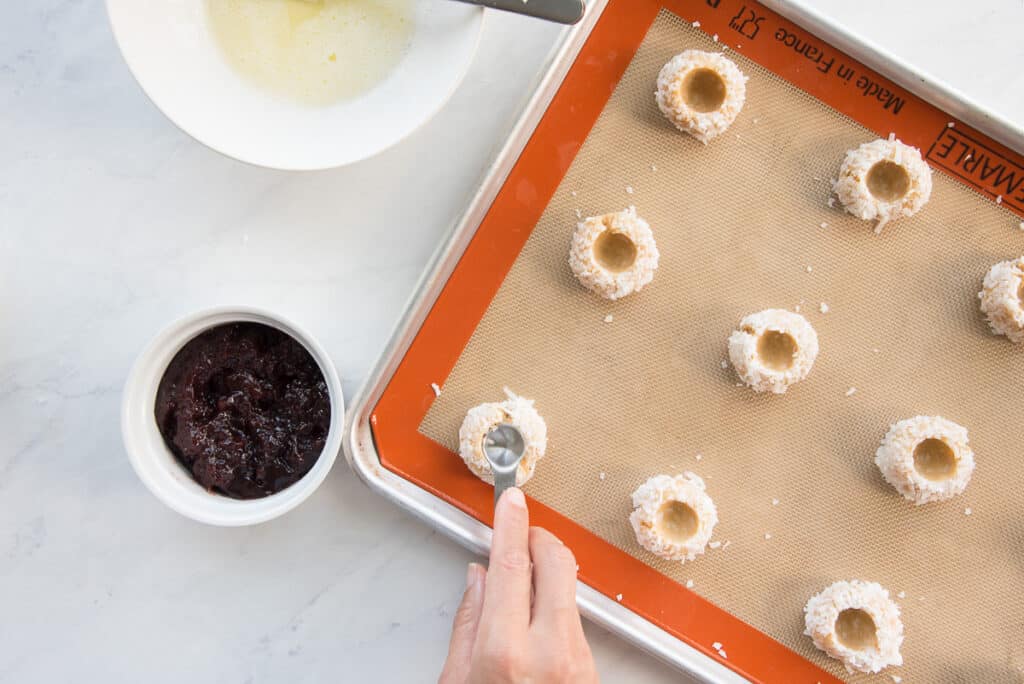
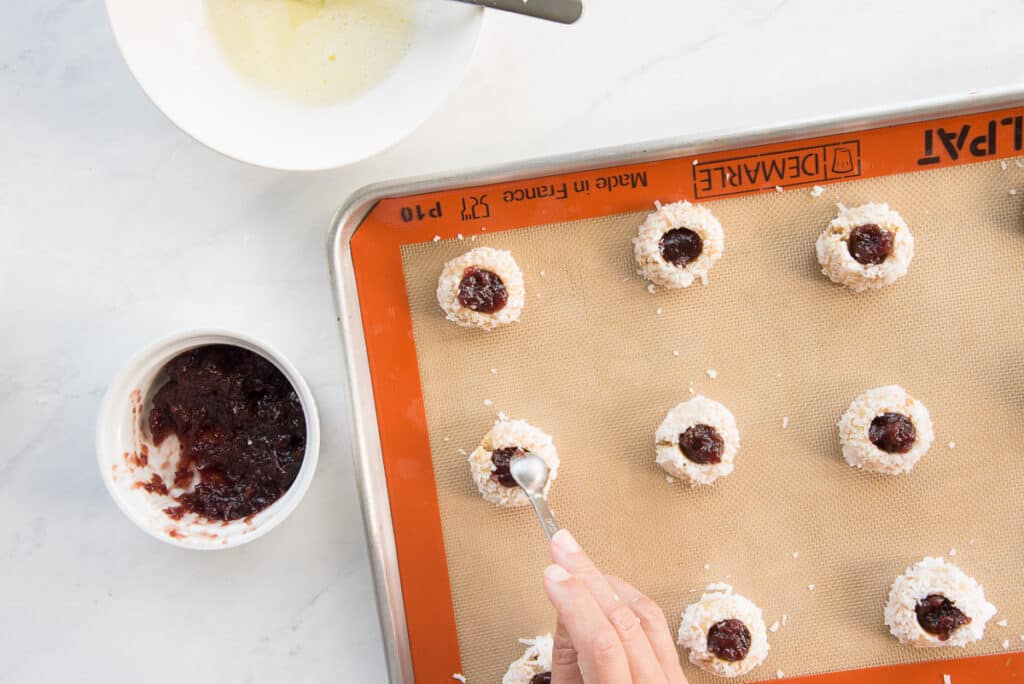
Now, I know these are “thumbprint” cookies, but I have weird man hands, and my thumbs would probably flatten them. Plus, I don’t like having stuff stuck under my nails. I press a 1/2 teaspoon measuring spoon into the dough instead of jamming my thumb in it. This is great because it means all of your dents are uniform.
Use the bottom of your measuring spoon to press down the dough right in the center. The spoon will stick, so to remove it, twist it to the left or right while you lift up.
I don’t like raspberry. What other jam can I use in my coconut raspberry thumbprint cookies?
Ummm… okay. You don’t like raspberry. You can replace the raspberry in this coconut raspberry thumbprint cookie with a jam you do like. I know you read that shade. It’s okay. I love you no matter what. You can even fill thumbprint cookies with this Meyer Lemon Curd or this Cajeta.
How long do I bake Coconut Raspberry Thumbprint Cookies?
Use that same 1/2 teaspoon to fill the indentation with raspberry jam. Bake the cookies in a preheated 350°F (177°C) oven for 15-18 minutes or until the coconut is slightly toasted.
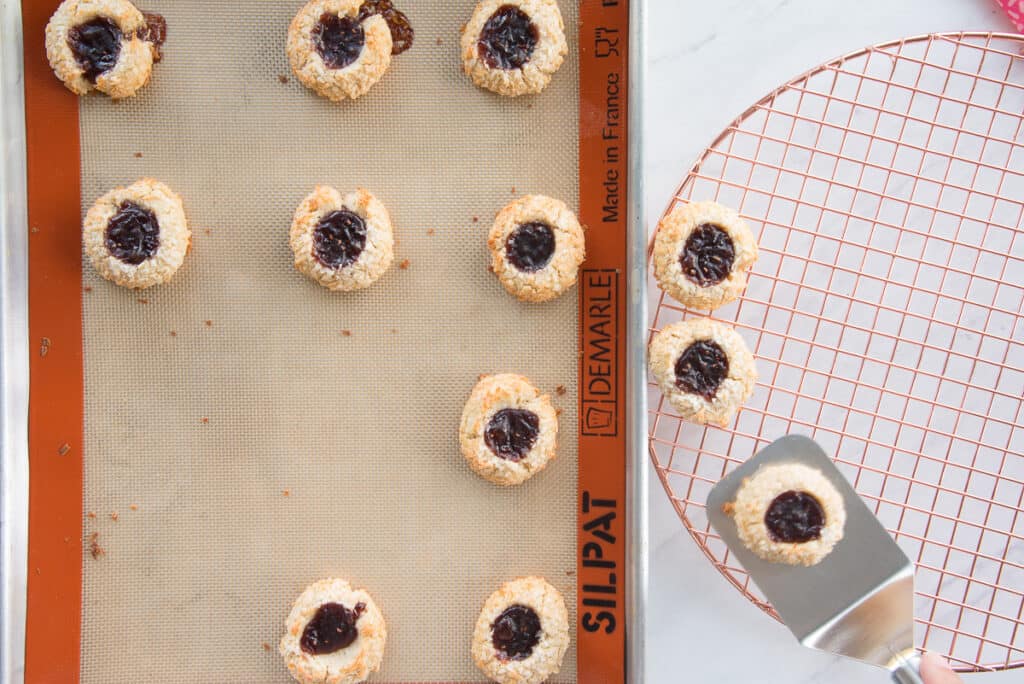
Remove the pans from the oven and let the cookies cool on the pan for 3-5 minutes.
What if I forget to fill them before baking?
Now, if you forget to fill your thumbprint cookies before you bake them for some unknown reason, there’s no reason to panic. You can fill your thumbprint cookies after baking them for 15 minutes. When they come out of the oven- while they’re still soft- use that 1/2 teaspoon to make the dent. Fill the cookies with the jam and return the pans to bake for another 5 minutes.
This will firm up the jam a bit.
Why did my cookies crack?
Transfer the cookies to a cooling rack to cool completely.
Now, if your cookies crack during baking or when you press the measuring spoon into them, it just means the dough was still cold. It’s not a deal-breaker. To avoid cracks in your thumbprint cookies, allow the dough to warm on the countertop for at least 15-20 minutes. If they still crack after putting the dent in them, you can press the dough together to close the cracks. No harm, no foul.
How do you stop Thumbprint Cookies from spreading?
Thumbprint cookies spread because the dough is too warm before baking. They will also spread if you bake them on a greased sheetpan. Baking coconut raspberry thumbprint cookies on a silicone baking mat prevents the dough from spreading. Parchment paper is the next best option, but silicone is preferred.
If the first pan of cookies spread, chill the second pan for at least 15 minutes before baking. Just slide the pan into the fridge to firm up the butter in the dough a bit.
How do I store these Coconut Raspberry Thumbprint Cookies?
Store thumbprint cookies in a covered container at room temperature for 3 days.
Definitely avoid storing your coconut raspberry thumbprint cookies in the refrigerator. You don’t want to store any thumbprint cookies in the fridge because the cold air makes them go stale faster.
Can I freeze baked Thumbprint Cookies?
You can freeze the Coconut Raspberry Thumbprint Cookies, but you want to do it before filling them with the jam. I’ve found that freezing them with jam causes the water in the jam to bleed into the cookie upon thawing. That makes the cookies soggy and causes them to mold faster in storage.
Underbake the cookies slightly. Just shave 5 minutes off the baking time, then cool them completely. Transfer the cookies to a container and freeze them for up to 2 months. When you’re ready to eat them, thaw them at room temperature and fill them as instructed. Bake them in a 350°F (177°C) oven for 5 minutes to firm up the jam, and they’re ready to enjoy.
Can I ship these Coconut Raspberry Thumbprint Cookies?
Add 1 tablespoon of vital wheat gluten to the dry ingredients if you are making these cookies to ship. When added to baked goods, Vital wheat gluten extends the shelf-life, so to speak. Bake as instructed, then pack the cookies into a sealable container. I like to separate my layers of cookies with wax paper to keep the jam from sticking to the bottom of the cookie on top of it. When I shipped cookies to Hector and his soldiers when they were deployed, I’d wrap the cookie container in plastic to seal it even further. I then wrapped the container in bubble wrap to keep them from breaking apart during shipping. You will experience some breakage, but it shouldn’t be too bad. Try to ship the cookies within 24 hours of baking them to ensure their freshness.
These Coconut-Raspberry Thumbprint Cookies are best eaten up to 3 days after baking. Enjoy them year-round, though. Just pin the recipe for easy reference, and don’t forget to let me know what you think of them in the comments below!

Coconut Raspberry Thumbprint Cookies
at Sense & EdibilityEquipment
- sheetpans
- silicone baking mats
- hand or stand mixer
Ingredients
- 2 cups (165 grams) sweetened coconut flakes
- 2 cups (270 grams) all-purpose flour
- 1 teaspoon (3 grams) ground cinnamon
- 1/2 teaspoon (3 grams) baking powder
- 1/4 teaspoon kosher salt
- 1 cup (2 sticks or 226 grams) unsalted butter at room temperature
- 1/3 cup (75 grams) granulated sugar
- 1/4 cup, packed (65 grams) light brown sugar
- 2 large eggs whites separated from yolks, at room temperature
- 2 teaspoons (10 milliliters) vanilla extract
- 1/2 cup (155 grams) raspberry jam
Instructions
Pulse the Coconut Flakes to a Smaller Size
- Add the coconut flakes to the bowl of a food processor fitted with the blade attachment. Pulse the flakes in the food processor until you have small pieces coconut that are about a quarter of an inch long.
- Remove 1/2 cup of the coconut flakes to use in the dough. Save the remaining flakes to roll the cookie dough in later.
Make the Coconut Cookie Dough
- Use a whisk to combine the 1/2 cup of coconut flakes, all-purpose flour, ground cinnamon, baking powder, and kosher salt together in a mixing bowl.Add the butter, granulated sugar, and brown sugar to a separate mixing bowl.
- Blend the sugars and butter together at medium-low speed until they form a thick paste. Stop the mixer and scrape down the bowl and beaters.
- Add the yolks, one at a time to the butter-sugar mixture in the bowl. Blend on low speed to mix the egg yolk into the butter thoroughly, then stop the mixer and scrape down the bowl and beaters before adding the next yolk. Add the vanilla extract with the last yolk.
- Stop the mixer and scrape down the bowl and beaters once again.Add the dry ingredients to the butter mixture in three stages, blend the mixture on low speed just until the flour is mixed in. Scrape down the bowl and beaters before adding the next third. Continue this process until all of the dry ingredients are blended in.
Chill the Cookie Dough
- The final dough will be thick but still slightly sticky. Scrape the dough onto a sheet of plastic wrap and form it into a square. Wrap the dough in the plastic and refrigerate it for at least 30 minutes.
Roll and Coat the Cookie Dough
- Remove the chilled dough from the fridge about 15 minutes before you plan to bake the cookies.Preheat your oven to 350°F (177°C).Line 2 or 3 sheetpans with silicone baking mats. Add the remaining 1 1/2 cups of coconut flakes to a wide, shallow bowl.
- Vigorously beat the egg whites until they are foamy and run smooth. Allow the egg whites to sit while you cut and roll your cookie dough. Cut the dough into 1-inch squares or chunks the size of walnuts.
- Pinch the squares between your thumb and fingers to loosen it up a bit. Roll the dough square between the palms of your hands to form it into a ball. Set the ball on the silicone-lined baking mat and continue forming the rest of the dough into balls.
- After the dough balls are formed, toss them into the beaten egg whites, allowing the excess whites to drip off. Transfer the wet balls of dough to the bowl of coconut flakes and use your fingers to roll it around to coat the entire surface until it resembles a snowball. Lift the ball out and toss it between your hands to shake off excess coconut flakes.
- Lay the coated dough ball onto the sheetpan and continue dipping and coating the remaining balls. Use the bottom of a 1/2 teaspoon measuring spoon to press down the dough right in the center of the ball. The spoon will stick. Twist it to the left or right while you lift up to remove it easily.
Fill and Bake the Coconut Raspberry Thumbprint Cookies
- Use the same 1/2 teaspoon to fill the indentation with raspberry jam. Bake the cookies in a preheated 350°F (177°C) oven for 15-18 minutes or until the coconut is slightly toasted.
- Remove the pans from the oven and let the cookies cool on the pan for 3-5 minutes.Transfer the cookies to a cooling rack to cool completely, then enjoy.
Notes
Swaps and Substitutions:
- You can replace the coconut flakes in this recipe with toasted hazelnuts or almonds processed to a fine crumb.
- Replace the vanilla extract in this recipe with almond extract, pure lemon extract, or rosewater.
- You can replace the raspberry jam with your favorite fruit jam, guava jelly, this Meyer Lemon Curd, or this Cajeta.
Tips and Techniques:
- If you replace the coconut flakes with nuts, you want pulse them to look like the coconut in the image in the post.
- You can chill the dough from 30 minutes up to 24 hours.
- Chilling (or resting) the dough gives the flour in the dough a chance to absorb the liquids and plump up.
- Roll the cookie dough in the coconut just before baking them. If you do it too far ahead, the egg whites will dry, and the cookies will have a cracked-looking surface.
- To fill your cookies after baking:
- Bake the cookies for 15 minutes.
- When they come out of the oven- while they're still soft- use the1/2 teaspoon to make the dent.
- Fill the cookies with the jam and return the pans to bake for another 5 minutes to firm up the jam a bit.
- To avoid cracks in your thumbprint cookies, allow the dough to warm on the countertop for at least 15-20 minutes.
- If they still crack after putting the dent in them, you can press the dough together to close the cracks.
- Thumbprint cookies spread because the dough is too warm before baking. Baking coconut raspberry thumbprint cookies on a silicone baking mat prevents the dough from spreading. Parchment paper is the next best option.
- If the first pan of cookies spread, chill the second pan for at least 15 minutes before baking.
Storage Instructions:
- Store thumbprint cookies in a covered container at room temperature for 3 days.
- Avoid storing coconut raspberry thumbprint cookies in the refrigerator because the cold air makes them go stale faster.
Freezing Instructions:
-
To freeze unbaked thumbprint cookies:
- Mix the cookie dough as instructed.
- Form the chilled dough into 1-inch balls and arrange the dough balls onto a silicone-lined sheetpan.
- Freeze the balls of dough until solid. Once frozen, transfer the cookie dough to a freezer storage bag and freeze them for up to 3 months.
- To use the cookie dough: arrange the frozen balls on a silicone lined sheetpan and let them thaw for 20-30 minutes at room temperature before coating and filling.
- To freeze the baked Coconut Raspberry Thumbprint Cookies:
-
- Before filling them with the jam, underbake by 5 minutes.
- Cool the cookies completely.
- Transfer the cookies to a container and freeze them for up to 2 months.
- When you're ready, thaw the cookies at room temperature and fill them as instructed.
- Bake the filled cookies in a 350°F (177°C) oven for 5 minutes to firm up the jam, and they're ready to enjoy.
*Freezing the cookies with jam causes the water in the jam to bleed into the cookie upon thawing, making the cookies soggy and prone to molding faster.
Making Cookies to Ship:
- Add 1 tablespoon of vital wheat gluten, which extends their shelf-life.
- Bake as instructed, then pack the cookies into an air-tight container, separating the layers of cookies with wax paper to keep the jam from sticking to the bottom of the cookie on top of it.
- Wrap the cookie container in plastic to seal it even further, then wrap the container in bubble wrap to prevent breakage during shipping.
- Seal the shipping box and ship the cookies within 24 hours of baking them.






these look so good 😍😍 Great recipe!
Thank you, Joy!
I love thumb print, my mom makes them all the time!!! I should try this recipe i love coconut! would make it soooo good!
Yes, you should totally try them!
Yum Jammies thumbprint cookies just say the holidays to me always! Love your recipe!
Thanks Jen!
These are really good! The coconut really gives a good texture to this.
I’m so glad you think so, Stephanie!