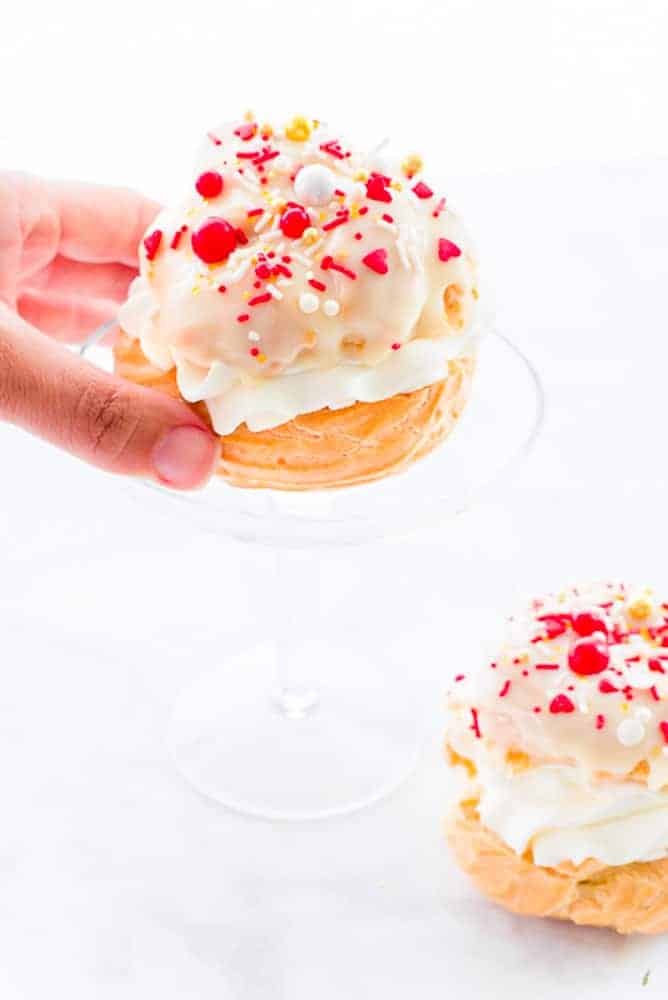
Major confesh: I’m not a massive fan of chocolate. Yes, there are certain times when a piece of chocolate is necessary, but on the whole, I could do without it. Instead, I like sweets that aren’t overly sweet. That’s a big reason why I enjoy eating cream puffs: because they aren’t too sweet. They’re also light as air, easy to assemble, and versatile. In other words, you can fill cream puffs with sweet or savory fillings.
Pâte à choux (or choux paste)- the pastry cream puffs are made of- is also a chameleon. Pipe it in different shapes and sizes, and you can have anything from eclairs, profiteroles, Paris Brest (a cream puff ring), churros, or cheese puffs. All this means is that you need to master this dough. These Cream Puffs are better than any bakery version you can get. And I’m willing to bet you have all the ingredients to make them already in your kitchen.
What are Cream Puffs?
Cream puffs are a European pastry made from a baked ball of pâte à choux. The actual name for that ball of dough is “profiterole,” but, here in the States, the entire dessert is referred to as a cream puff. The pâte à choux is baked and slowly cooled, leaving you with a golden brown exterior and creamy, soft interior.
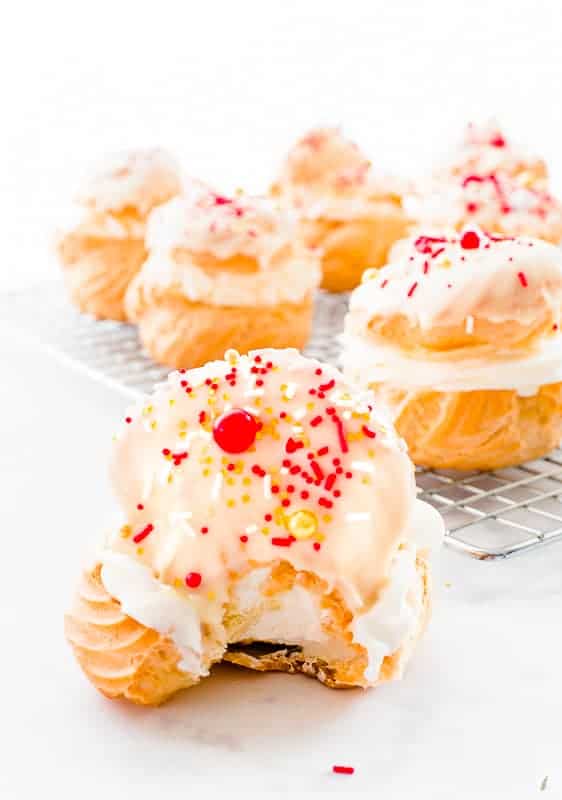
After cooling, the profiterole’s top is sliced away to expose the interior. Like me, some folks press down a smidge of the interior to provide more room for filling with whipped cream of choice. Some cream puffs are topped only with their cut away half, while others get more luxurious treatments.
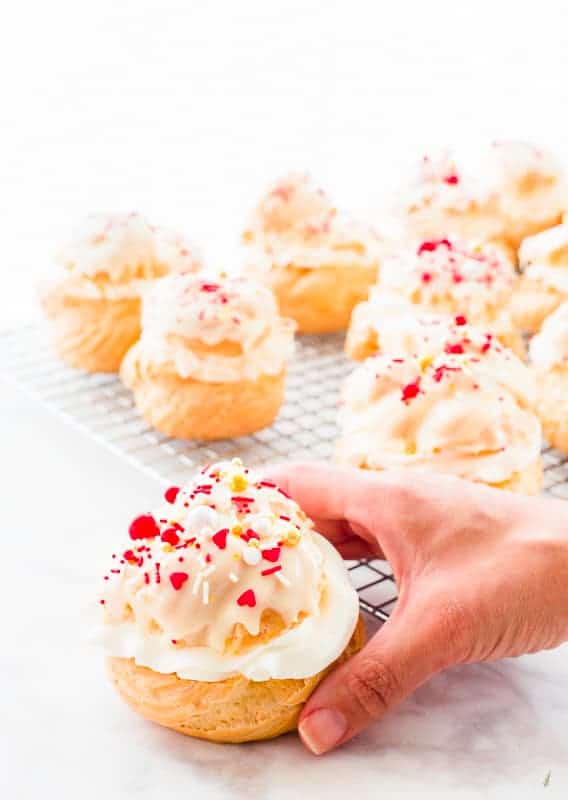
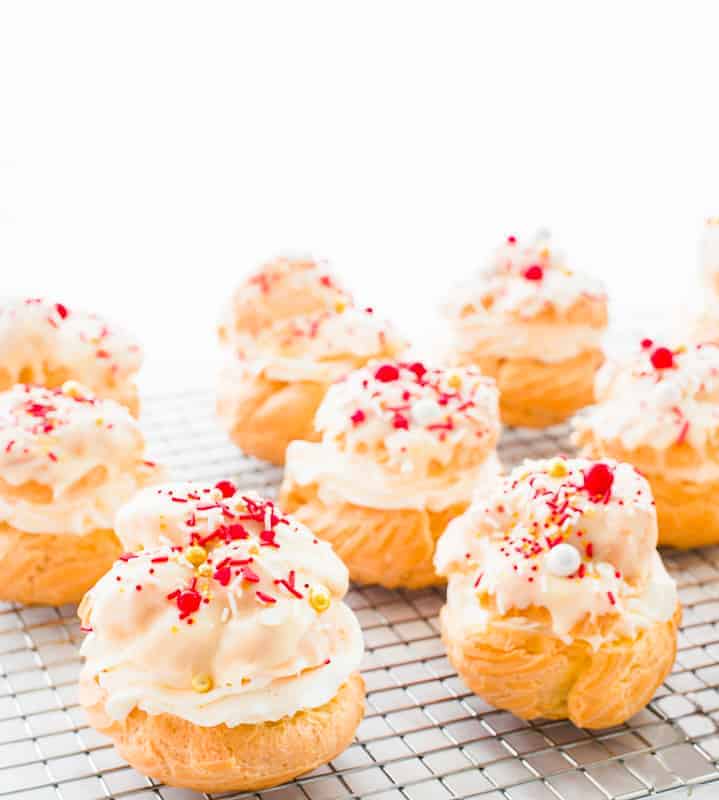
If you’ve eaten an eclair, you have an idea of what toppings cream puffs can have. Here, instead of a dark chocolate coating, I top mine with a white chocolate version. Sprinkles or a dusting of powdered sugar are strongly encouraged.
What is Pâte à Choux?
There’s no cream puffs or profiteroles without pâte à choux (pronounced paht a shoe). Pâte à choux, or choux paste, is an ooooold French pastry. When I say old, I’m talking about the 16th century. It gets its name from its appearance. The ball of dough closely resembles a head of cabbage (or choux in French) after baking. So, pâte à choux means paste of cabbages. The French are so descriptive.
Pâte à choux is one of the most versatile doughs in the bakeshop. With it, you can make eclairs, beignets, profiteroles, churros, croquembouche, or these cream puffs. The key, though, is mastering the dough. Because pâte à choux contains no chemical leaveners, like baking powder or yeast, mixing the right balance of egg (its only leavening agent) is critical.
Take your time when making pâte à choux. Employ your stand mixer and save your arm a workout. Let’s get started.
What do I need to make these Cream Puffs?
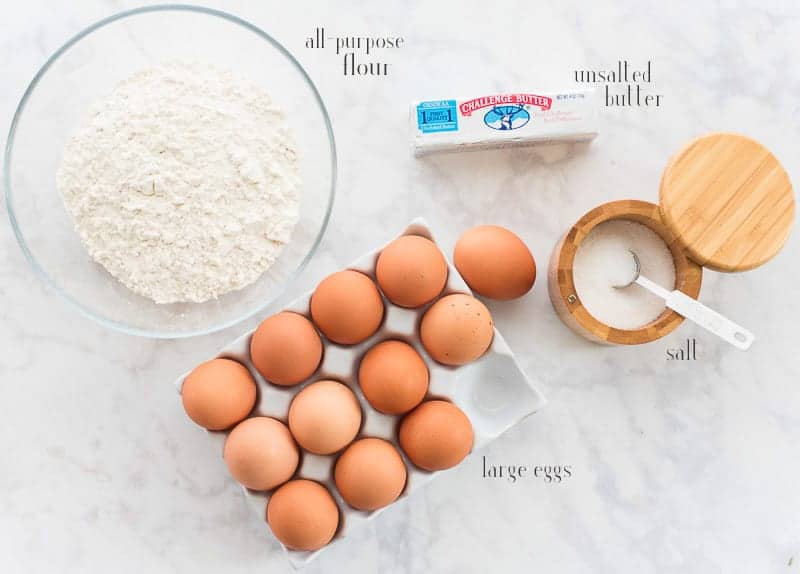
The pâte à choux for these cream puffs only requires five ingredients: water, unsalted butter, all-purpose flour, room temperature eggs, and a bit of salt. That’s it- for the dough, at least. I’ll walk you through optional fillings and toppings later in the post.
Equipment you’ll need: one or two sheet pans (two works best, so you don’t have to crowd your dough), a stand mixer if you have one, and a piping bag with a large tip. If you don’t have any of this equipment, no worries. I’ll walk you through workarounds.
The first thing you need to do is heat the oven to 425°F (218°C). If you have two ovens, that’s a bonus because you’ll need to turn the oven off to cool the pâte à choux. With double ovens, you can bake the next pan of pâte à choux in the second oven while one pan is cooling. If not, there’s a workaround for that, too.
How long do I boil the water for the Pâte à Choux?
The key to manipulating these ingredients into a bomb pastry is patience and some elbow grease (or a sound stand mixer).
Because the goal of a cream puff is for it to puff, you need to mix the dough properly. You also need to make sure you don’t whip it out of the oven too fast and cause all that puffiness it’s achieved to deflate, but more on that later.
The best pan to use when cooking pâte à choux is a saucier or a similar saucepan with sloped sides. Corners equal clumps of flour getting stuck, which leads to clumps in your dough, which should be smooth. That’s why the pan makes a difference here.
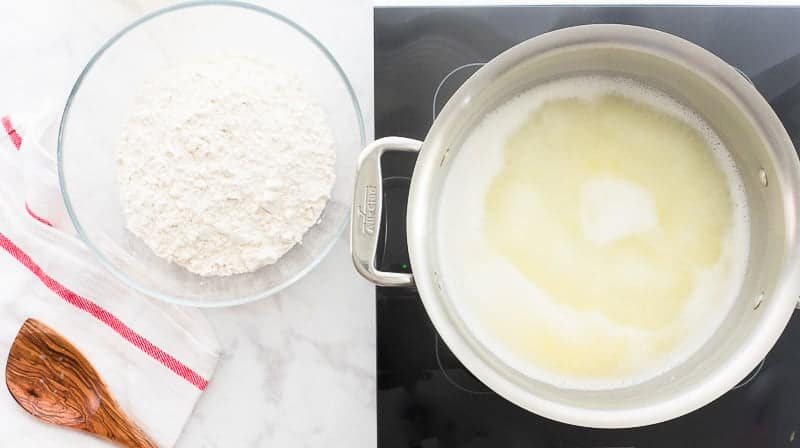
The first step in making the paste’s actual making is to create a homogenous mixture of water and fat. Combine the water, butter, and salt in the saucepan and bring the mixture up to a rapid boil over medium-high heat. As the mixture comes to a boil, the butter will begin to melt, but that’s not where it stops. If you were to move forward with the recipe without allowing that fat to disperse in the water, you’d end up with a greasy, soggy cream puff because the fat would run out from the dough during baking. So, for now, give it a stir to encourage mixing.
After a while, the water will begin to boil and will become murky and pale yellow in appearance. That appearance means that the fat has completely melted into the water, which means it is now ready for the flour.
What’s the best way to mix the flour for Pâte à Choux?
Grab the flour and dump it in all at once, then begin stirring like mad. Because we’re not going to cook this mixture any further, we need to heat all of the flour in the boiling water to begin cooking off the raw, starchy taste. This step also thickens the dough, which we’ll later thin out with the eggs.
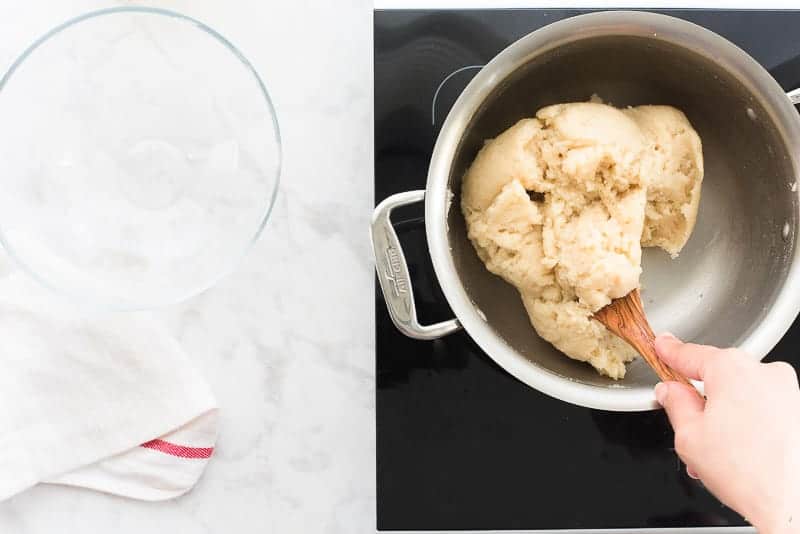
Stir, stir, stir until the flour pulls away from the pot’s sides and forms a ball. It’s going to give your arm a workout; just be prepared. For me, this is the easiest way to complete this step. Alternatively, you can pour the boiling-hot water into the bowl of a stand mixer and blend the flour in with the paddle attachment. I don’t recommend this, at least not for this step, because molten fat and water mixed with a mixer are bound to slosh out and burn you. Instead, save the electric mixer for the next step and count this as arm day.
We use a wooden spoon to avoid burning our hand with a heat-conducting metal spoon. Metal spoons also have notoriously rigid edges, making using them to stir stiff batters a pain in the…hand.
Once your flour-water mixture has balled up, spread it out into an even layer in the bottom of the pot and let it cool for 5 minutes. Stir it after 5 minutes to encourage even cooling of the dough, then spread it again to cool it for another 5 minutes. Cooling the pâte à choux is essential because, without doing so, we run the risk of curdling, and prematurely cooking, our eggs.
How do I add the eggs to the dough for Cream Puffs?
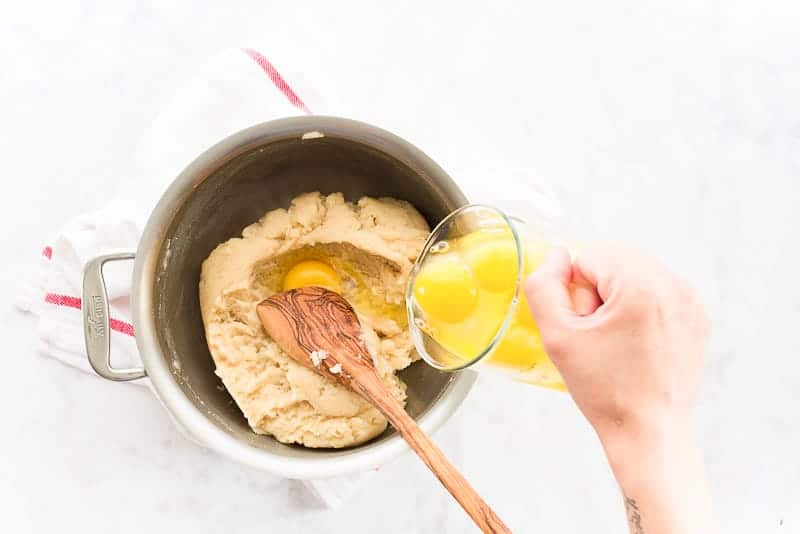
Once the mixture has cooled a bit, begin adding the eggs, two at a time. Again, the eggs are part of what will help our pâte à choux rise in the oven; steam- from the water in the dough and in the eggs- is the most critical element in the dough’s rising. Some recipes call for adding beaten eggs to the mix, which I don’t do. Adding whole eggs forces you to thoroughly mix the dough, which decreases the likelihood of a disappointing cream puff.
I put my pot on top of a kitchen towel or potholder to stop it from spinning while I stir in the eggs. If you’re not up to vigorous and laborious stirring, now’s a safe time to transfer the dough to a stand mixer and use the paddle attachment to mix in the eggs (on low speed). After adding the eggs, the mixture will separate into weird chunks. That’s good; you just need to stir the mixture vigorously until it looks like a spongy paste.
Once it looks like this- an indication that the dough has absorbed the first amount of eggs- you can add the next two eggs. The process will repeat itself like this three, maybe four, more times until all the eggs are mixed in.
The funny thing about making pâte à choux is that depending on where you are in the world (and what the humidity is like on the day you decide to make it), you may need one less egg. For the addition of two last eggs, only add them one at a time. If it still feels stiff- the consistency of stiff mashed potatoes- or if you see it’s dry like pictured above, add the final egg.
How do I know when my Cream Puff dough is ready?
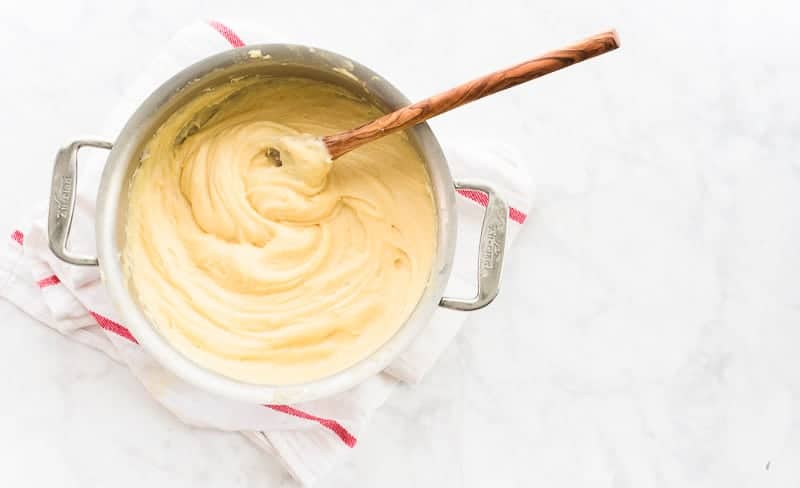
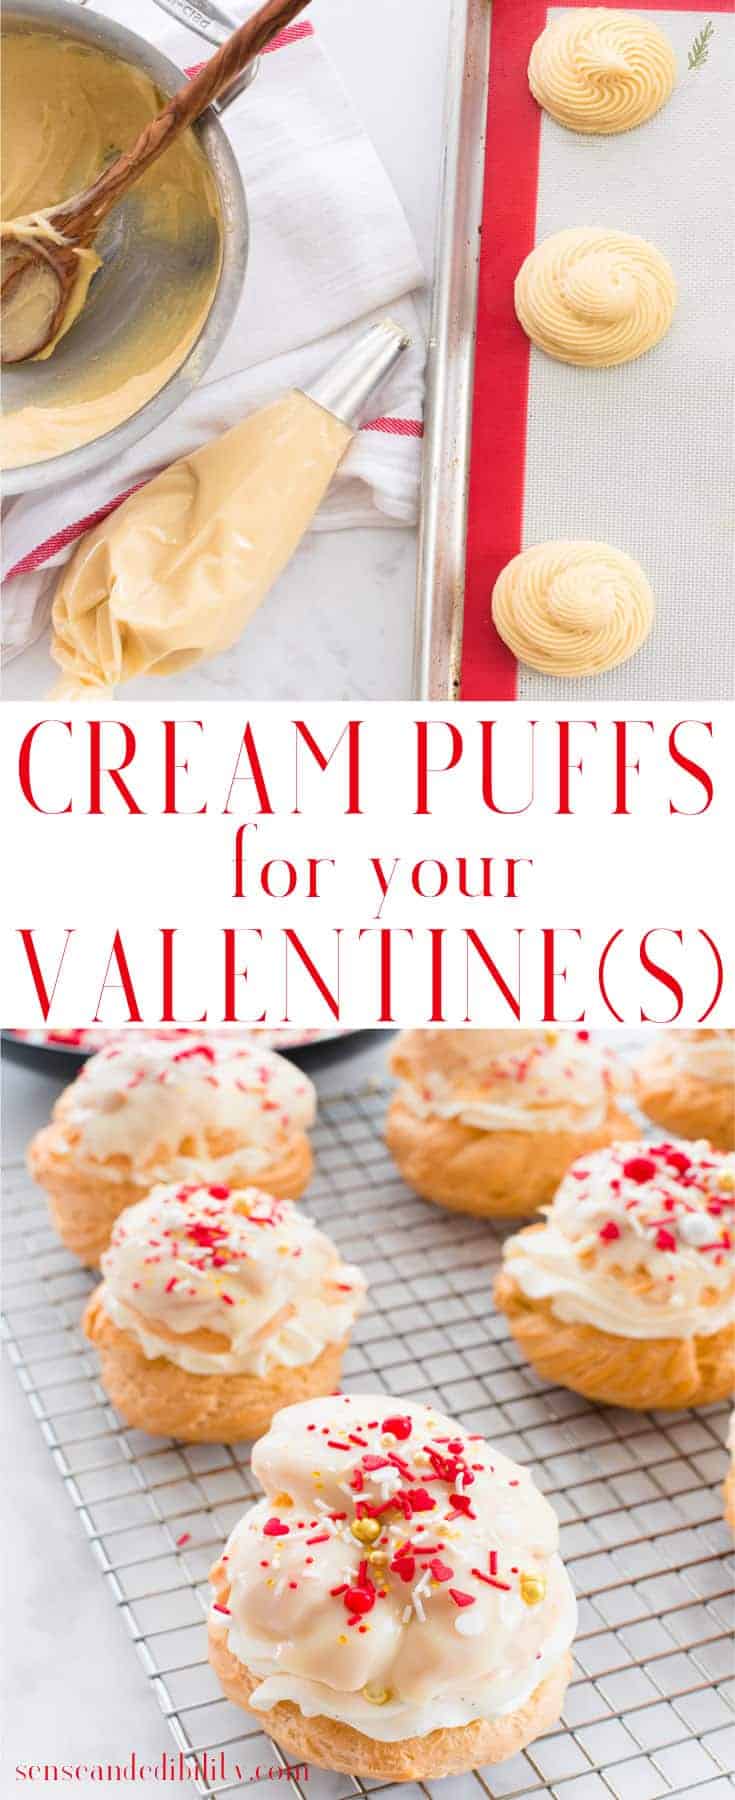
When properly mixed, the dough is glossy and thin enough to pipe, yet it will still hold its shape. Look at the image above. The dough holds the swirls made in it with the spoon, but it is also smooth.
If I were to try to smooth it out with the back of my spoon, it would act like buttercream icing. Meaning it would also hold any shape I’d pipe it into, as well. If your dough doesn’t look like the image above, it may need one more egg. Just mix it in as you did the others.
What tip is best for piping Cream Puffs?
Piping the pâte à choux is pretty straightforward; however, uniformity is vital. You want all of the puffs to puff and bake at the same rate.
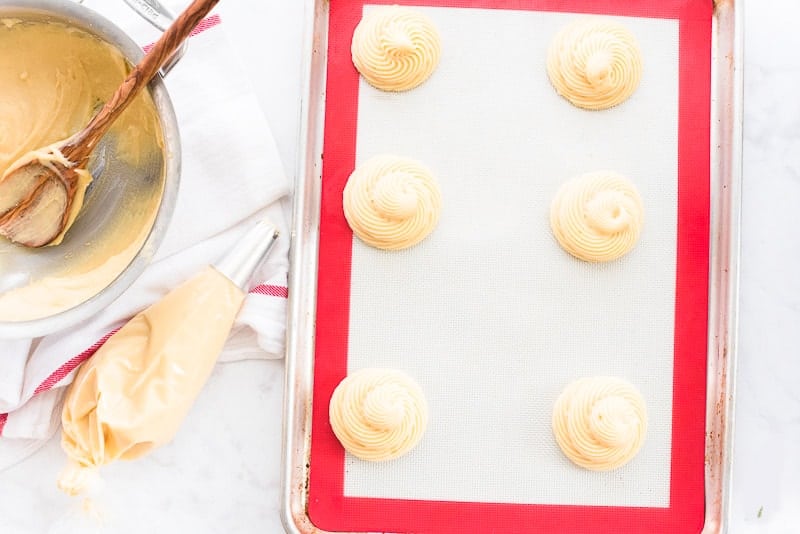
Scoop the paste into a piping bag fitted with a 1M tip, or simply snip off 1-inch of the tip to create a round tip. I prefer a star tip because it gives my baked cream puffs more character. A plain round tip works just fine, though. If you want profiteroles, use a smaller tip, a #12, instead.
Line a sheet pan with a silicone baking mat or parchment paper. Once your pan is prepped, pipe a circle of dough, roughly 3-inches in diameter, and mound it up 1 to 1 1/2-inches high. I space my dough out pretty generously, but that’s also because I had two ovens to work with, which means I could bake two pans simultaneously. If you only have one oven, it may be best to pipe smaller puffs (only 2 by 1 1/2-inches) or pipe 6 puffs on one pan and hold off on piping the remaining. To make profiteroles, pipe balls that are 1-inch.
Can I freeze Pâte à Choux before baking it?
A workaround for only having one oven is to hold off on piping the second pan while you bake the first pan of puffs. That said, I know it can be irritating to wait when you want to shove cream puffs in your mouth.
Freezing the piped dough and baking them later is an excellent workaround for this. Instead of waiting for the first pan to bake and cool, you can pipe all of the dough onto a lined sheet pan and freeze the dough until solid. Transfer the frozen dough to a freezer storage bag and freeze them for 3 months. When you feel like baking, remove just the dough you want to bake. You will have to add an additional 4-5 minutes of baking to account for their being frozen, but it is an excellent solution to having only one oven.
You can also freeze the whole batch of pâte à choux– unpiped- for 3 months, but I like forming them first.
How long do I bake the Cream Puffs dough?
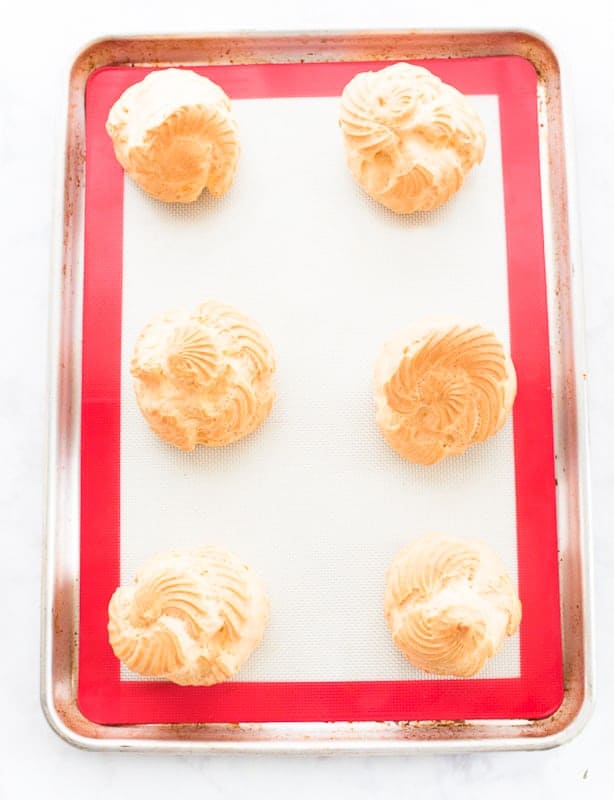
Place the pan of piped dough into the preheated oven, bake the pâte à choux for fifteen minutes, or until the puffs are golden brown and puffed up. The high heat will blast the dough into rising up very fast, but if we leave it that high throughout the baking time, the puffs will burn. Instead, we’re going to decrease the heat after about 15 minutes.
Once they’ve puffed and browned a little, reduce the baking temperature to 375°F (190°C) and crack the door open a smidge. Just decreasing the oven’s temperature doesn’t reduce the heat inside the oven. You need to release some of that heat by cracking the door open. This will prevent the cream puffs from burning as they complete their bake time.
Don’t open the door TOO wide, though, or the oven will cool too fast and cause the puffs to deflate. Propping the door for a count of “5-Mississippi’s” works.
Bake the dough for 10-15 more minutes or until they are golden brown.
My Cream Puffs deflated! What happened?
Once the puffs are golden brown and puffed up, turn the oven off and prop the door open a smidge. This is where having two ovens comes in handy. But, we’ll make do, right?
Use a wooden spoon to hold the door ajar and allow the puffs to cool slowly in the oven. Removing them from the heat into a much cooler environment is a sure-fire way to end up with deflated puffs. Now, if you only have one oven and have more puffs to bake, you can quickly transfer the finished puffs to your microwave. Leaving them in that enclosed space will accomplish the same task if the pan fits! If not, just wait out the cooling time and re-heat the oven to make your second batch.
Cool the puffs in the oven until you can remove the pan with your bare hand, or about an hour. Allow the now-stable puffs to cool completely at room temperature.
If your puffs deflate, they weren’t cooled slowly enough. As long as they’re baked through, they’re still edible. You’ll just need to call them cream “sandwiches” instead of “puffs.”
What can I top my Cream Puffs with?
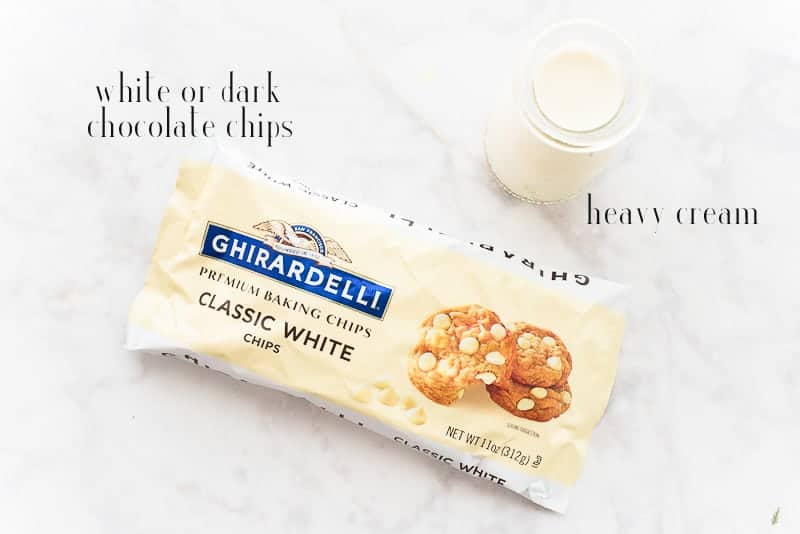
White chocolate ganache is an elegant topping for these cream puffs. White chocolate ganache is fancier than the confectioner’s sugar dusting you usually see on cream puffs. But it’s not as rich as a dark chocolate ganache would be.
You only need high-quality white chocolate chips and heavy cream. Adding flavorings, like vanilla extract, brandy, or rum, can elevate the plain ganache to something more indulgent. Just add a 1/2 teaspoon of your favorite flavoring to the cream while you heat it.
White chocolate ganache sets up thinner than the dark chocolate version, so I double-dip the cream puffs top to give them more coverage. You can also make a dark chocolate ganache if you want to, however. Simply replace the white chocolate here for dark or semi-sweet chocolate.
How do I make Ganache?
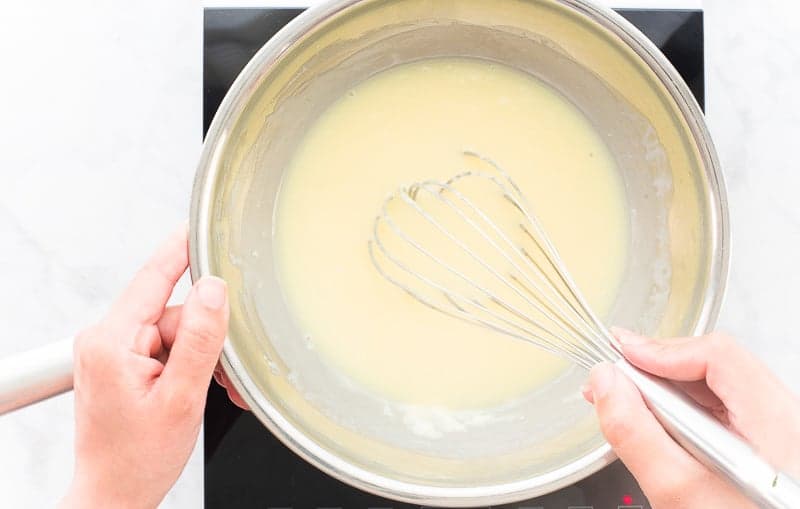
To make the white chocolate ganache, combine the white chocolate chips and heavy cream in the bowl of a double-boiler. If you don’t have a double-boiler, you can also use a metal (or glass) bowl set over a saucepan. Just fill the lower pot with 3-inches of water.
Bring the water up to a simmer.
Once you see steam escaping from under the bowl, start whisking the cream and chocolate together. That steam gradually heats the cream, which in turn melts the chocolate. Whisk the two together until smooth, or for 5 minutes.
When the ganache is lump-free, remove the bowl from the heat and allow it to cool until it’s thickened. Whisk the ganache every 3 minutes to ensure the ganache cools evenly and without lumps.
The ganache should be the perfect consistency for dipping your cream puffs tops in 30 minutes.
What’s the best filling for Cream Puffs?
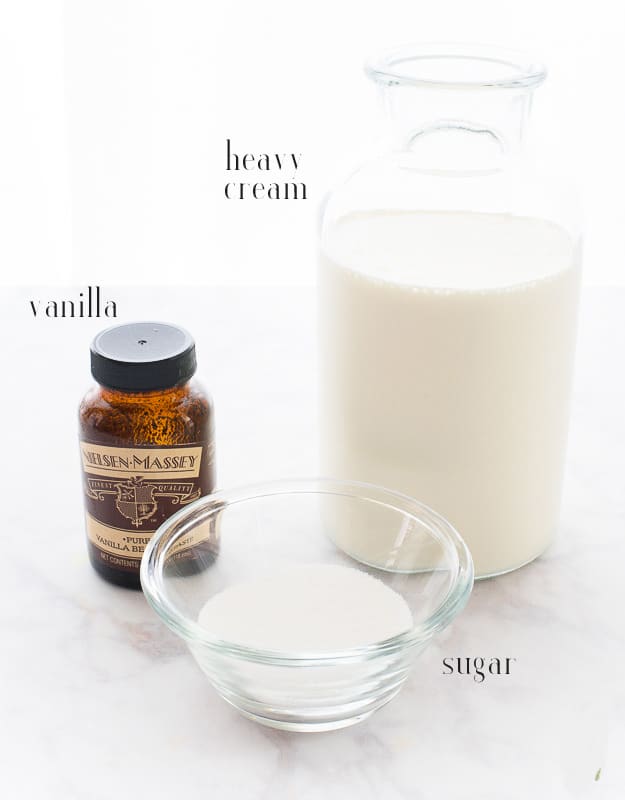
Cream Puffs can be filled with anything from pastry cream to scoops of frozen custard, but a proper cream puff is filled with whipped cream (or crème Chantilly).
All it requires is heavy cream, sugar, and vanilla. I suggest using a vanilla bean paste to flavor your whipped cream, but vanilla extract will also work here.
You need a mixing bowl and an electric hand mixer, as well. That is unless you have the urge to whip the cream by hand.
How do I make Whipped Cream?
If you want to whip the cream quickly, freeze a metal mixing bowl for a half-hour until it’s ice-cold. A cold bowl will help your cream whip faster and thicker. It’s not a must, but it does make this go faster.
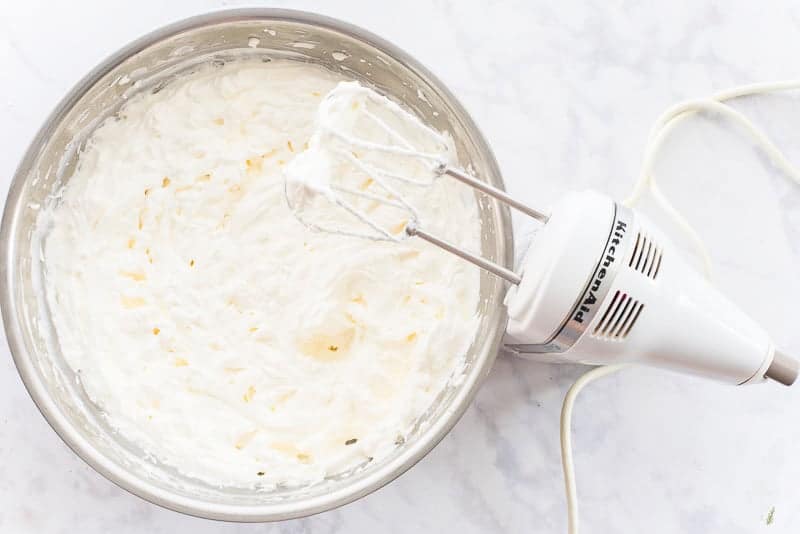
Using an electric hand mixer or stand mixer fitted with the whip attachment (or a whisk and brute strength), whip the cream and flavoring on high speed until the beaters begin leaving trails on the surface of the cream- about 1-2 minutes. Gradually add the sugar and continue beating for an additional 3-4 minutes.
The cream should be stiff and, when the beaters are lifted from it, hold peaks.
If the cream begins to separate, you may salvage it by adding a 1/2 cup more cream and re-whipping on a lower speed for 1 minute. If it’s too far gone- or completely curdled- just toss it and start over.
The cream should be stiff and, when the beaters are lifted from it, hold peaks.
If the begins to separate you may be able to salvage it by adding a 1/2 cup more cream and re-whipping on a lower speed for 1 minute. If it’s too far gone- or completely curdled- just toss it and start over.
What are some swaps for Cream Puff fillings or toppings?
Optional Sauce Toppings:
Whipped Cream Flavor Suggestions:
Replace the vanilla bean paste with:
- Almond
- Rum
- Brandy
- Cinnamon
- Maple
Swap the Whipped Cream with:
- Frozen custard
- Pastry Cream
- Pudding
- Aligot (cheese and potato)
Sprinkles on top or gel food coloring added to the whipped cream are easy ways to tailor your cream puffs to the occasion or holiday.
How do I fill and top Cream Puffs?
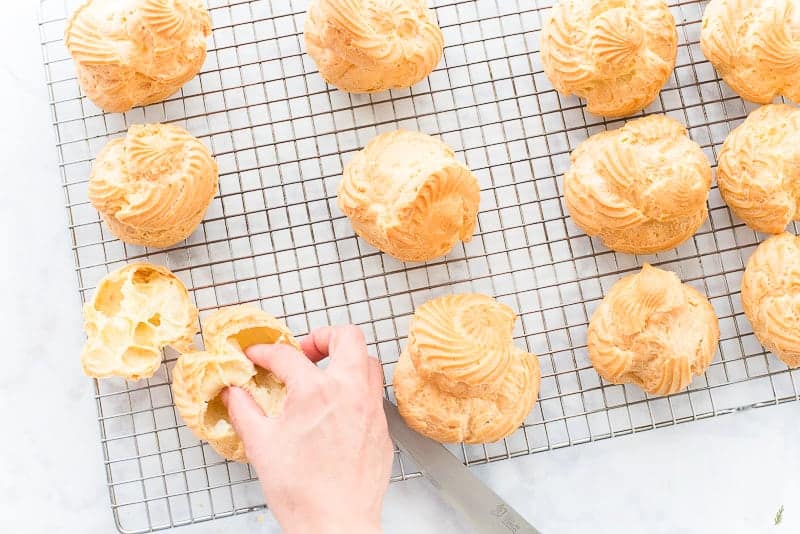
Grab a serrated knife and use it to cut off the tops of the puffs. It’s going to be closer to the top third of the puff, as opposed to half and half. Just think of it as the cream puffs “hat.”
If you find that the puff’s interior has segments, just press it down to create a well. Try not to pull anything out because it will likely cause a hole in the puff where the cream will later ooze out from. Try to keep the “hats” with their matching puffs for the sake of aesthetics.
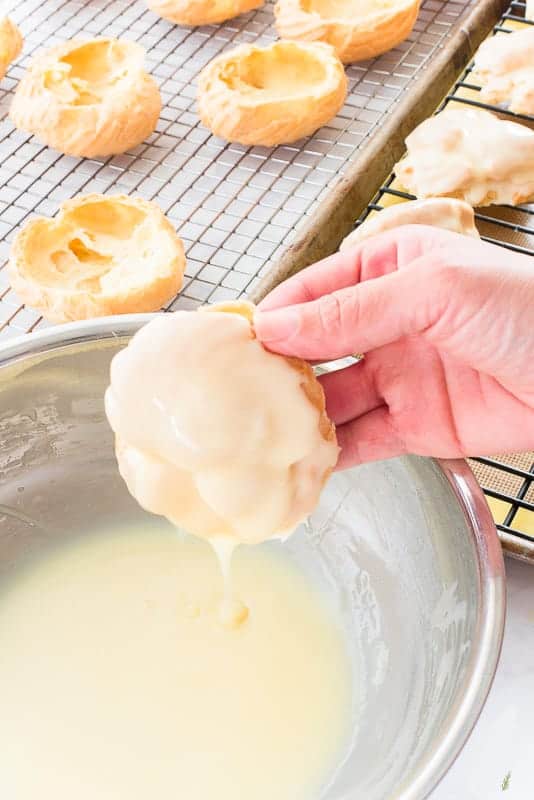
Dip the puffs’ tops into the thickened ganache, allowing the excess to run back into the bowl. Place the top onto a cooling rack set over a parchment-lined sheet pan to catch drips. If you’re in a hurry, pop the tray into the freezer to get the ganache to harden a little quicker.
Dip the tops in ganache a second time to get nice, thick coverage.
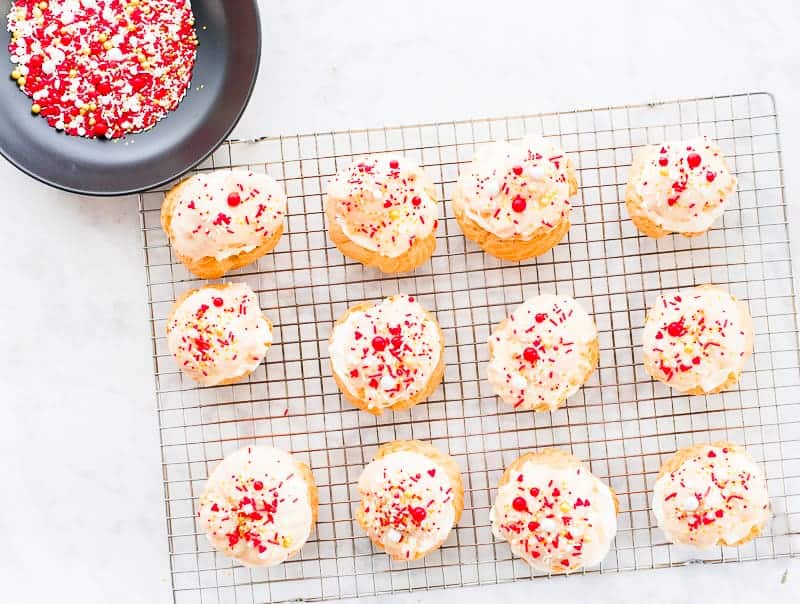
After your tops’ ganache has set, decorate them with a big pinch of sprinkles. Sprinkles are totally optional, but who hates sprinkles? If you hate sprinkles- fair enough- you can leave them off and dust the filled cream puffs with powdered sugar instead.
How do I store Cream Puffs?
Before you proceed with the cream puffs, you should know that you shouldn’t fill them until you’re ready to serve them. The cream’s moisture will seep into the pâte à choux and cause it to become rubbery. My tip is to only bake what you’re going to eat that day. After you fill the puffs with any type of filling, the clock starts ticking. If you absolutely have to fill them ahead of time, just keep them in the fridge, understanding that the longer they sit, the soggier they will be.
In other words, don’t say I didn’t warn you.
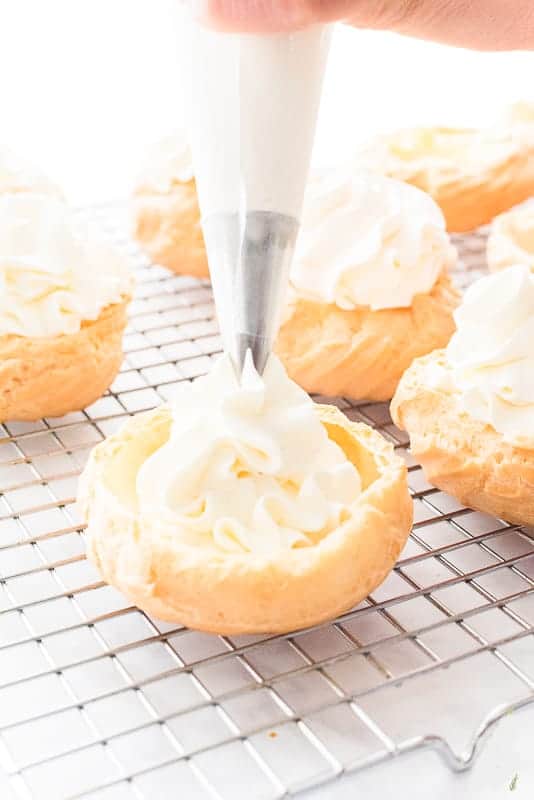
Fill another piping bag (fitted with a 1M star tip) with the vanilla whipped cream.
Pipe a generous amount of the cream into the middle of each puff. You can also spoon the whipped cream into the center of each bottom shell.
Top the whipped cream-filled puff with the dipped hat. Refrigerate the cream puffs until ready to serve.
If you’d rather wait to fill the cream puffs, you can let them cool down completely before packing them into plastic storage bags and keep them in the fridge. Refrigerated, they will keep (uncut and unfilled) for a week. Just pop them into the oven for 5 minutes at 350°F (177°C) before cutting if you want them to be crisper.
Can I freeze Pâte à Choux after baking it?
I actually prefer to freeze my baked, unfilled pâte à choux.
Because the puffs thaw so fast, I find that freezing them makes more sense. I mean, I can freeze them for 6 months and pull them out whenever I need them as opposed to only getting a couple of days of life from them in the fridge. They also are more durable when frozen.
To freeze the baked puffs:
- Cool them completely as instructed.
- Transfer the cooled puffs to a freezer-safe storage bag or container.
- Freeze the puffs for 6 months.
- Remove them from the freezer as needed and cut the tops while frozen.
- Fill and serve.
How long are filled Cream Puffs good for?
Again, after filling, cream puffs are best if eaten within 24 hours. You can refrigerate the unfilled puffs for 3 days, though.
If you don’t think you’ll eat them within 24 hours, just fill them “to order,” so to speak.
Can I make savory Cream Puffs?
Savory puffs are an excellent option for this pâte à choux. Instead of filling it with whipped cream, you can fill it with a meat filling, veggie filling, or aligot.
Plain, unstuffed puffs are excellent replacements for bread. They’re basically Yorkshire puddings. Serve them alongside hearty cuts of meat or stews. Sprinkle a generous pinch of shredded cheese and bake them for 3-4 minutes to melt the cheese, and you have a fantastic cheese puff.
Can I make these ahead?
Because of the shelf-life on filled cream puffs, I suggest waiting until the last minute to fill them. You can, however, assemble all the components up to a week ahead. I would make the whipped cream a few hours ahead, though, as it tends to deflate the longer it sits.
Make this a cream puff party! Gather your friends and set up a cream puff bar. Have a variety of whipped creams or fillings to choose from. Do the same with dipping sauces and sprinkles. Your guests can customize their cream puffs on their own and take the work off of you!
With these helpful hints, your better than bakery-style Cream Puffs are only a short bake away. Once you master this recipe, you have endless dessert options for every holiday imaginable.
Be sure to share this recipe with the Cream Puff lovers in your life and pin it to your dessert boards for easy finding later.

Better than Bakery Cream Puffs
at Sense & EdibilityEquipment
- sheet pans
Ingredients
Pâte à choux
- 2 cup (470 milliliters) water
- 6 ounces (170 grams or 1 1/2 sticks) unsalted butter sliced
- 1/2 teaspoon (3 grams) kosher salt
- 2 cups (256 grams) all-purpose flour sifted
- 8-10 large eggs room temperature *see notes
White Chocolate Ganache
- 1/2 cup (120 milliliters) heavy cream
- 11 ounces (312 grams) white chocolate chips
Vanilla Bean Whipped Cream
- 1 quart (960 milliliters) heavy cream
- 1 teaspoon vanilla bean paste (or other flavoring)
- 1/2 cup (100 grams) granulated sugar
Optional Decorations
- sprinkles
- powdered sugar
Instructions
- Preheat your oven(s) to 425°F. Line two sheet pans with silicone baking mats or parchment paper. Set the pans aside.
Make the Pâte à Choux
- Add the water, butter slices, and salt to a saucepan or saucier with sloped sides.Bring the mixture up to a rapid boil over medium-high heat. Stir the liquid to encourage melting and mixing of the butter and the water.
- After 3-4 minutes of boiling the the butter will have dispersed in the water and causing it to appear murky and pale yellow.Stir the entire amount of flour into the liquid in the pot until the flour pulls away from the pot's sides and forms a ball.
- Once the dough has balled up, spread it out into an even layer in the bottom of the pot and allow it cool for 5 minutes. To encourage the dough to cool evenly, stir it after 5 minutes before spreading it out again to cool for an additional 5 minutes.
Add the Eggs to the Flour Mixture (Two at a Time)
- At this point, you can also transfer the dough to a stand mixer and use the paddle attachment to mix in the eggs (on low speed).Once the mixture has cooled, stir in the eggs, two at a time. After each addition of eggs, the mixture will separate into chunks.
- Continue vigorously stirring until it combines and resembles a spongy paste. This is an indication that the eggs have been absorbed and that the next two eggs can be added.Add the next two eggs. The process will repeat itself like this until all the eggs are mixed in.
- For the addition of two last eggs, add them one at a time. If the dough feels stiff- the consistency of stiff mashed potatoes- or dry, add the final egg.When properly mixed, the dough will be glossy and thin enough to pipe, yet it will still hold its shape. Allow the paste to cool for 20 minutes.
Pipe, Bake, then Cool the Pâte à choux
- Transfer the cooled pâte à choux to a piping bag fitted with a 1M tip, or simply snip off 1-inch of the tip to create a round tip.
- Pipe a circle of dough, roughly 3-inches in diameter, and mound it up 1 to 1 1/2-inches high. Place the pan of piped dough into the preheated oven, bake the pâte à choux for fifteen minutes, or until the puffs are golden brown and puffed up.
- Once the mounds have puffed and browned slightly, reduce the baking temperature to 375°F (190°C) and crack the door open slightly for a full five seconds. After the oven has cooled slightly, close the door and continue baking the dough for 10-15 more minutes or until they are golden brown.
- After the dough has baked and is a deep golden brown, turn the oven off and prop the door open slightly using a wooden spoon to hold the door ajar. Allow the puffs to cool slowly in the oven to prevent them from deflating. Cool the puffs in the oven until you can remove the pan with your bare hand, or 45 minutes to 1 hour. Allow the now-stable puffs to cool completely to room temperature.
Prepare the White Chocolate Ganache (while the puffs are baking or earlier in the day)
- Once steam begins to escape from the lower pot, whisk the cream and chocolate together. Whisk the two together until smooth, or for 5 minutes.
- When the ganache is lump-free, remove the bowl from the heat and allow it to cool until it has thickened, whisking every 3 minutes to ensure the ganache cools evenly and without lumps.The ganache should be ready for dipping your cream puffs tops after cooling for 30 minutes.
Whip the Cream (while the puffs are baking or earlier in the day)
- Using an electric hand mixer, a stand mixer fitted with the whip attachment, or a whisk, whip the cream and flavoring on high speed until the beaters begin leaving trails on the surface of the cream- about 1-2 minutes.
- Gradually add the sugar and continue beating for an additional 3-4 minutes. When properly whipped, the cream should be stiff and, when the beaters are lifted from it, hold peaks.Store the whipped cream, covered, in the fridge until you're ready to use it.
Decorate the Cream Puff Tops
- Use a serrated knife to cut off the top third of the puff. Just think of it as the cream puffs "hat."Try to keep the "hats" beside their matching bottom for the sake of aesthetics.
- Dip the tops into the thickened ganache, allowing the excess to run back into the bowl. Place the top onto a cooling rack set over a parchment-lined sheet pan to catch any drips. To speed up the setting of the ganache, place the tray of tops into the freezer for 5 minutes.
- Dip the tops in ganache a second time for a thicker coating.After ganache on the tops has set slightly, decorate them with a big pinch of sprinkles.
Fill the Cream Puffs Just Before Serving (See Notes for Make Ahead Options)
- If the puff's interior has sections created by lines of dough, just press down those lines to create a well. Try not to pull out the interior as that will likely cause a hole in the puff where the cream will later ooze out from.
- Fit a piping bag with a 1M star or a plain round tip. Fill the piping bag with the vanilla whipped cream.
- Pipe a generous amount of the cream- about 1/2 cup- into the middle of each puff. You can also spoon the whipped cream into the center of each bottom shell. Top the whipped cream-filled puff with its matching dipped hat. Refrigerate the cream puffs until ready to serve.
- Cream puffs are best if eaten within 24 hours.
Notes
Notes about making pâte à choux:
- Depending on you climate and the humidity on the day you decide to make it, you may need to add one more (or less) egg. Pay close attention to the appearance of the dough to determine the need for more or less eggs.
- If you only have one oven and want to make the full batch of dough, carefully, but quickly, transfer the baked puffs to your microwave. Leaving them in that enclosed space will accomplish the same task so long as the pan fits in the microwave.
To Freeze Unbaked Pâte à Choux Dough:
- Pipe all the dough onto a lined sheet pan into your preferred shape and size.
- Place the pan into the freezer and freeze the dough until solid.
- Transfer the frozen dough to a freezer storage bag and freeze for 3 months.
- To bake: remove just the amount of dough you want to bake, add an additional 4-5 minutes of baking to account for their being frozen.
- You can also freeze the whole batch of pâte à choux- unpiped- for 3 months in a sealed container. Thaw in the refrigerator before forming and baking as instructed.
Cream puffs shouldn't be filled until you're ready to serve them. The moisture in the cream will seep into the pâte à choux and will cause them to become rubbery. My tip is to bake only what you're going to eat that day.
Cream Puff Swaps:
Optional Sauce Toppings:
Whipped Cream Flavor Suggestions:
- Almond
- Rum
- Brandy
- Cinnamon
- Maple
Swap the Whipped Cream with:
- Frozen custard
- Pastry Cream
- Pudding
- Picadillo
- Vegan Picadillo
- Aligot (cheese and potato)
Storage Tips for Baked, Unfilled Puffs:
- Bake the puffs as instructed and allow them to cool completely before transferring them to plastic storage bags.
- Store the puffs in the refrigerator (uncut and unfilled) for 1 week. Crisp them in the oven for 5 minutes at 350°F before cutting.
To Freeze Baked, Unfilled Puffs:
- Cool them completely as instructed.
- Transfer the cooled puffs to a freezer-safe storage bag or container.
- Freeze the puffs for 6 months.
- Remove them from the freezer as needed and cut the tops while frozen.
- Fill and serve.
Nutrition




I made these with my partner this past weekend to indulge a bit and it was delicious! Definitely would recommend as this was such a fun recipe especially to do with someone else. These puffs were light and fluffy as expected and I couldn’t be more happy!
I’m so glad you guys enjoy it, Sydelle!
I was always so nervous to make cream puffs but finally decided to make this recipe after seeing it come up on Google. The pictures lured me in, everything looks so beautiful! I decided to give it a try and wow, it wasn’t nearly as difficult as I thought! So fluffy, so delicious – we all loved them!!
I’m so glad to hear they weren’t as intimidating as you thought!
These were, in fact, better than the bakery and I honestly never thought I could pull them off. Thanks for this detailed recipe!
It’s my pleasure, Jazz! I’m so glad you enjoyed them!
I love your clear and complete instructions for this recipe! This was my first time making Choux pastry and it came out great thanks to your detailed tips!