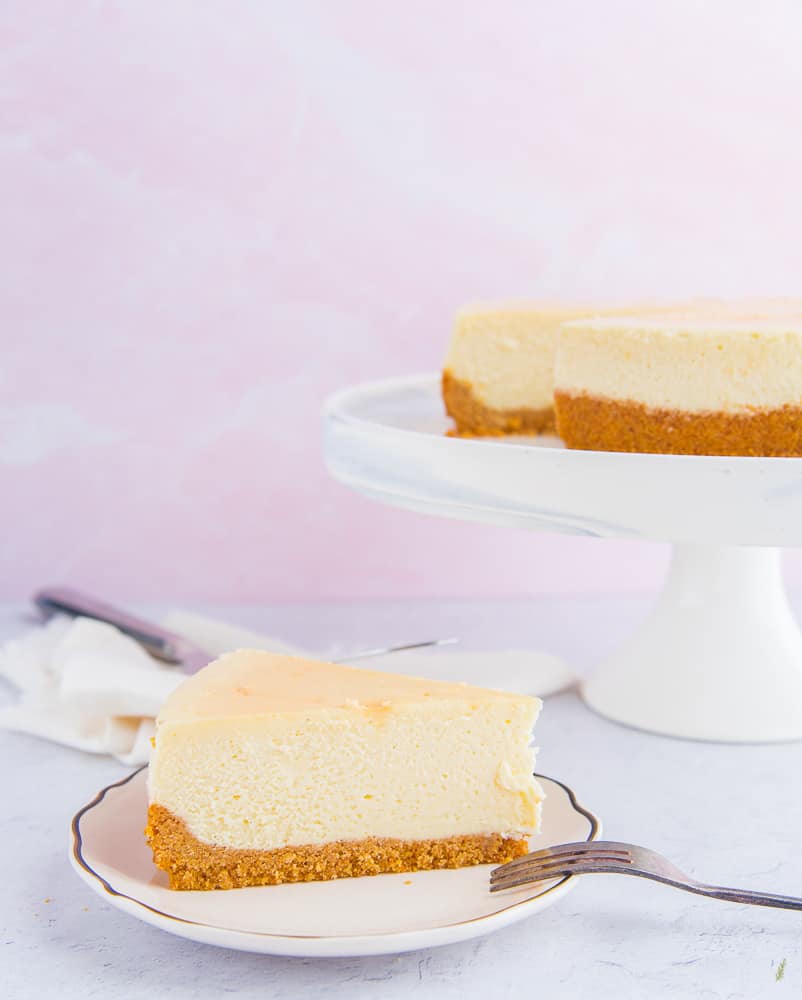
 I feel a dessert week coming on, so brace yourself. A Classic Cheesecake is a dessert of beauty so let’s start with that. Beginning with its buttery-crisp graham cracker crust and ending with its luscious, custardy filling; nothing on the planet tops my NY style cheesecake for flavor and versatility. Nothing, that is, except an amazing dessert topping, which I’ll post later.
Once you know the characteristics of a perfect cheesecake, you can alter it to suit your mood. There are a wide variety of ways in which to flavor a cheesecake, as well as tons of toppings that compliment it. This post will teach you everything I know about baking cheesecakes. You are going to feel confident and equipped to make your very own by the end of this post.
What Is a Classic Cheesecake?
You may find it surprising to discover that the classic cheesecake has been around for quite some time. Since the 15th century, Europeans- and spots of other nations around the world- have been baking these custards. Areas with a dairy industry most often have a version of cheesecake that their region is known for. The difference is as varied as the regions and countries they are made in. Some prefer a lighter, fluffier cheesecake. Others favor a dense, creamier cheesecake. Mine will pay homage to my NYC roots with its denseness and creaminess.
The main ingredient used to make cheesecakes is the cheese. Here in the States, the most popular cheese to use in cheesecakes is cream cheese. Ricotta, cottage, or quark (mostly used in German käsekuchen) are commonly used in Europe. Because we’re learning the classic cheesecake preparation, we’re going to use the most widely recognized cheese- cream cheese.
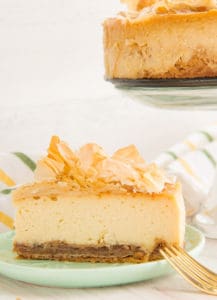
Besides the cheese, which makes up the bulk of the dessert, there are many ways to change cheesecakes up. NY Style cheesecake often has a sponge cake crust. I’m a sucker for, and die-hard fan of, graham cracker crust- the most commonly used crust for cheesecakes. Flavored cookies- such as chocolate, gingersnaps, or Biscoff- may also be used in place of grahams. I’ve even gone so far as to use other desserts as crusts, as I did with this Honey Cheesecake with Baklava Crust.
But! We’re getting ahead of ourselves. Let’s learn the classic recipe and get all fancy after we’ve mastered it.
What You’ll Need to Make This Classic Cheesecake
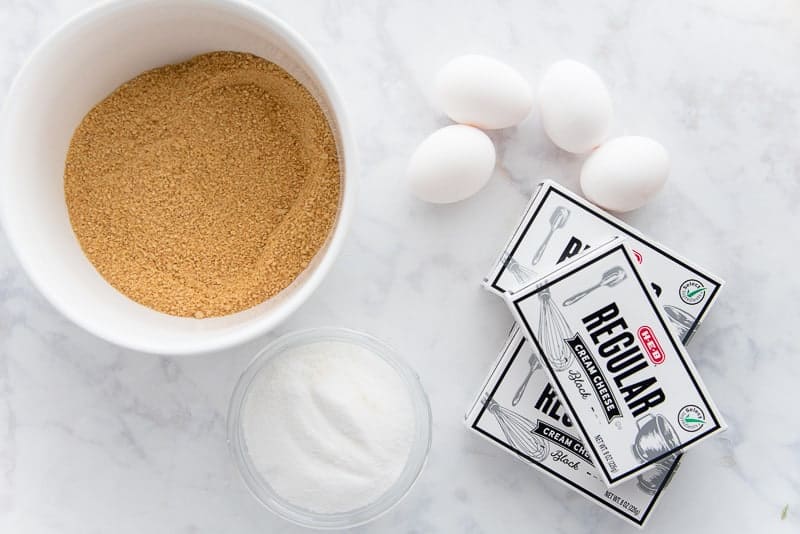
The classic cheesecake consists of two parts: the crust and the cheesecake batter (or filling). The crust, again, is made from graham crackers that have been pulsed to a very fine crumb. It is then mixed with melted butter to bind it together, as well as sugar to sweeten it up a little bit.
The cheesecake filling requires softened cream cheese, granulated sugar, eggs, cornstarch, a pinch of salt, and a flavoring of your choice. I make mine with vanilla bean paste most often.
The dessert is baked in a foil wrapped pan, which is later nestled into a water bath called a bain-marie.
Prepare the Graham Cracker Crust
The first step in making a classic cheesecake is the preparation of the crust. Because we want a crust that has a bit of texture to it, it needs to be par-baked prior to filling it with the cheesecake batter. One important thing to remember when making a graham cracker crust is that the measurements of grahams to butter is often approximate. Different brands of graham cracker crumbs will have varying degrees of moisture. If you opt to make your own graham cracker crumbs, those will have a difference in moisture as well. So, don’t be surprised if on a super-humid day, or after switching to a different brand of crackers, you need to add more butter to create a well-binding crust. However, you can usually bank on the measurements provided to be pretty spot on.
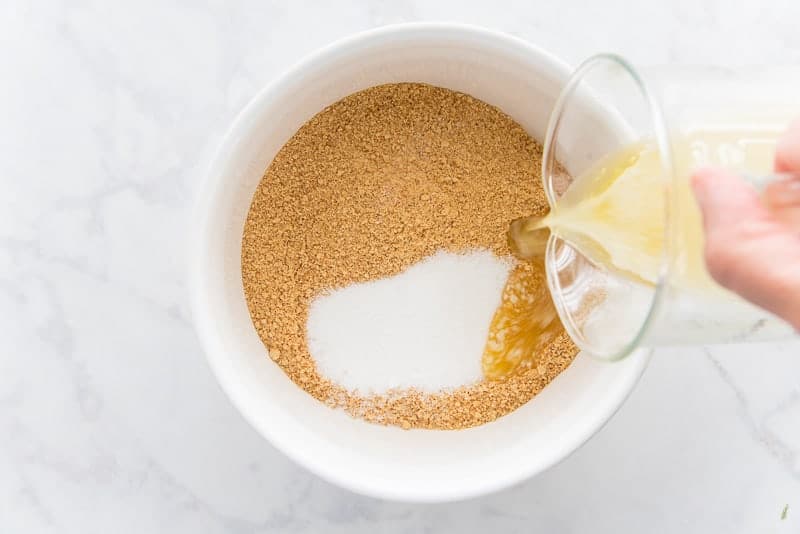
Add the graham cracker crumbs to a mixing bowl. Stir in the sugar and melted butter. Properly mixed, the crumbs will hold together when clenched in your fist. If you find the mix is too loose- it crumbles when you release your grip- add more butter. On the contrary, if the mix oozes butter when squeezed, you need to dry it out by adding more crumbs.
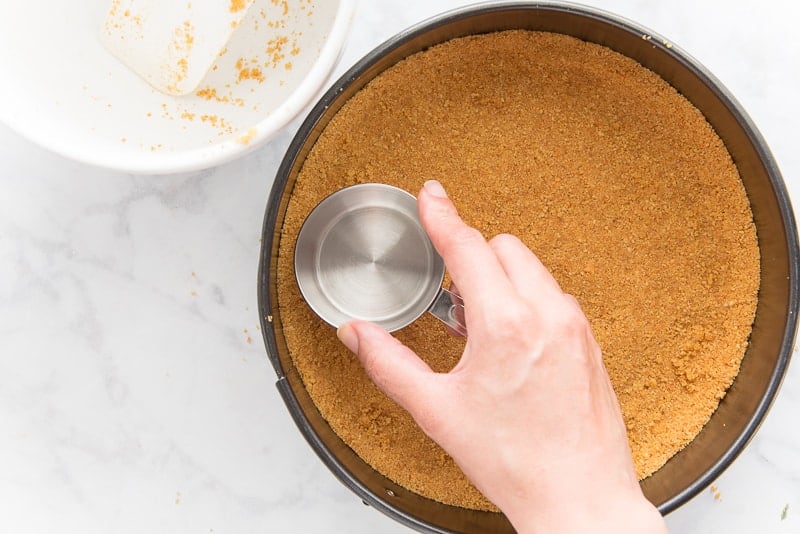
After you’ve developed a well-balanced crust, press it into a 9″ springform pan. The measuring cup that was used to measure the ingredients is the perfect tool for this. Press the crumb mixture into an even layer on the bottom of the pan. Guide the crust about a 1/2″ up the sides of the pan to create a side crust. Create a packed crust by pressing firmly as this will ensure the crust won’t break when you serve the cheesecake.
Double Wrap the Pan
Place the pan into a preheated oven and bake it for 10 minutes. You will smell its aroma wafting into the air when it’s ready to come out. Remove the pan from the oven and allow it to cool to the touch.
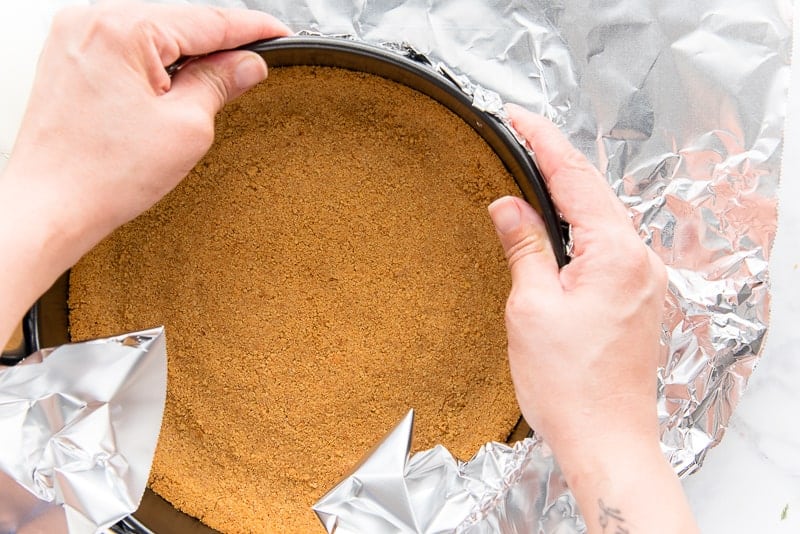
After the pan is cool enough to handle, wrap it carefully in two layers of aluminum foil. Heavy duty aluminum foil is best, but whatever you have in the pantry is fine. It is important not puncture holes in the foil while you’re wrapping it because those holes may let water in. Since water will saturate the baking custard and prevent it from setting completely, we must avoid puncturing the foil at all cost.
Options for Cheesecake Crusts
NY Style cheesecakes- namely Junior’s, which is among the most recognized cheesecakes in the world- often have a sponge cake crust. Because I don’t like its texture, I’m not a fan. If you are a fan, the sky’s the limit on the flavor of the sponge cake crusts you can use: chocolate, lemon, orange, fruit-flavored, or red velvet, are all the cakes I’ve used as crusts for others.
The same applies for graham crusts. Crushed chocolate cookies, vanilla wafers, gingersnaps, Biscoff, or zwieback cookies are options you can use as crusts. The sweeter the cookie, the less sugar you should add to the crust mixture. Yes, it’s a dessert, but we don’t want it to be obnoxiously sweet.
Avoid the Most Common Cheesecake Mistake!
The star of this dessert is the cheesecake batter. But, one of the most common errors I see in cheesecakes are lumps. We’re all human, yes, but lumpy cheesecake batters are totally avoidable.
The best cheesecakes are not made the same day you want to serve them. They are- at the very least- a 2-day process. Don’t roll your eyes at me. I’m doing this for your good!
Cream cheese has added stabilizers and thickeners to help it hold its shape and maintain freshness. As a result, you can’t whip up this batter with cheese that’s been yanked straight from the fridge. The cream cheese needs to sit at room temp for at least 6 hours before it’s soft enough to blend smoothly. Two days before I plan to eat cheesecake, I set out the cream cheese I’m going to use to make it. The next day is when I mix and bake the batter. That gives my cream cheese enough time to soften to the point where, when I press my finger into it, it goes straight through.
In a pinch- and I mean as a complete last resort- you can soften the cream cheese in the microwave. I cringe at this, but I know sometimes it’s unavoidable. Just nuke the bricks of cheese in 30 seconds intervals until soft. The short bursts of heat prevent it from actually melting and cooking.
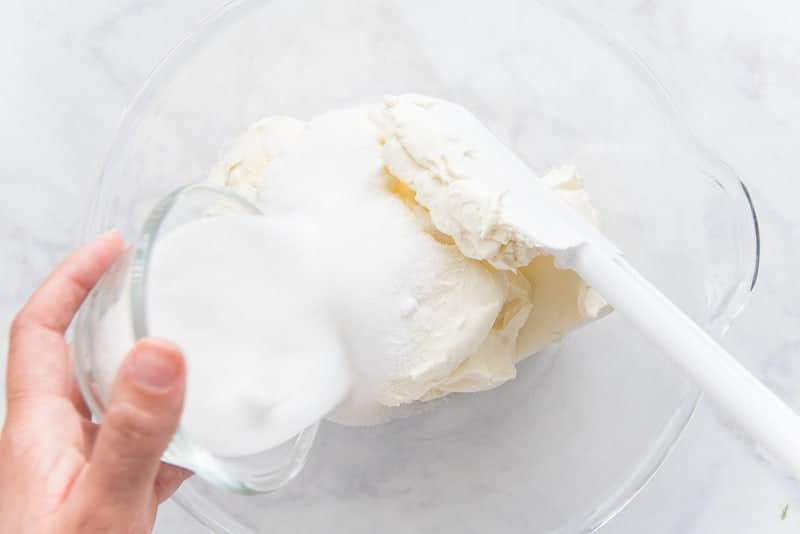
Once you have your softened cream cheese, add it and the granulated sugar to a large mixing bowl.
Blend the Classic Cheesecake Batter
Use an electric mixer (or a stand mixer fitted with the paddle attachment) to blend the cream cheese and sugar together on low speed. After the cream cheese and sugar come together, increase the mixing speed to medium and beat until very smooth, about 2 minutes.
Stop the mixer and scrape down both the beaters and the bowl. Because this is also where lumps are likely to develop. Scraping down the bowl, though it may seem like a bother, is the best way to achieve a super-smooth classic cheesecake batter. If you don’t scrape the beaters and bowl down, you’re going to find chunks of cream cheese clinging to the sides of the bowl or at the very top of the beaters. When you scrape the batter into the cheesecake pan, those lumps will mock you.
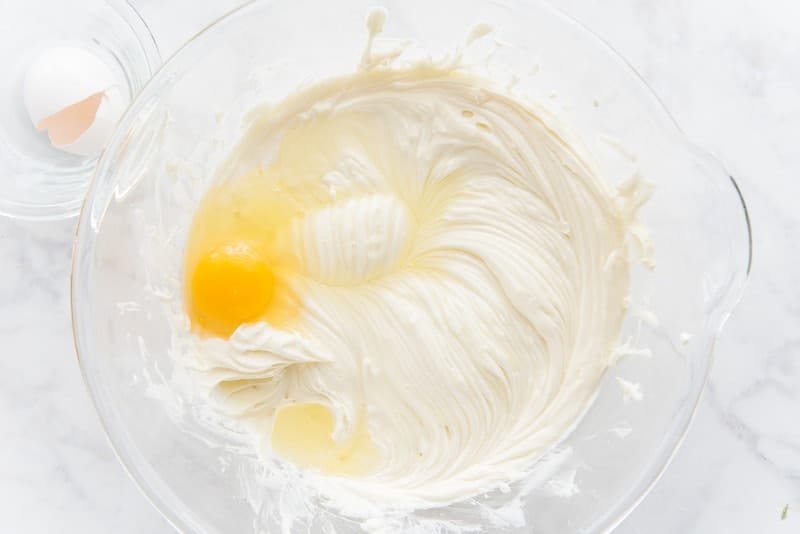
After you’ve scraped down the bowl, begin adding your room temperature eggs, one at a time. Room temperature eggs blend into the batter more evenly and faster than eggs that are straight from the fridge. After each egg addition, blend the batter on medium speed for 30 seconds, before scraping everything down. Only after you’ve scraped down the bowl, should you add the next egg. Continue adding the eggs, blending, and scraping down until all the eggs have been mixed in.
Use High-Quality Flavorings
When it comes to giving your classic cheesecake a flavor, you’re limited only to the extracts, emulsions, or syrups you can find in your grocery store. Nielsen Massey has high-quality extracts, pastes and powders. Emulsions are extracts on steroids. If you can find emulsions- they’re usually found at cake decorating supply stores- use them sparingly (usually, half the amount of extract called for). No matter which you use, be sure to use natural flavorings in your cheesecake. Artificial extracts, though they are more economical, taste chemically. They’re not at all appetizing.
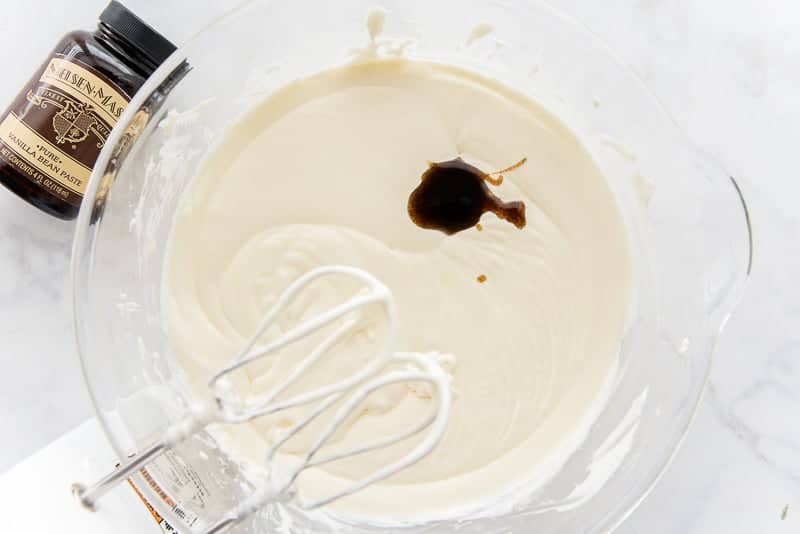
Because I want to keep this classic cheesecake nice and neutral, I’m adding pure vanilla bean paste. After I add the paste to the batter, I blend it in on low speed for 30 seconds.
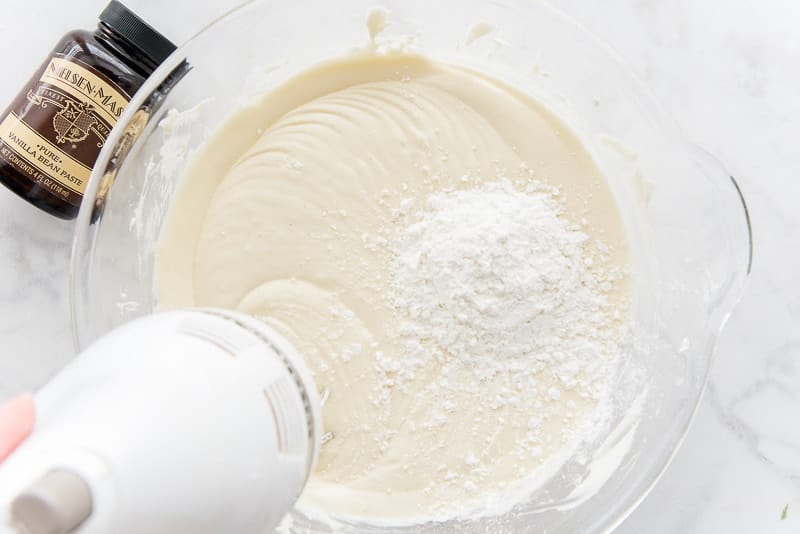
Cornstarch creates body in this cheesecake. While you can substitute flour for the cornstarch, I find it takes longer to blend in and it’s more susceptible to lumping up. Once the cornstarch has been added, blend the batter on low speed for 30 seconds, or until it’s mixed in. Scrape down the bowl and beaters and give it a 15 second mix. Try not to overmix at this point, or the cheesecake will turn out gummy.
Tips on Baking the Perfect (Crackless) Classic Cheesecake
The following tip has never failed me. Since I have started following this tip religiously, I have never had a crack in my cheesecakes. In fact, once, when I forgot to turn off my oven- I thought I was slowly cooling it in a turned off oven- I baked my cheesecake a 1/2 hour longer than I was supposed to. With the exception of a pretty golden brown top, you couldn’t tell I overbaked it. No cracks, perfectly cooked interior, the whole nine.
A bain-marie translates from French to “marriage bath” or “bath of marriage”. Some other translations are Mary’s bath, but since the marie isn’t capitalized, that translation never sat well with me. No matter, a bain-marie maintains a consistent temperature in which to bake custards- like this classic cheesecake. Without it, the oven’s natural fluctuation of temperature causes the temperature of the custard to also rise and fall. As a result, it tends to develop small fissures in the custard. Some you can’t see, while others create a faultline to rival the San Andreas right in the center of your otherwise perfect cheesecake. Water can’t get hotter than 212°F (the point at which water boils) and this is what we rely on to maintain that constant temperature to bake our cheesecake in.
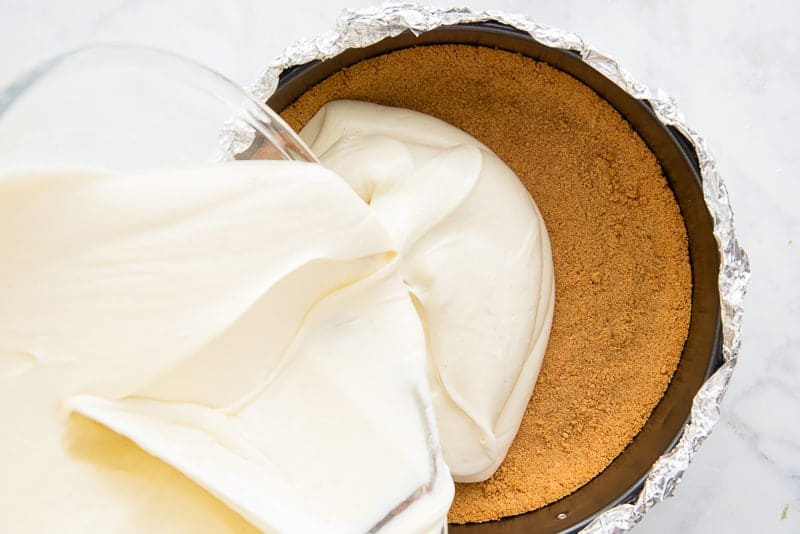
Pour the cheesecake batter into the foil-wrapped springform pan.
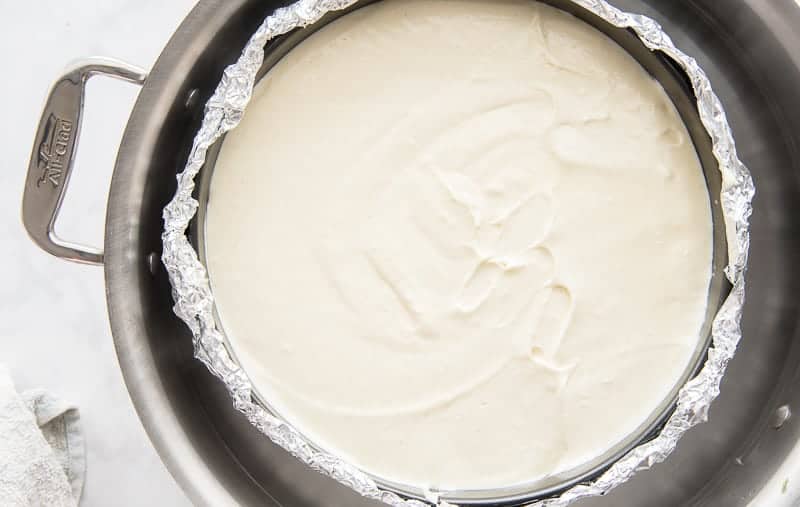
Set the cheesecake pan into a large pan and carefully pour boiling water into the outer pan. Take great pains to avoid splashing water into the cheesecake batter. It could interfere with the baking of the custard.
Carefully slide the pans into the preheated oven and bake for one hour.
Gradually Cool the Cheesecake Down
The second step in preventing that crack in the center of your classic cheesecake is allowing it to cool down slowly.
Instead of whipping it out of the oven and scaring it, we want to acclimate it to cooler temperatures. To do that, we need to allow it to cool in the oven prior to bringing out. So, after it has baked for an hour, turn the oven off and prop the oven door open an inch or two. You can use a wooden spoon to hold the door open if need be. Allow the cheesecake to cool in the oven for an hour before removing it.
Once it’s out of the oven, take it out of the bain-marie, before unwrapping the foil from the cheesecake pan. Leave the cheesecake to cool to room temperature on the counter. Cover the cheesecake with plastic wrap and place it into the fridge, still in the pan. Allow the cheesecake to chill for a minimum of 6 hours, but preferably overnight. This chill time gives the cheesecake ample time for its structure to develop.
Serve Your Classic Cheesecake As Is…
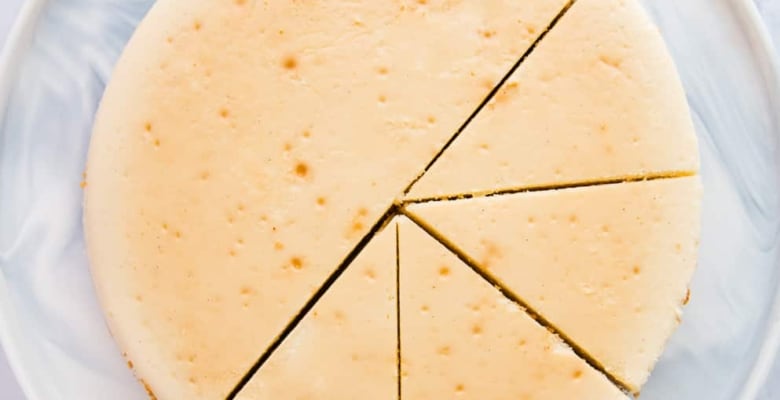
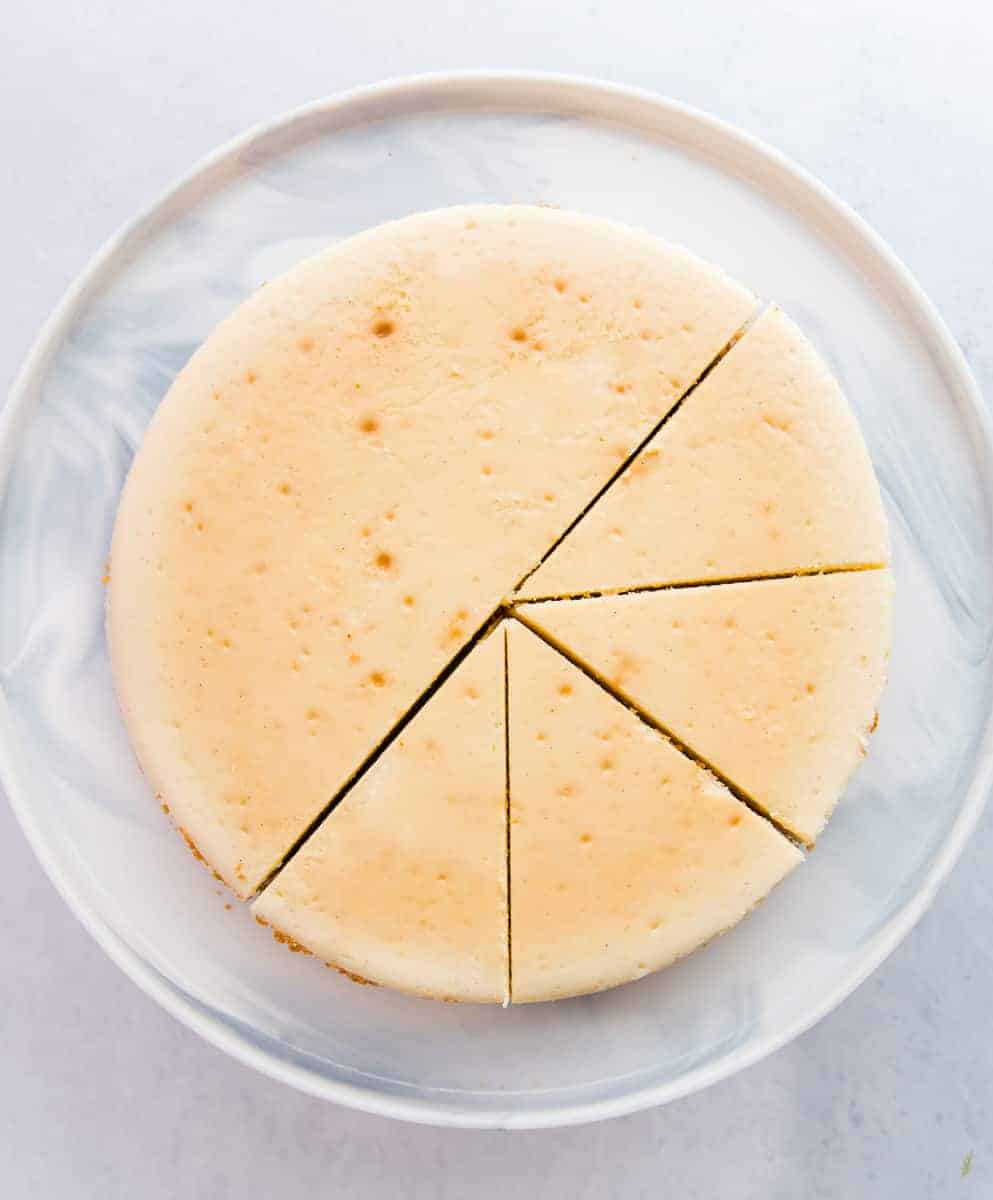
After chilling in the fridge for several hours, remove the pan’s collar and slice the cheesecake.
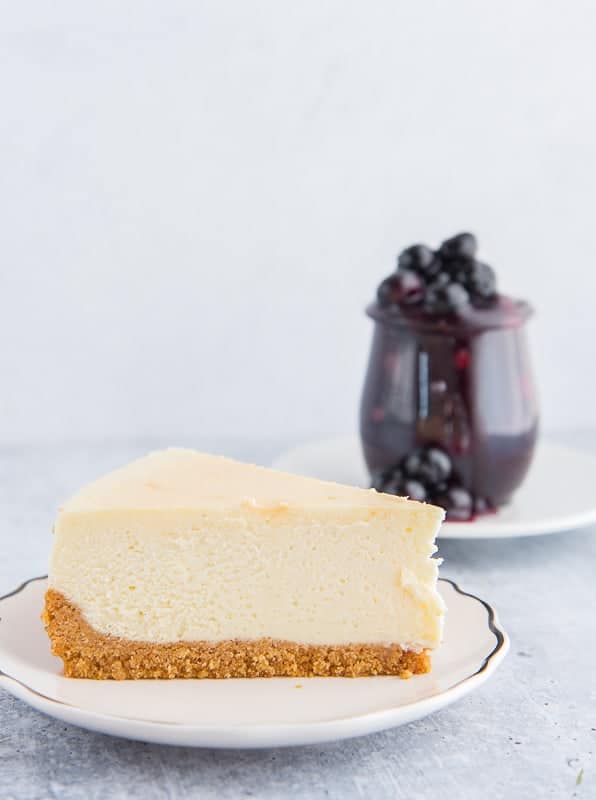
The finished cheesecake should hold a slice perfectly: it shouldn’t be too loose (or runny). To achieve those clean slices, dip your cutting knife into really hot water before slicing. Wipe the blade so it’s not wet, then cut your slices.

A tip from my pastry chef days helps to keep the rest of the cheesecake from gunking up after you’ve sliced it: press pieces of parchment or wax paper directly against the exposed parts of the cheesecake. Air equals gunk. Try to avoid it.
Clearly, this classic cheesecake is ready to enjoy.
…Or with Your Favorite Fruit Topping
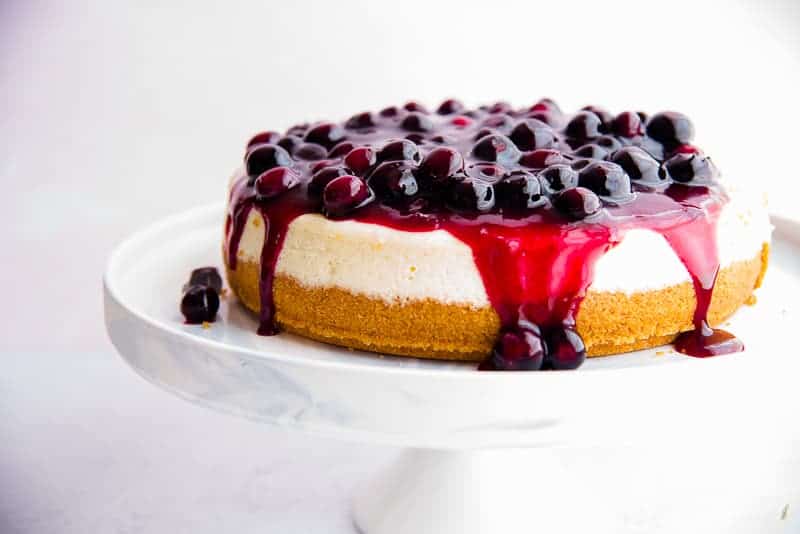
A drizzle of caramel, chocolate, or a dollop of whipped cream would do nicely here. However, no one would be mad if you topped it with your favorite fruit topping. This Blueberry Ginger Dessert Topping is a nice start.
See? Who would be mad about that? Not me.
Pin this recipe for later. We all should master this one and- as you can see- it’s easy enough to do so.
Classic Cheesecake Recipe
at Sense & EdibilityEquipment
- 9" springform pan
- electric mixer
Ingredients
Graham Cracker Crust
- 2 cups (215g) graham cracker crumbs (or cookie crumbs)
- 2 tablespoons (25g) granulated sugar optional
- 1/2 cup (113g) unsalted butter melted
Classic Cheesecake Batter
- 4 8 ounce bricks (904g) cream cheese room temperature
- 1 cup (198g) sugar
- pinch kosher salt
- 4 large eggs room temperature
- 1 tablespoon vanilla bean paste or extract (or your choice of flavoring)
- 1/3 cup (43g) cornstarch
Instructions
Prepare and Bake the Graham Cracker Crust
- Preheat your oven to 350°F.Add the graham cracker crumbs, sugar, and melted butter to a mixing bowl. Stir until combined. When finished, the crumbs should hold together when clenched in your fist. If the mix is too loose- it crumbles when you release your grip- add more butter, a tablespoon at a time. If the mix oozes butter when squeezed, add more crumbs by the tablespoonful.
- After the crust has been mixed, press it into a 9" springform pan using the bottom of your measuring cup. Press the crumb mixture into an even layer on the bottom of the pan, then guide the crust about a 1/4" up the sides of the pan to create a side crust. Pack the crust by pressing firmly to ensure the crust won't break when you serve the cheesecake.
- Place the crust-lined pan into the preheated oven and bake for 10 minutes. After baking, remove the pan from the oven and allow it to cool to the touch. Once the pan is cool enough to handle, carefully wrap the bottom and sides in two layers of heavy-duty aluminum foil. Set the pan aside while you prepare the cheesecake batter.
Mix the Cheesecake Batter
- Set a pot, filled with 5-6 cups of water, to boil on the stove. Meanwhile, in a large mixing bowl, with your mixer on low speed, blend together the cream cheese and granulated sugar. After the cream cheese and sugar come together, increase the mixing speed to medium and beat until very smooth, about 2 minutes. Stop the mixer and scrape down both the beaters and the bowl twice during mixing.
- After 2 minutes, scrape down the bowl once again. Add the eggs to the mixture, one at a time. After each egg addition, mix the batter on medium speed for 30 seconds, before scraping everything down. Continue adding the eggs, blending, and scraping down until all the eggs have been mixed in. Mix the batter after all the eggs have been added for 1 minute.
- Add the vanilla bean paste (or extract) to the batter, then blend it in on low speed for 30 seconds. Add the cornstarch to the batter and blend on low speed for 30 seconds, or until it's mixed in. Scrape down the bowl and beaters once more and blend on low for 15 seconds. Do not overmix the batter after the cornstarch has been added or the cheesecake will become gummy.
Bake, then Cool the Cheesecake
- Pour the cheesecake batter into the foil-wrapped springform pan. Set this pan into a larger pan and carefully pour the water you boiled earlier into the outer pan. Try to avoid splashing water into the cheesecake batter as it could interfere with the custard's baking.
- Carefully slide the larger pan, with the cheesecake pan inside, into the preheated oven and bake for one hour. Take care not to splash the water into the cheesecake.
- After the cheesecake has baked for an hour, turn the oven off and prop the oven door open 1-2 inches. You can use a wooden spoon to hold the door open if necessary. Allow the cheesecake to cool in the oven for 1 hour before removing it.
- After you've removed the pan(s) from the oven, take the cheesecake pan out of the larger pan.Remove the foil from the cheesecake pan, then the cheesecake to cool to room temperature on the counter.
- Cover the cheesecake with plastic wrap and refrigerate it, still in the pan, for a minimum of 6 hours, but preferably overnight.
- After chilling in the fridge for several hours, remove the pan's collar and slice the cheesecake.After cutting, press pieces of parchment or wax paper directly against any exposed parts of the cheesecake to prevent it from drying out. Store this cheesecake in the fridge for up to 3 days.
Notes
- Fresh fruit
- Whipped Cream
- Crème Anglaise
- Salted Caramel Sauce
- Cajeta (Goat's Milk Caramel)


I made this recipe with the blueberry compote and it was heavenly! This must have been the cheesecake the Golden Girls were always drooling over!
I love that, Yarita!
I made this recipe for my husband who now loves cheesecake (after a ton pf years trying for him to eat it). He said “this is the best cheesecake I’ve ever had! It’s the perfect balance of sweetness”. Thank God for the Chef and her creations!!!
LOVE THIS!!! I’m so glad you gave it a go for your hubby!
Looks gorgeous. Fun fact, this is the first dessert my husband and I ever ate together. So we are very fond of a classic cheese recipe. Thank you for sharing. Loved it and brought back memories.
How sweeeeeet!!! Thank you for sharing such a great memory with me!